Photoshop合成正在施法的巫师【英】(5)
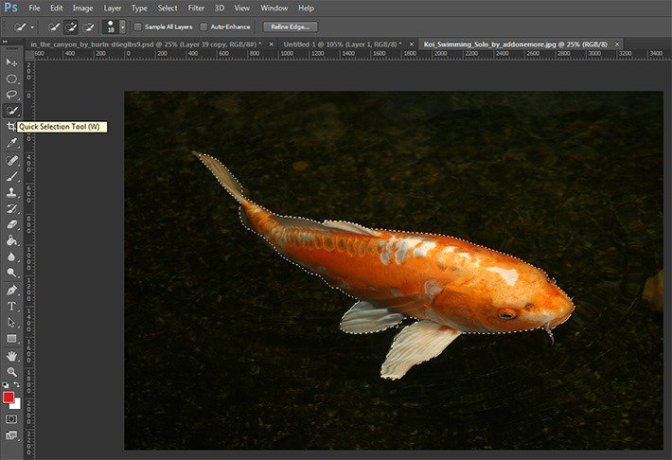
文章来源于 photoshoptutorials.ws,感谢作者 MARIA SEMELEVICH 给我们带来经精彩的文章!Step 74
Put gold koi. Go to the tab with the desired fish. Choose a Quick Selection Tool (W). Select all the fish.
Step 75
Now take the Move Tool (V). Capture the selection and drag it into the document with work.
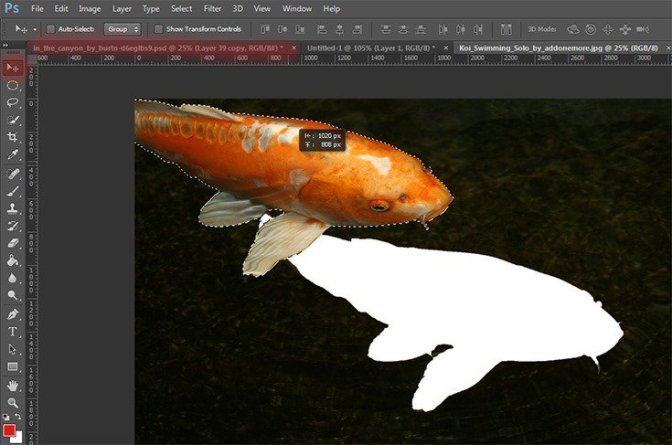
Step 76
Now change the size of the fish. Ttransform it to the desired size. The short key Ctrl+ T make it small. Try to place the fish in a circle, but observing the randomness.
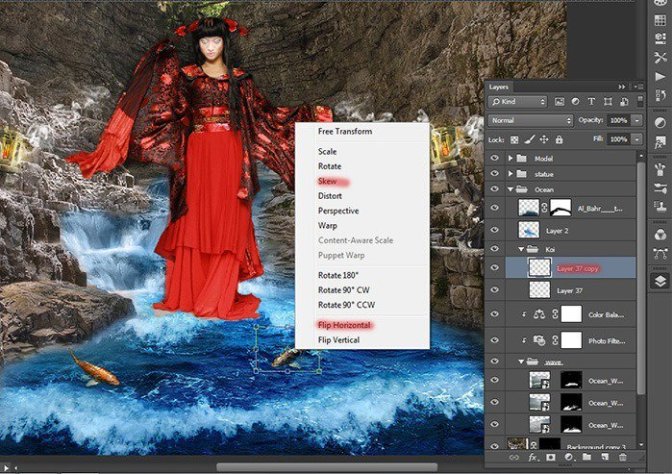
Step 77
Now I duplicate the fish changed its size and tilted. Ttransform it to the desired size. The short key Ctrl+ T. Right click in any field pattern and in drop-down list, select “Flip Horizontal”. To tilt in the same list, select “Skew”.
Step 78
Duplicate 4 times. Change the fish want to you want or as shown in Figure. Placed them so. Remember this is a creative process and show how I did it. Not necessarily as I do.
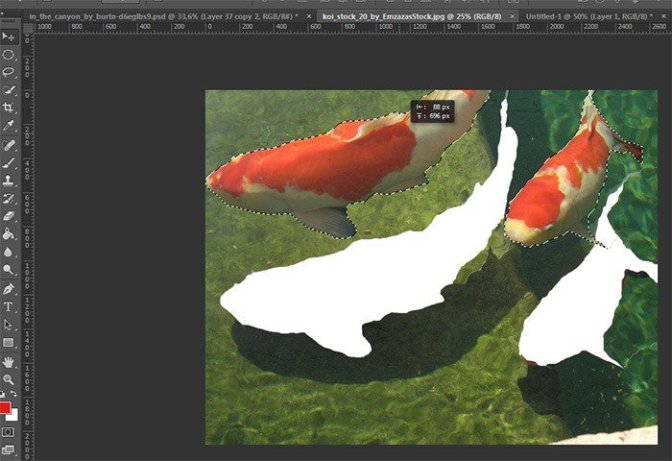
Step 79
Let’s add some other fish. Go to tab with open red and white fish. Choose a Quick Selection Tool (W). Select fishes.

Step 80
Now take the Move Tool (V). Capture the selection and drag it into the document with work.
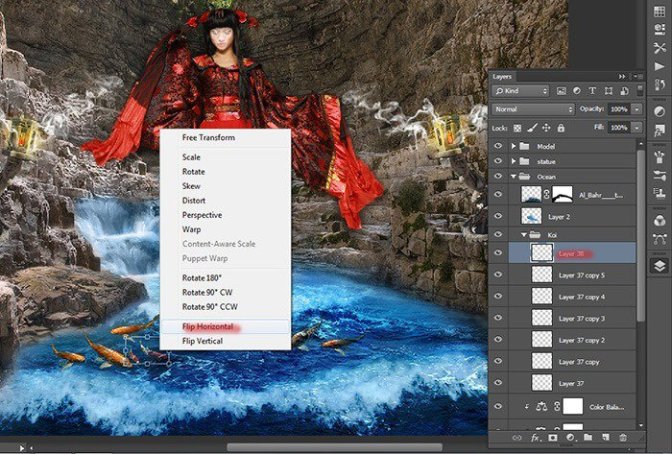
Step 81
Now I duplicate the fish changed its size. Ttransform it to the desired size. The short key Ctrl+ T. Right click in any field pattern and in drop-down list, select “Flip Horizontal”.
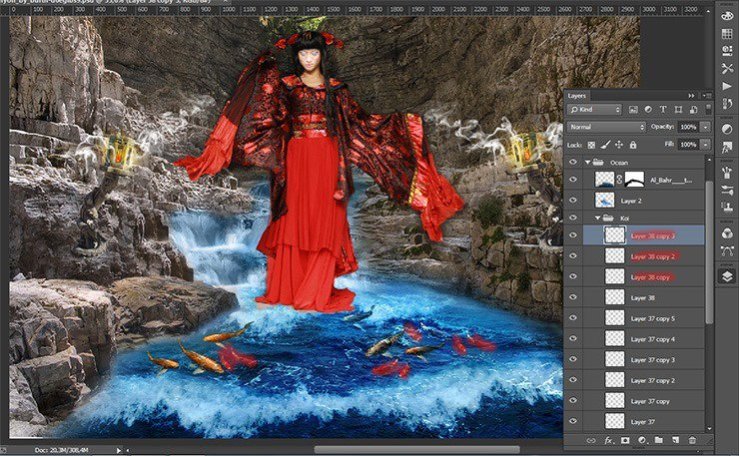
Step 82
Duplicate 3 times. Change the fish want to you want or as shown in Figure.
Step 83
It remains to add 2 more fish :) Repeat all have done with the last fish. I duplicate it once. Placed as shown in the figure.
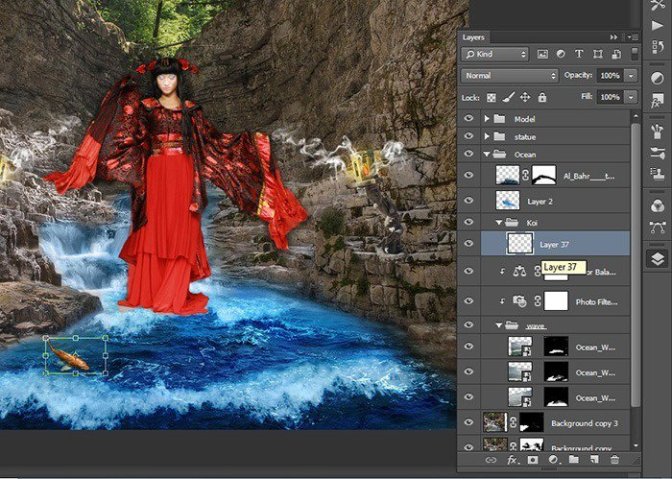
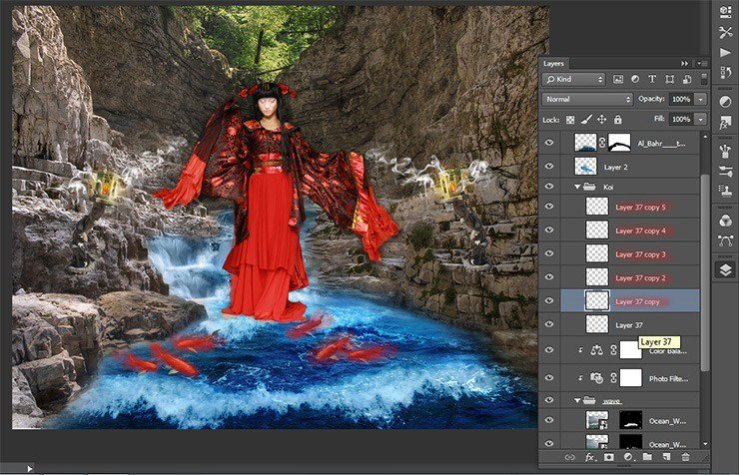
Step 84
Now I want to add shadows to the belly of fish and make them a little brighter. To do this, add two adjustment layers.
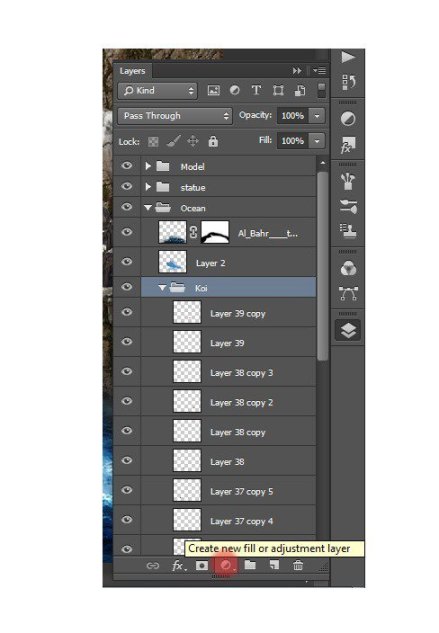
Step 85
The first layer is the Color Balance.
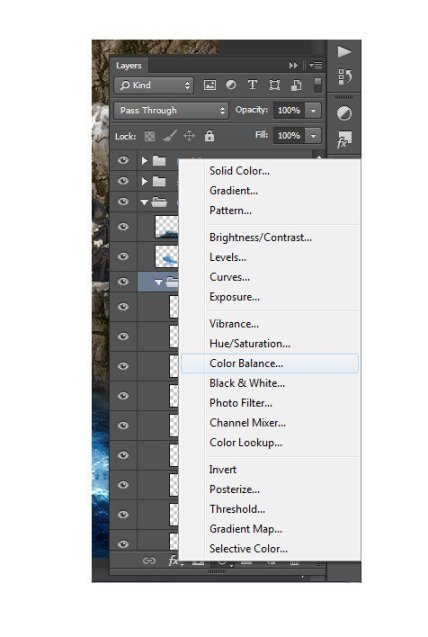
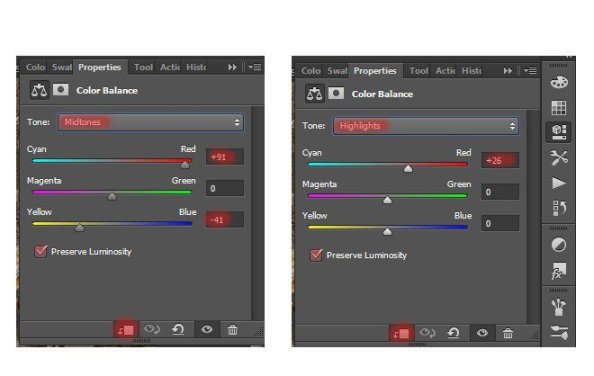
Step 86
In the window that appears, for midtones and highlights, set the settings as shown in the figure. Tone can change by clicking on the “tone”. Be sure to apply to a group of adjustment layer.
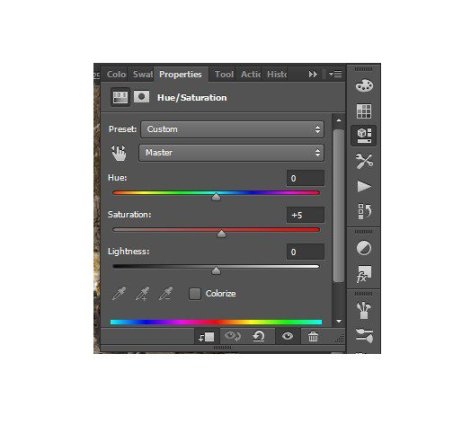
Step 87
Next adjustment layer is Hue/Saturation…
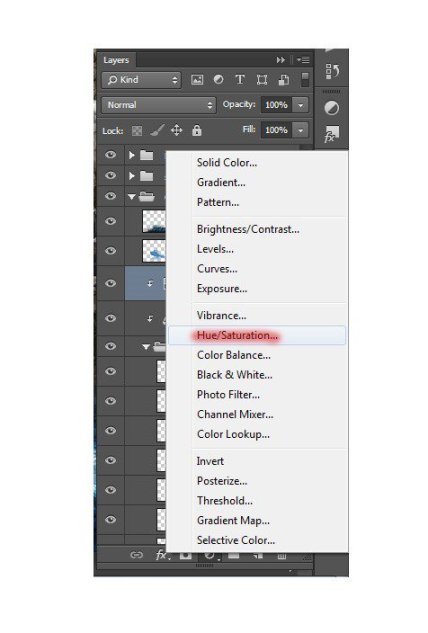
Step 88
Set the settings as shown in the figure.
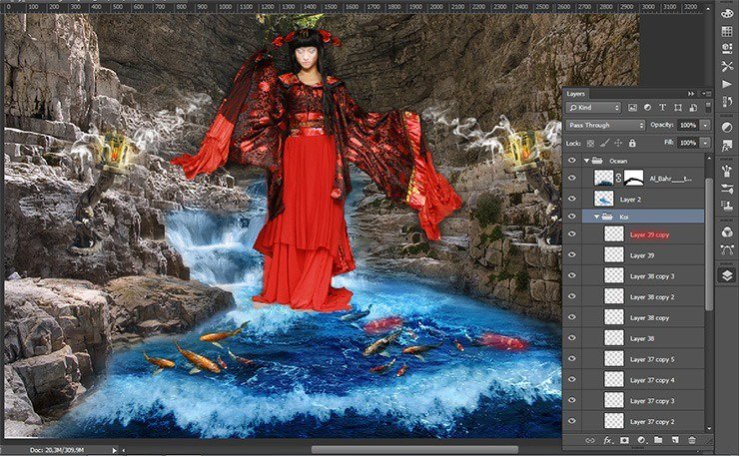
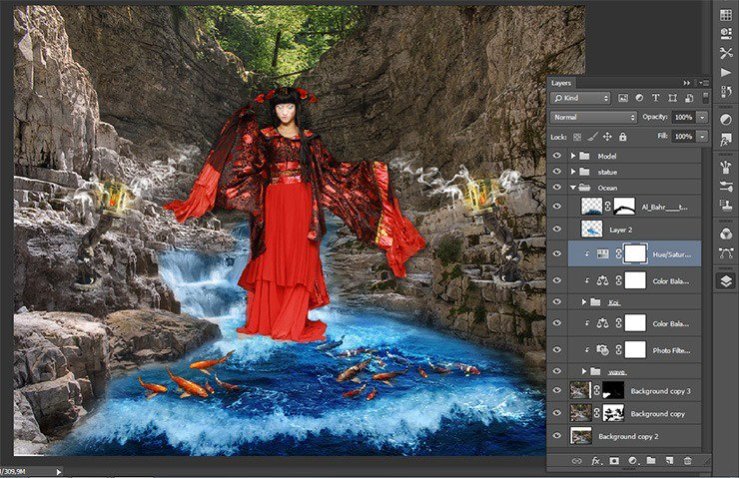
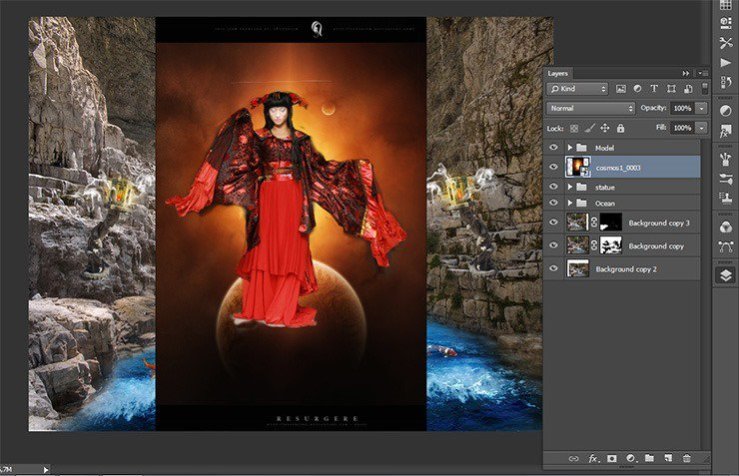
Step 89
Our work with a fish is complete! Here is the result.
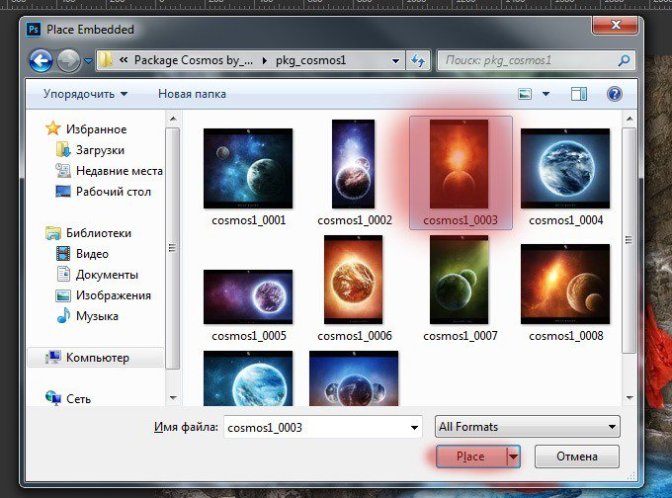
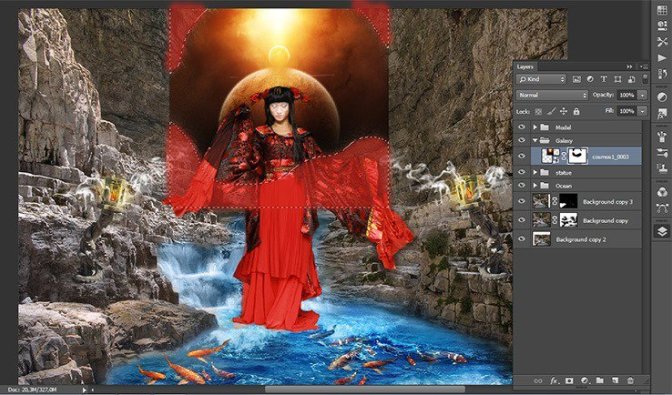
Step 90
I really wanted to add the magic, so I used the space. Begin to create space landscape. Go to File> Place and select file with two yellow planet.
Step 91
Select the with planets and click on folder icon in Layer panel to add in group the short key Ctrl+ G. Name it “Galaxy” Space group must be a under group with the model.
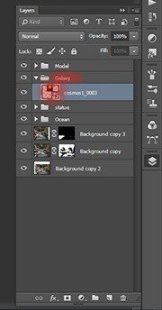
Step 92
Transform the planets (the short key Ctrl+ T). Reduce their size so that they are slightly larger than the model and move them behind model head as shown in the figure.
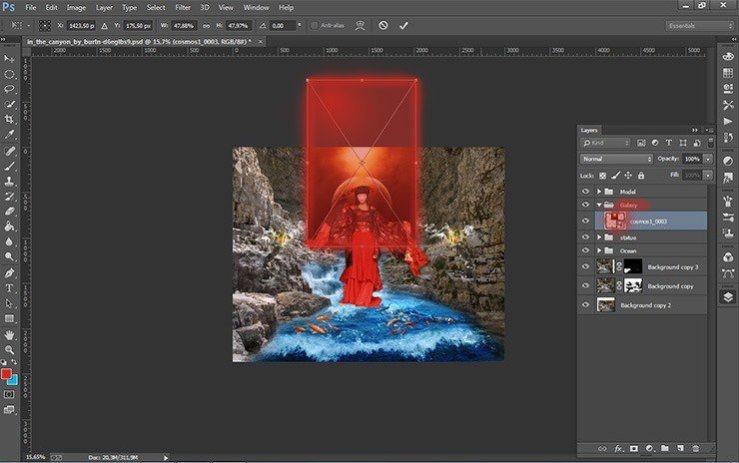
Step 93
Add a layer mask picture with planets and take the Brush Tool (B) on the toolbar.
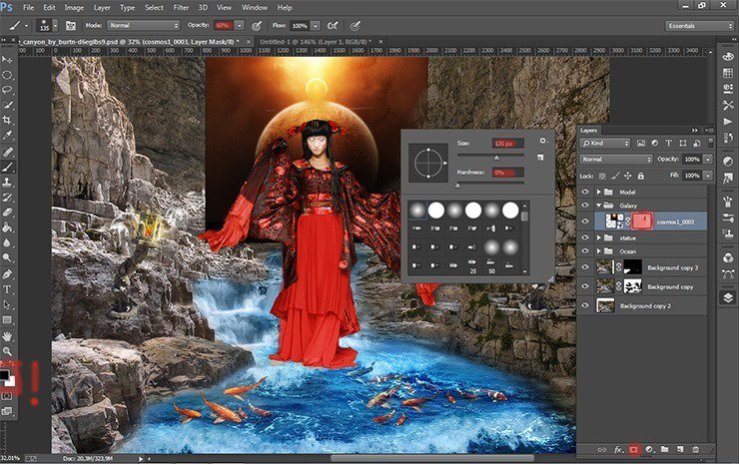
Step 94
Remove some of the dark using a Brush Tool (B) Size: 135px, Hardness: 0% Opacity: 60% Flow: 100%. Do not forget to set black color as your foreground color.
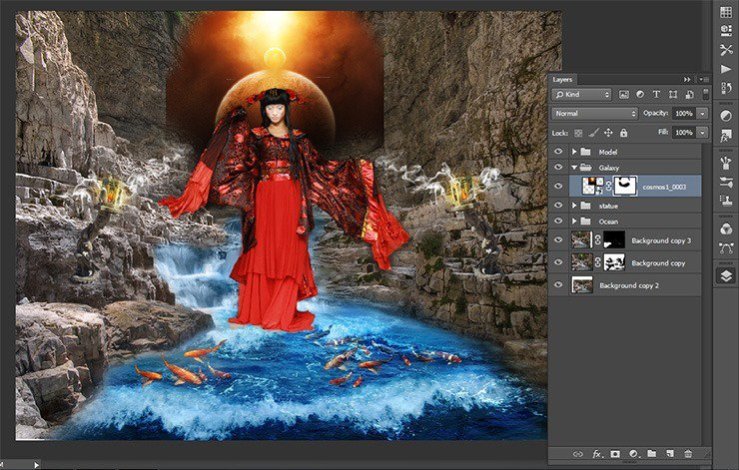
Step 95
Here’s how should get.
 情非得已
情非得已
-
 Photoshop制作复古风格的老照片效果【英】2018-04-23
-
 Photoshop合成长着创意大树的长颈鹿【英】2018-04-23
-
 Photoshop合成冰冻特效的金鱼场景【英】2018-02-10
-
 Photoshop合成梦幻风格的森林场景【英】2018-02-10
-
 Photoshop合成正在施法的巫师【英】2018-02-10
-
 Photoshop制作金属质感的3D立体字【英】2018-01-09
-
 Photoshop设计火焰燃烧艺术字教程【英】2018-01-09
-
Photoshop制作复古风格的老照片效果【英】
相关文章11882018-04-23
-
Photoshop合成长着创意大树的长颈鹿【英】
相关文章13832018-04-23
-
Photoshop合成冰冻特效的金鱼场景【英】
相关文章34052018-02-10
-
 Photoshop制作黄金质感立体字【英】
相关文章7422018-02-10
Photoshop制作黄金质感立体字【英】
相关文章7422018-02-10
-
 Photoshop制作惊艳大气的3D立体字
相关文章14682018-02-10
Photoshop制作惊艳大气的3D立体字
相关文章14682018-02-10
-
Photoshop合成梦幻风格的森林场景【英】
相关文章24492018-02-10
-
 Photoshop制作复古双重曝光字体
相关文章6532018-01-09
Photoshop制作复古双重曝光字体
相关文章6532018-01-09
-
 Photoshop制作木地板LOGO刻印效果【英】
相关文章19272018-01-09
Photoshop制作木地板LOGO刻印效果【英】
相关文章19272018-01-09
