Photoshop制作金属质感的3D立体字【英】
文章来源于 Tutsplus.com,感谢作者 Rose 给我们带来经精彩的文章!教程所需要的素材:大气的3D立体字设计PS教程素材
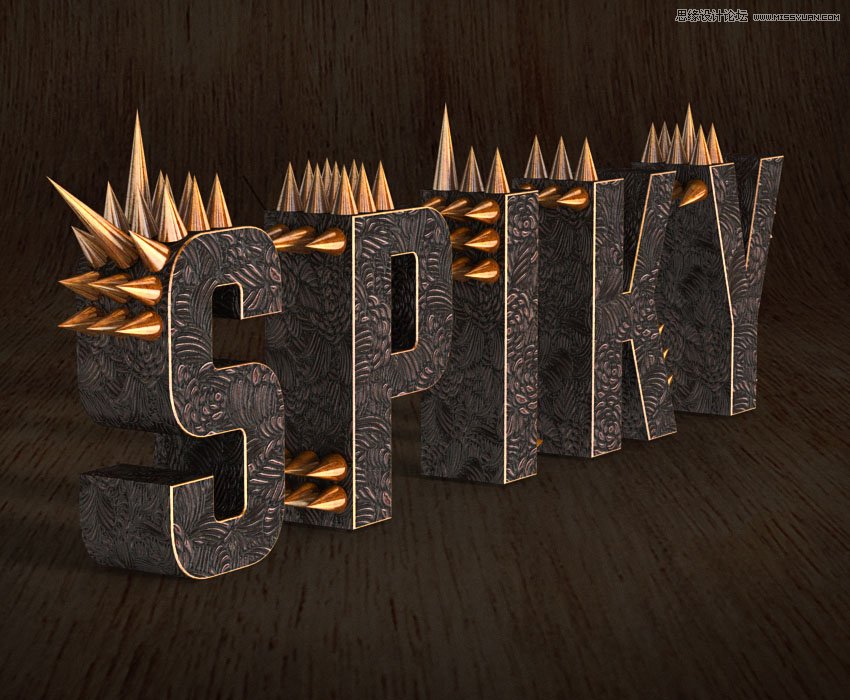
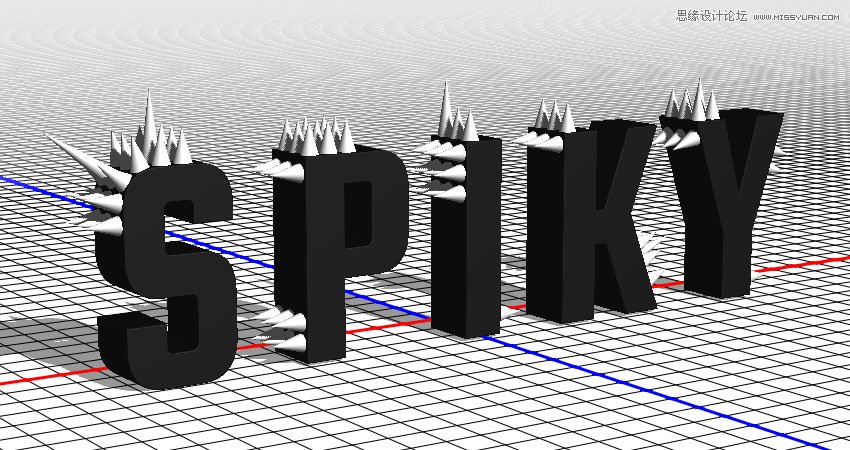
This tutorial will show you how to use Photoshop's 3D tools and settings to create a spiky text effect with text and preset meshes, as well as a few textures, adjustment layers, and filters. Let's get started!
先看看效果图
1. How to Create 3D Text
Step 1
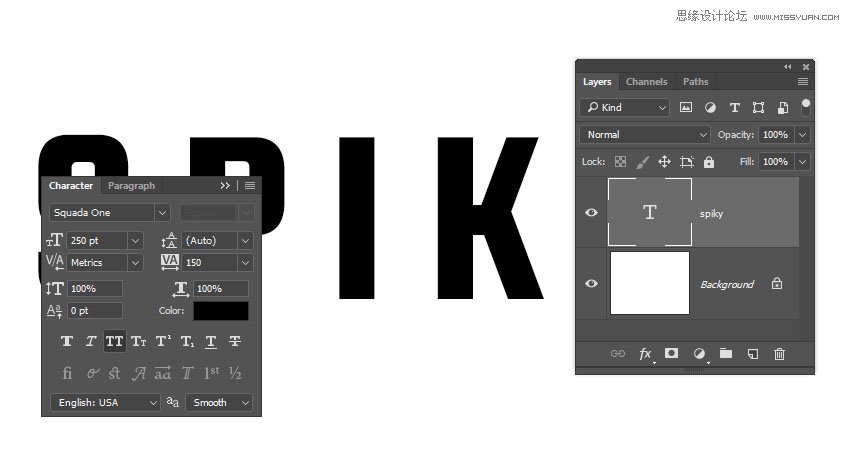
Create a new 1000 x 850 px document with a white background.
Create the text in All Caps using the font Squada One. Change the Size to 250 pt and the Tracking to 150.
Step 2
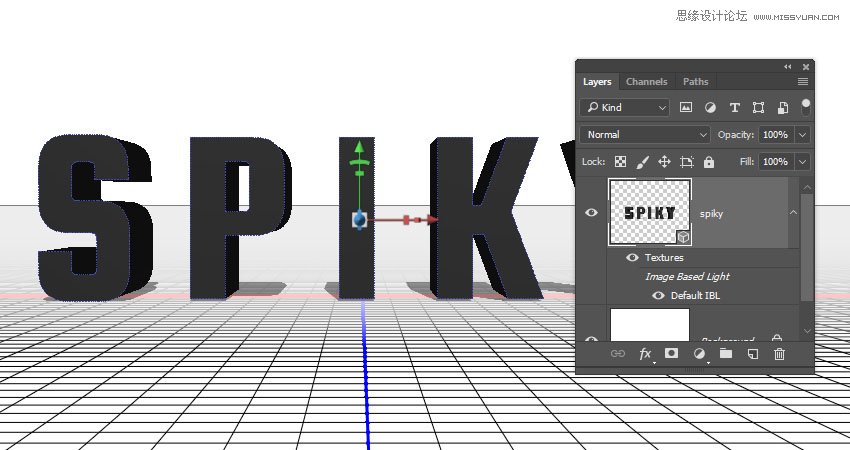
Go to 3D > New 3D Extrusion from Selected Layer.
2. How to Work With the 3D Scene
Step 1
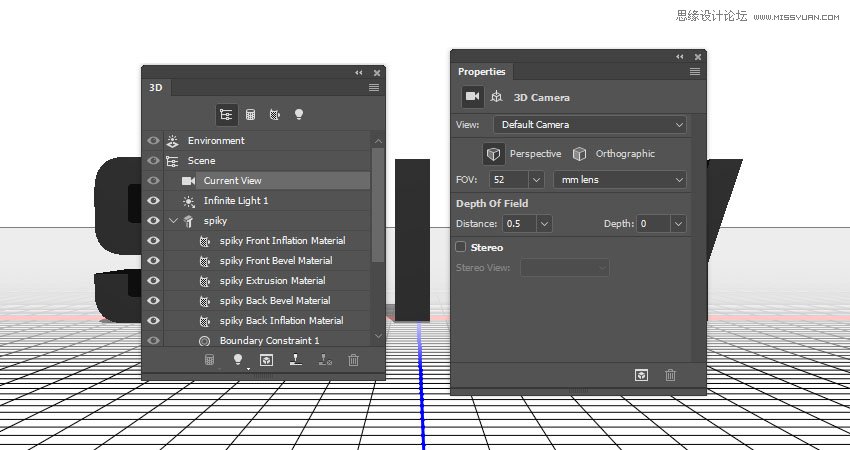
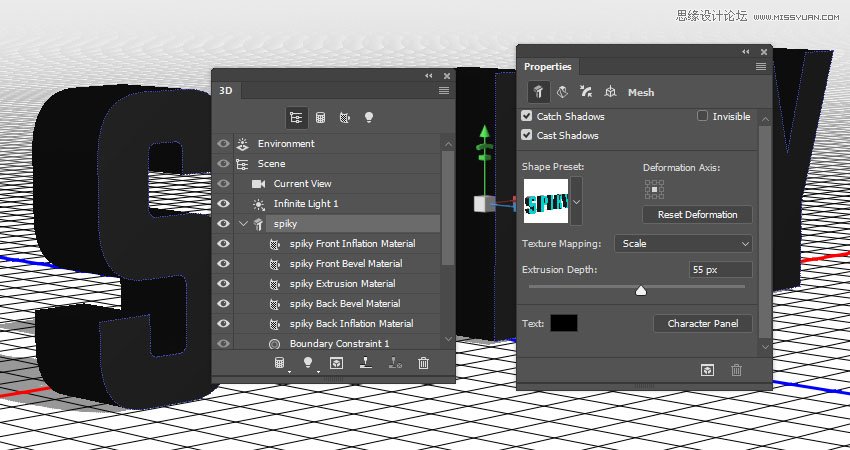
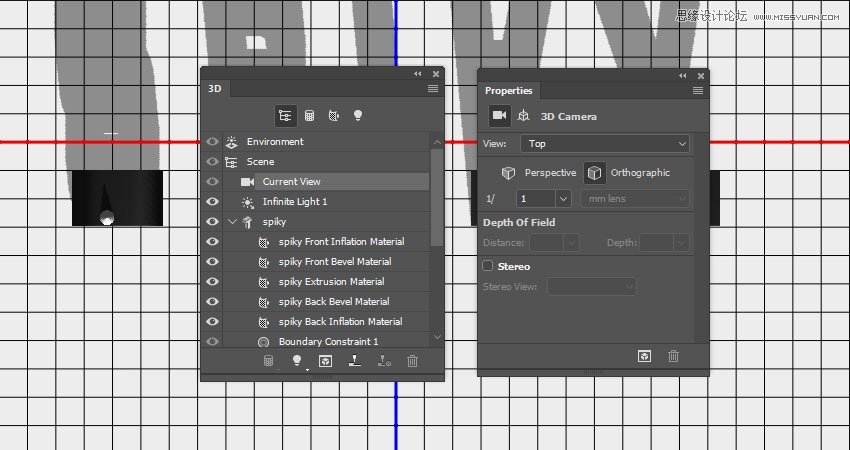
To access the 3D mesh settings and properties, you’ll need to open two panels: the 3D panel and the Properties panel (both found under the Window menu).
The 3D panel has all the components of the 3D scene, and when you click the name of any of those, you’ll be able to access its settings in the Properties panel. So make sure to always select the tab of the element you want to modify in the 3D panel before you change its settings in the Properties panel.
Step 2
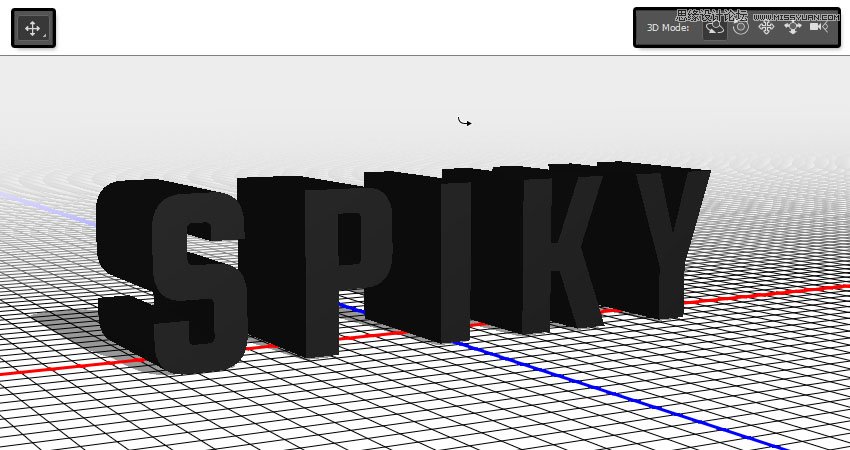
If you select the Move Tool, you’ll find a set of 3D Modes for it to the right of the Options bar.
When you choose one of those, you can then click and drag to perform changes (on the selected element in the 3D panel).
Use those modes to change the Current View into an angle you like.
3. How to Adjust 3D Mesh and Cap Settings
Step 1
Select the text mesh tab in the 3D panel, and change the Extrusion Depth in the Properties panel to 55 px.
Step 2
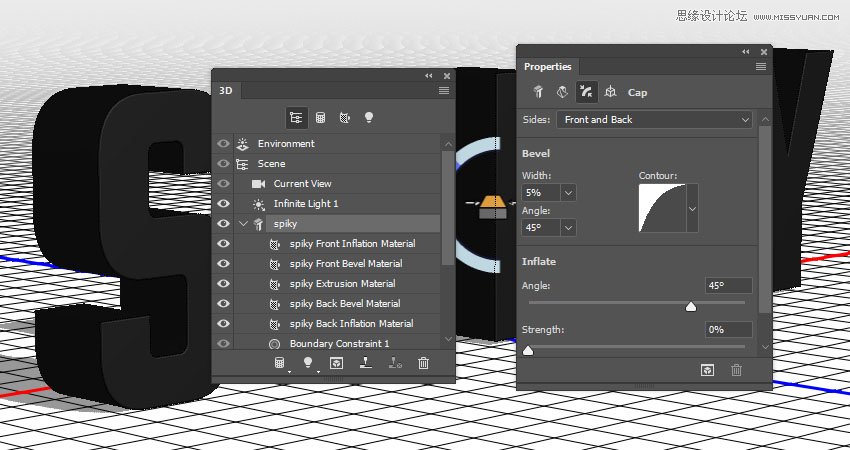
Click the Cap icon at the top of the Properties panel. Change the Sides to Front and Back, the Bevel Widthto 5%, and the Contour to Half Round.
4. How to Create a 3D Cone Mesh
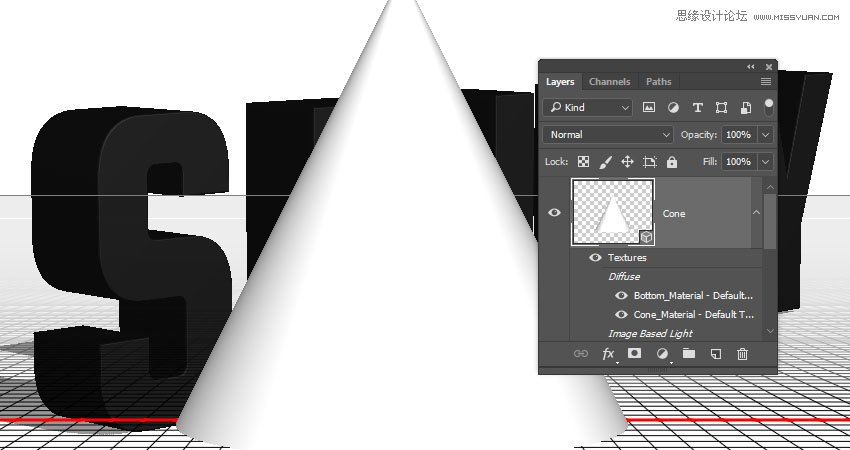
Step 1
Create a new layer on top of the 3D layer, fill it with White, and name it Cone.
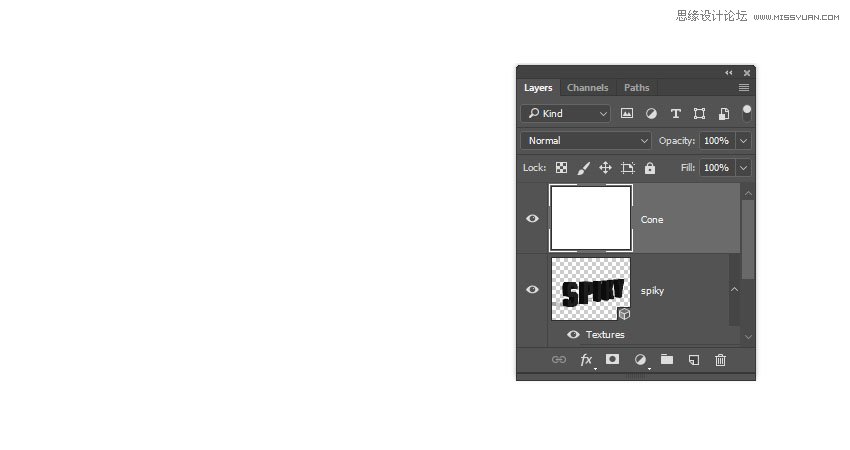
Step 2
Go to 3D > New Mesh from Layer > Mesh Preset > Cone.
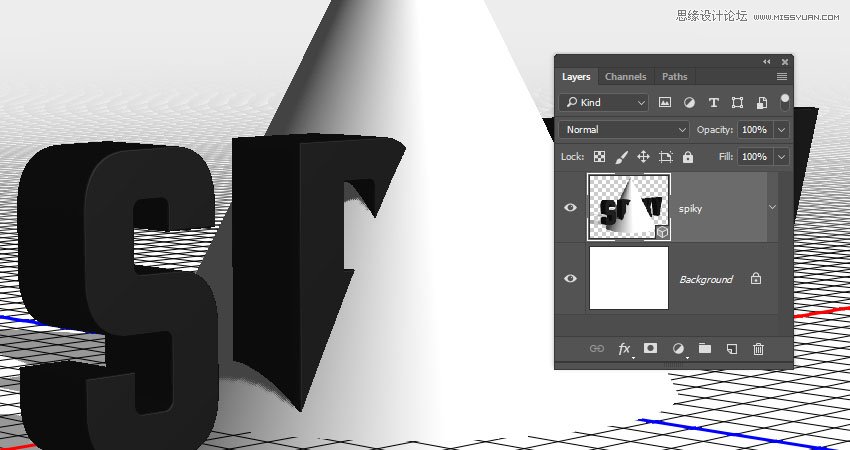
Step 3
Select the Current View tab in the 3D panel, and choose the 3D text layer's name from the View menu in the Properties panel.
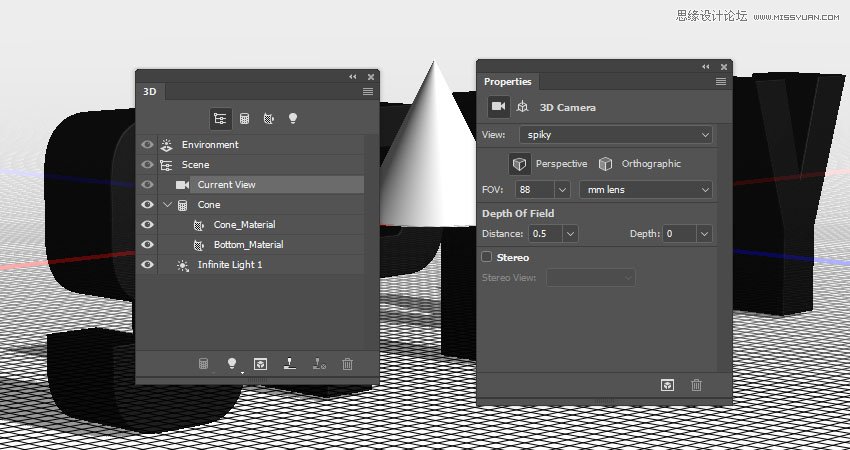
Step 4
Select both 3D layers, and go to 3D > Merge 3D Layers.
5. How to Scale 3D Meshes
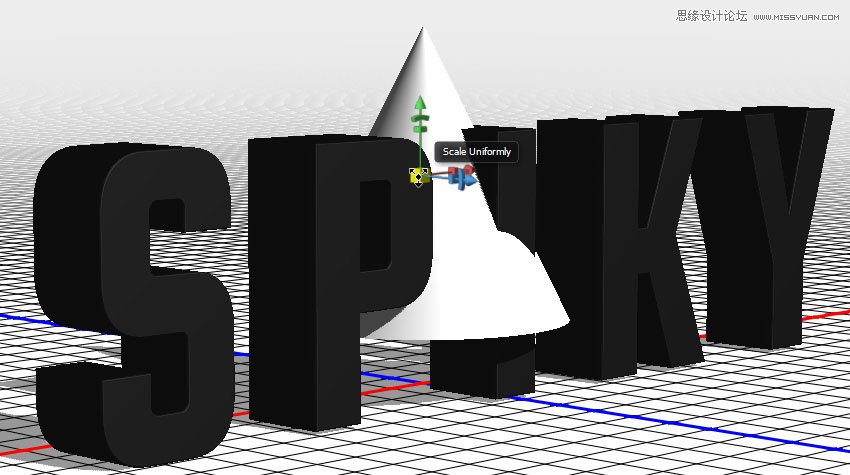
Step 1
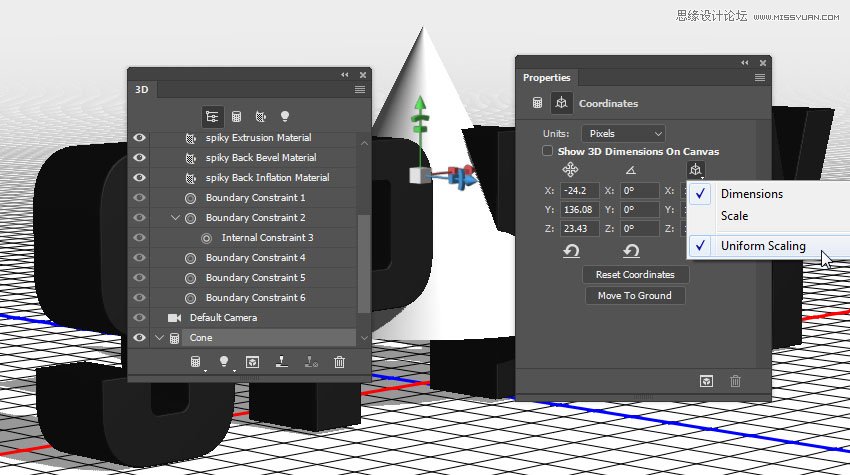
Select the Cone mesh tab, pick the Move Tool, and use the 3D Axis to scale the cone into a size you like.
The arrows at the ends of the axis move the mesh, the part below them is used for rotation, and the cubes are used for scaling. The cube in the center is used to scale the object uniformly. All you need to do is click and drag the part you want to use.
Step 2
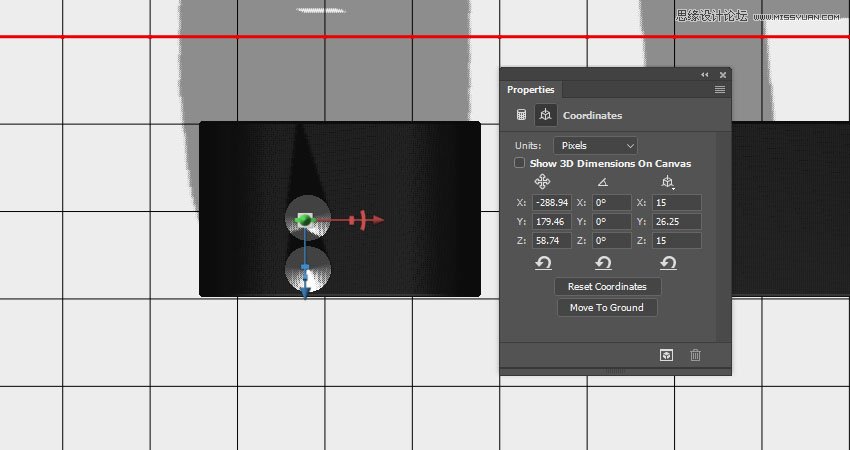
You can also click the Coordinates icon at the top of the Properties panel to use numerical values.
Click the Scale icon and uncheck the Uniform Scaling option if you don't want to scale the cone uniformly.
Step 3
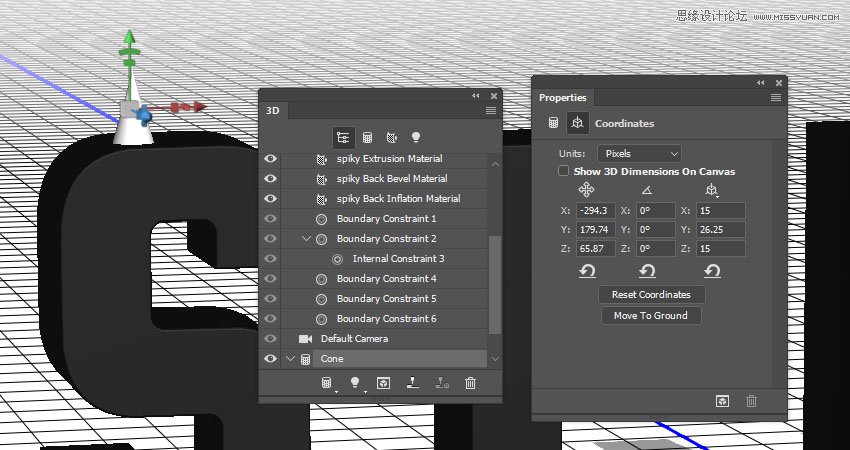
We need to achieve a long thin cone, so the Y Scale value needs to be larger than the other two.
The final overall size is up to you to decide, based on how many cones you plan on adding and the size you'd like them to be.
6. How to Use Different Camera Views
Step 1
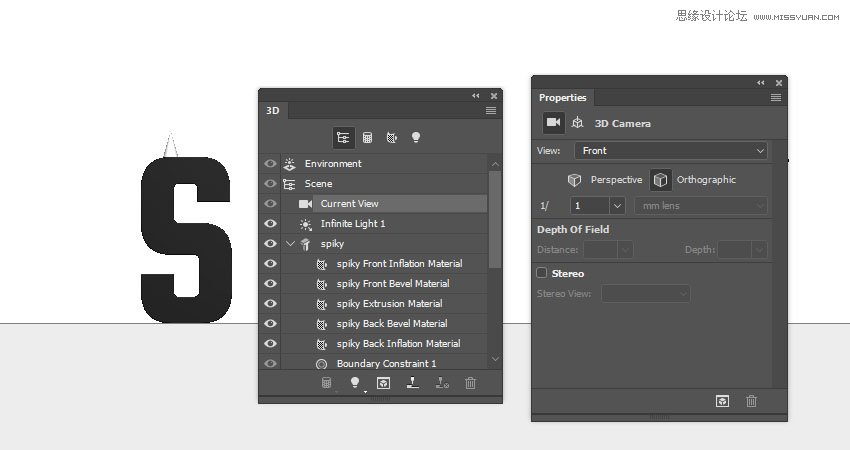
After creating the cone you want to use, it's time to duplicate and place it all over the text.
To help you to place the cones more precisely, you can use the different camera view options.
Select the Current View tab in the 3D panel, and choose Front from the View dropdown menu in the Properties panel.
Step 2
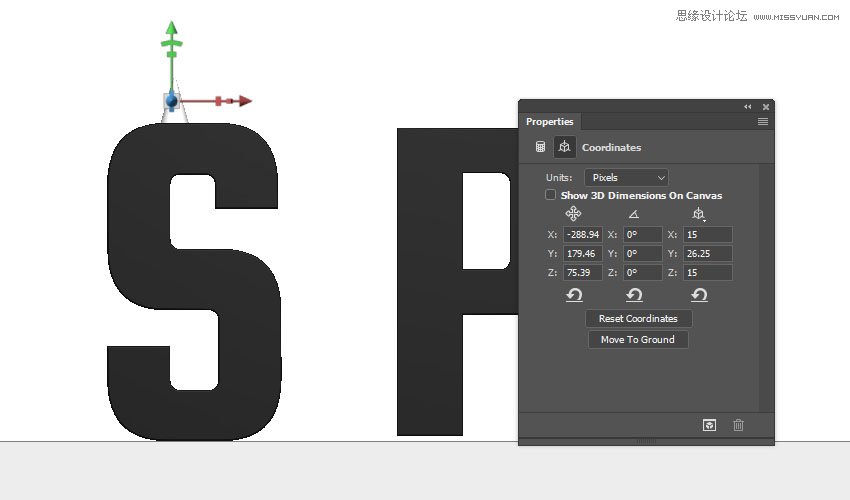
After you choose a camera view, you can zoom in or out, or move the scene around using the Move Tool's 3D Modes.
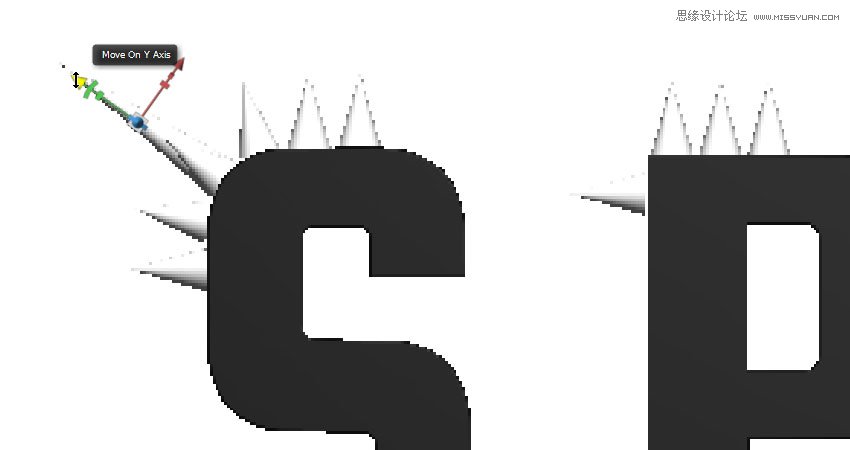
Once you get a clear view of the part of the text you want to work on, select the cone mesh tab and place it wherever needed.
You can initially use the 3D Axis, and then you can use the Coordinates values to get a more precise result.
Step 3
Another helpful camera view is the Top view. It will help you place the cones along the extruded part.
7. How to Instance Objects
Step 1
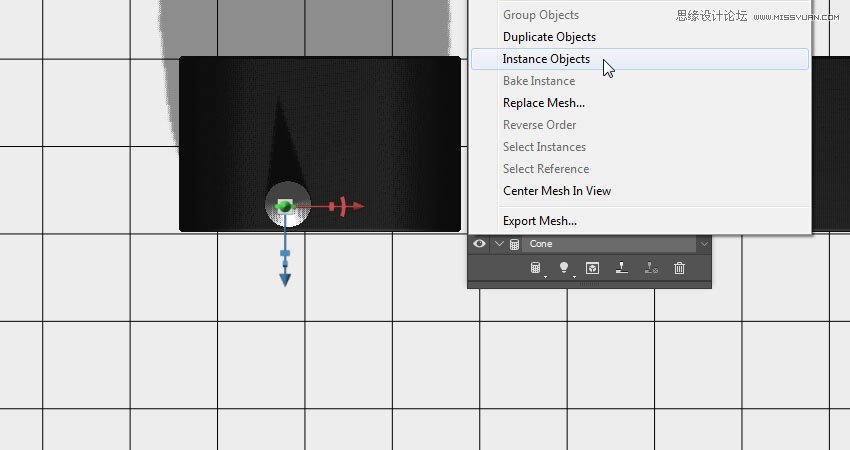
Right-click the Cone mesh tab, and choose Instance Objects.
This will create a linked copy that reflects the changes made to the original mesh, like the material settings, for example.
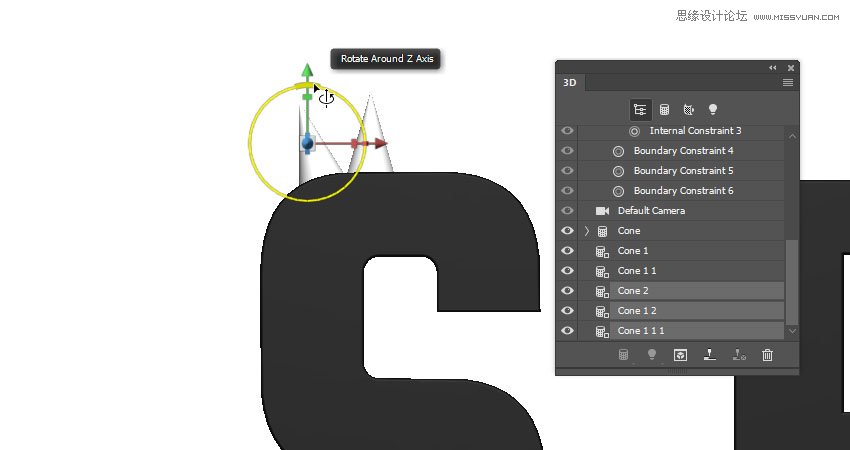
Step 2
Move the copy along the Z Axis to push it behind the original cone.
Step 3
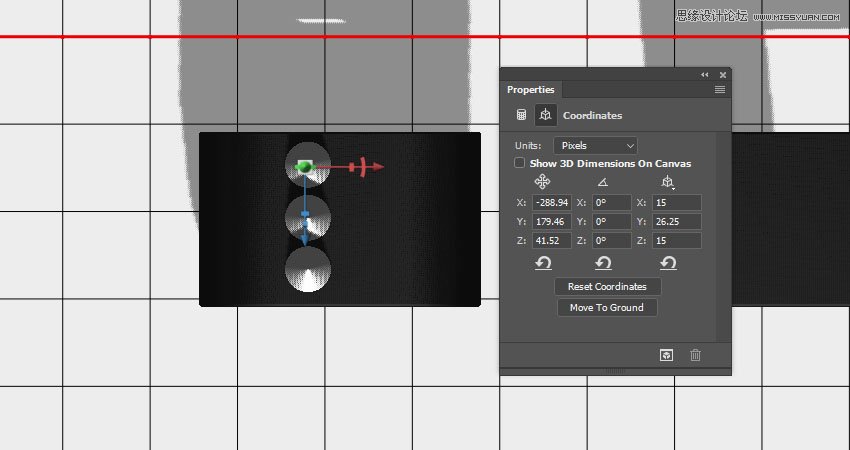
Instance as many objects as needed to cover the extrusion behind the original cone.
If the cone needs resizing to fit within the extrusion area, use the Coordinates values to scale it, and apply the same values to the copies.
Make sure to end up with an evenly spaced line of cones along the extrusion of the text.
8. How to Create a Spiky Effect
Step 1
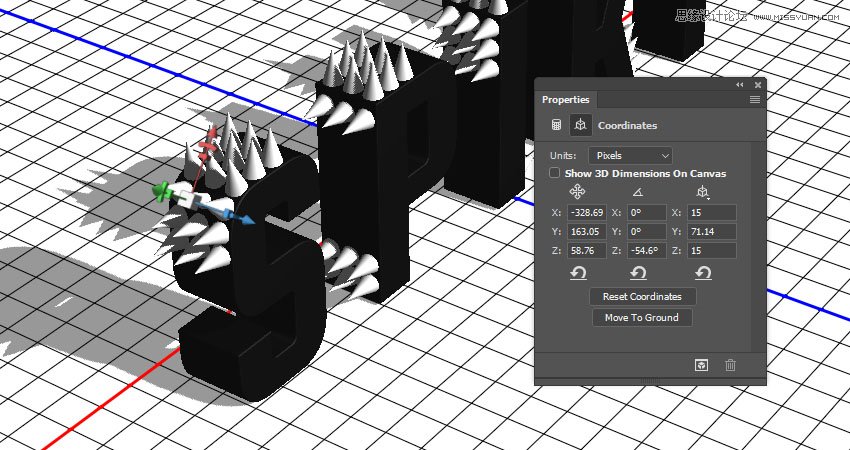
Select all the Cone mesh tabs created, right-click any of them, and choose Instance Objects. This will duplicate all of them together, and you can transform them as a unit as well.
Use the camera views, 3D Axis, and Coordinates values to move and rotate the copies next to the original meshes.
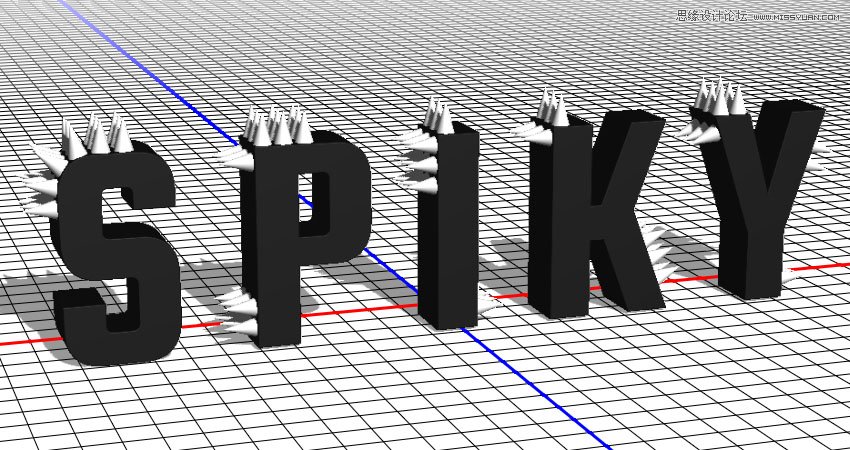
Step 2
Instance and move as many cone meshes as needed to place spikes all over the text.
Step 3
Once you're done, you can select a random cone mesh and change its Y Scale value to make it longer.
Step 4
Use the different camera views to adjust its position after scaling it.
Step 5
Repeat that to scale up a couple of other random cones.
9. How to Create a Metallic Cone Material
Step 1
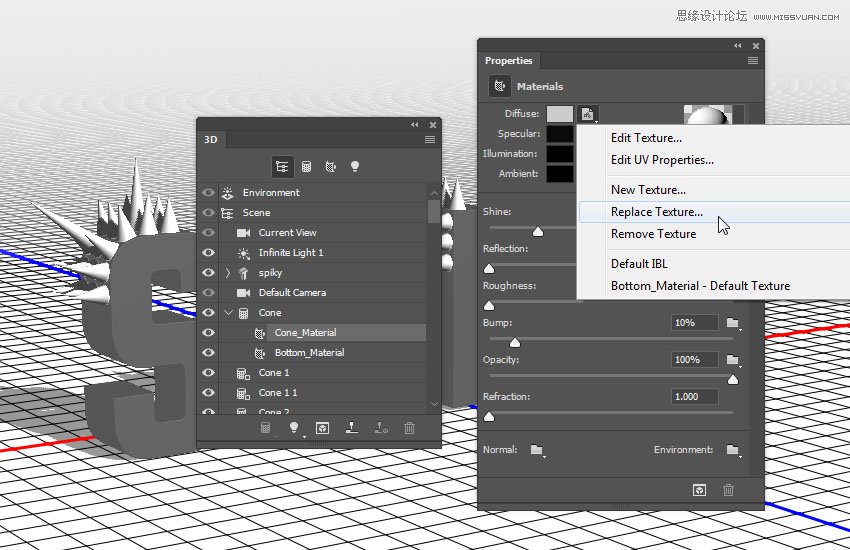
Select the Cone_Material tab in the 3D panel, click its Diffuse texture icon in the Properties panel to choose Replace Texture, and open the 9.jpg image from the Metal seamless textures pack.
Step 2
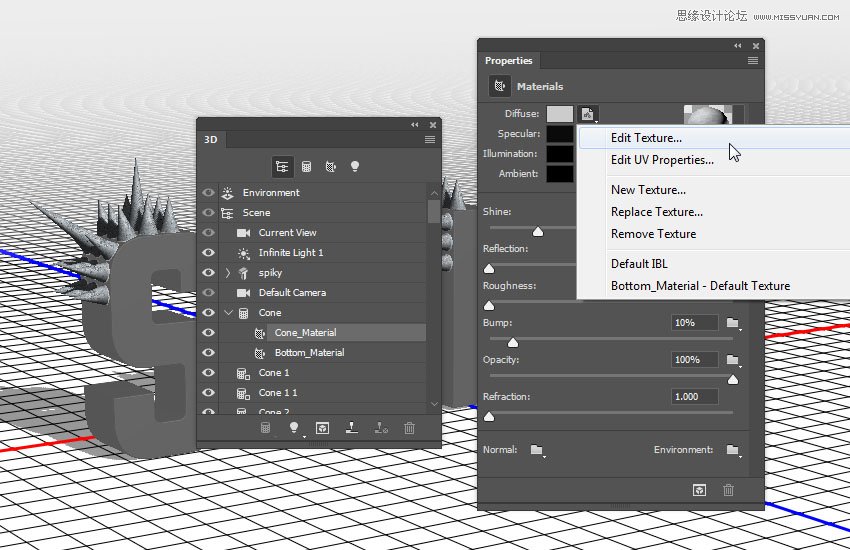
Click the Diffuse texture again, and choose Edit Texture.
Step 3
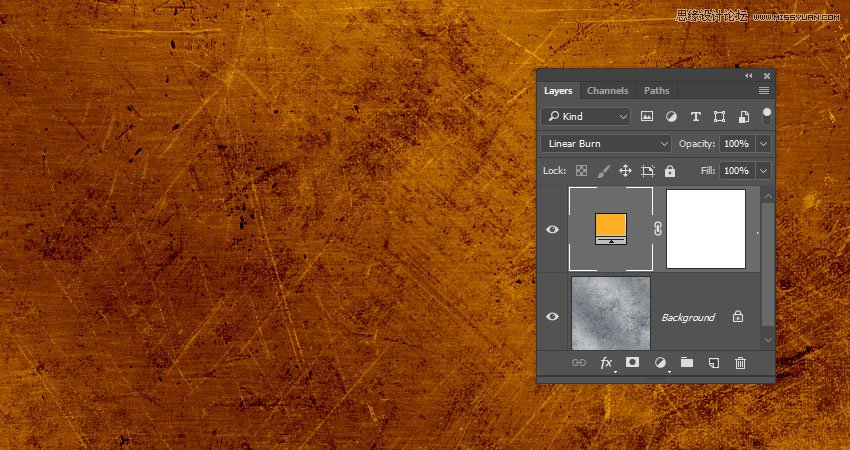
This will open the texture file. Add a Solid Color fill layer, use the Color #ffae21, and change the layer's Blend Mode to Linear Burn.
Save and close the file.
Step 4
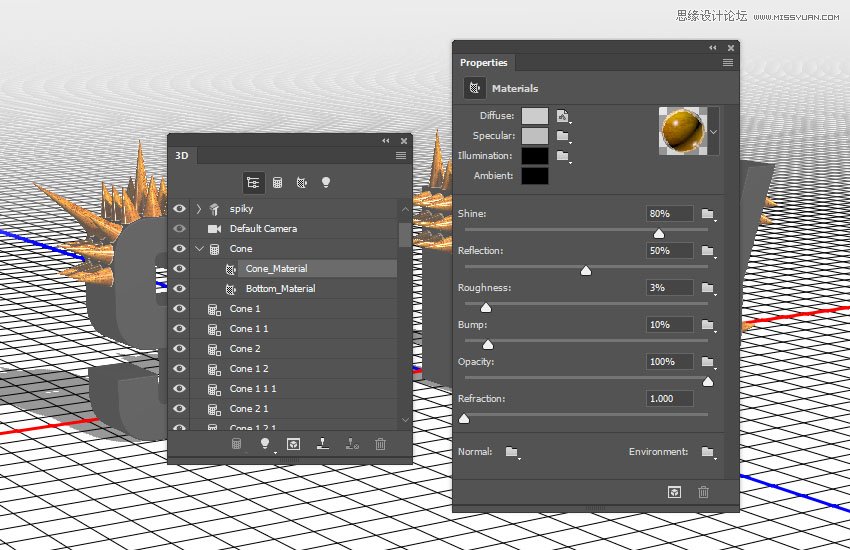
Use these settings for the rest of the values (the color values used are in RGB):
Specular: 191, 191, 191
Shine: 80%
Reflection: 50%
Roughness: 3%
10. How to Save 3D Materials
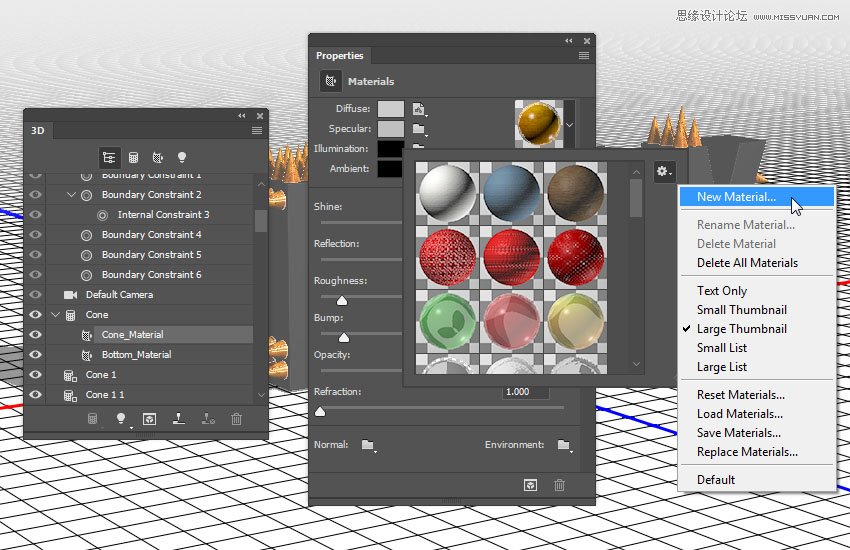
Step 1
Click the Material Picker box, click the pop-up menu icon, and choose New Material.
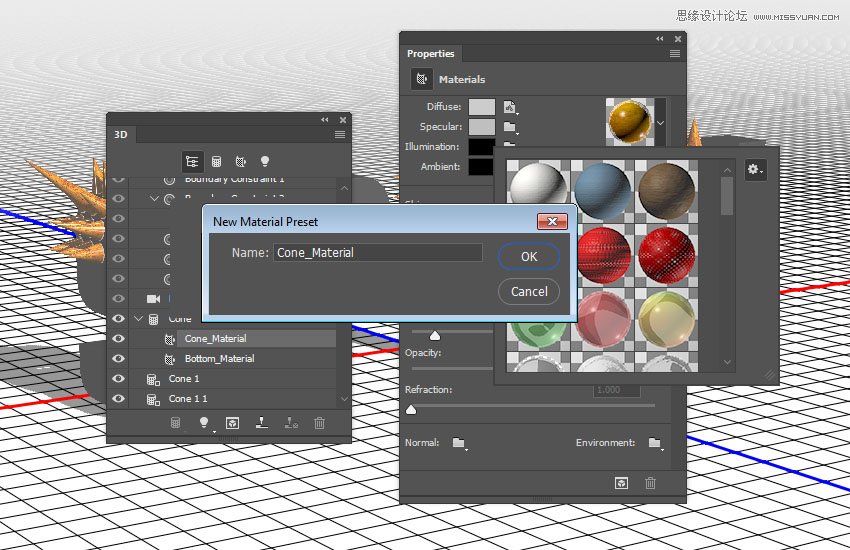
Step 2
Type Cone_Material in the Name field, and click OK. This will add the material to the picker so that you'll be able to reapply it later on.
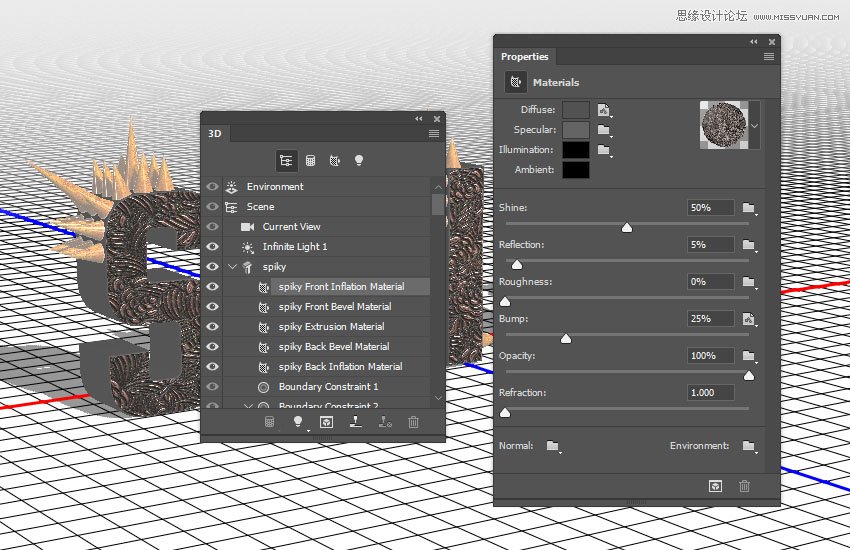
11. How to Create a Front Inflation Material
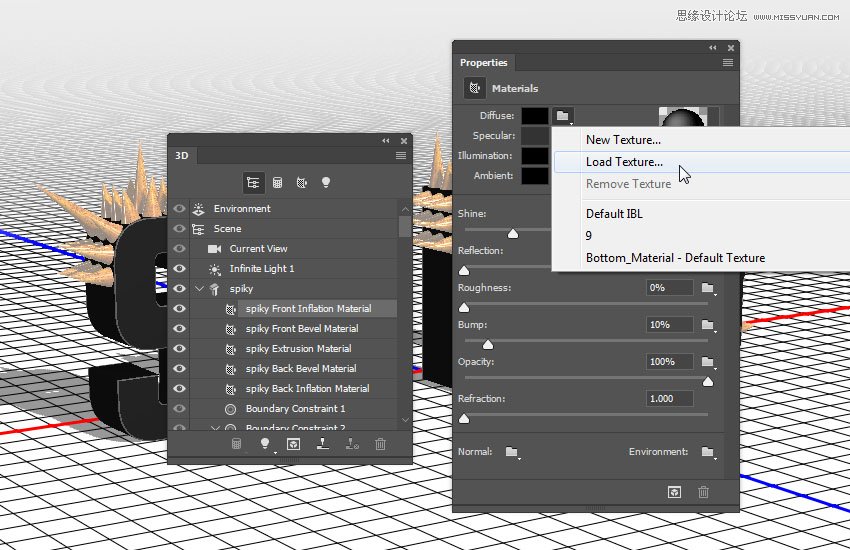
Step 1
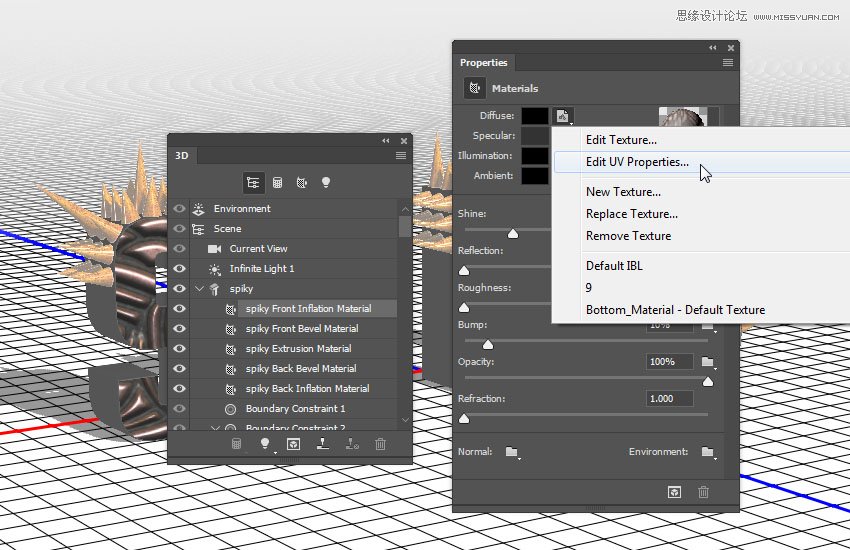
Select the text's Front Inflation Material tab, click its Diffuse texture icon, and choose Load Texture to open the 15.jpg image from the Metal seamless textures pack 5 pack.
Step 2
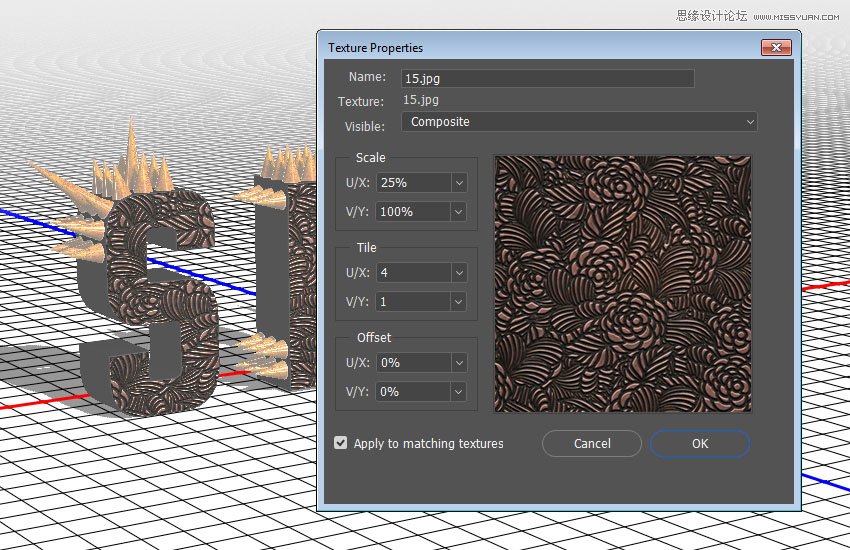
Click the Diffuse texture icon again, and choose Edit UV Properties.
Step 3
Use any Tile values that you like and click OK.
Step 4
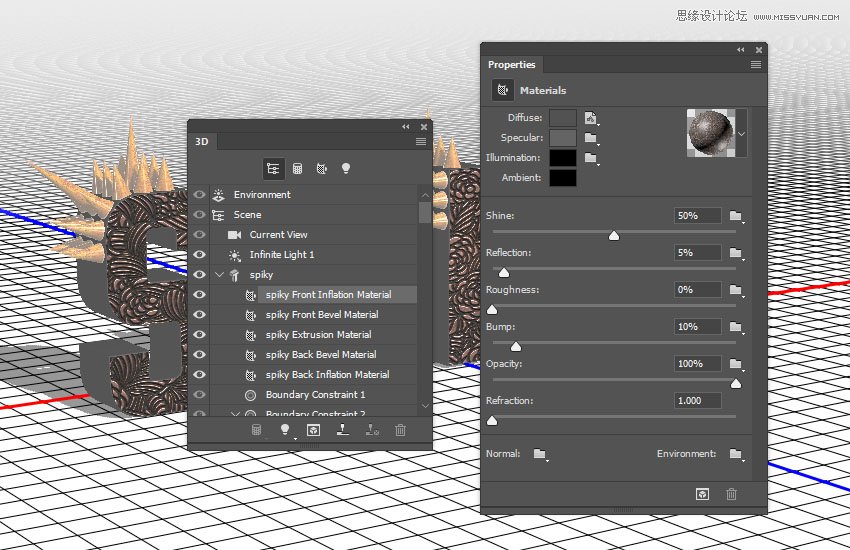
Use these values for the rest of the settings:
Specular: 100, 100, 100
Shine: 50%
Reflection: 5%
12. How to Add a Bump Effect
Step 1
Click the Bump folder icon and choose Load Texture to open the 10.jpg image from the Metal seamless textures pack 5 pack.
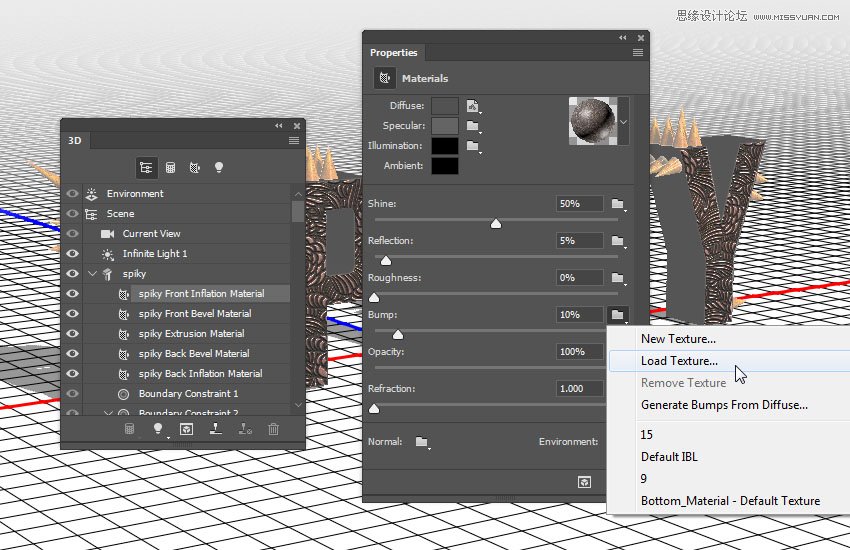
Step 2
Change the Bump value to 25, and edit its texture's UV Properties to match the Diffuse's.
Save the material once you're done.
Step 3
Select the text's Extrusion Material tab, open the Material Picker, scroll down to the Front Inflation Material's icon, and click it to apply it to the Extrusion Material.

13. How to Adjust More Material Settings
Step 1
Select the text mesh tab, and change its Texture Mapping to Tile.
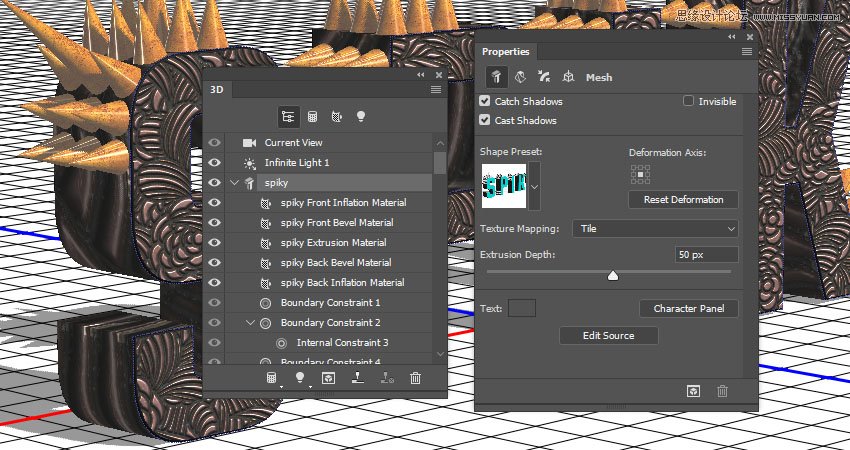
Step 2
Select the Extrusion Material tab again, and edit its Diffuse and Bump textures' UV Properties as needed.

Step 3
Select both Bevel Material tabs, and apply the Cone_Material to them. Also, apply the Front Inflation Material to the Back Inflation Material.

14. How to Adjust a 3D Scene's Lighting and Render It
Step 1
Select the Infinite Light 1 tab, and change its Intensity to 60% and its Shadow Softness to 30%.
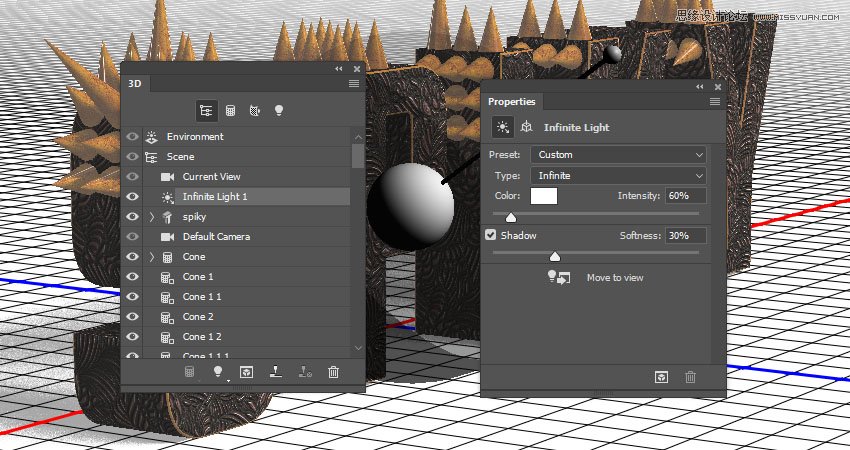
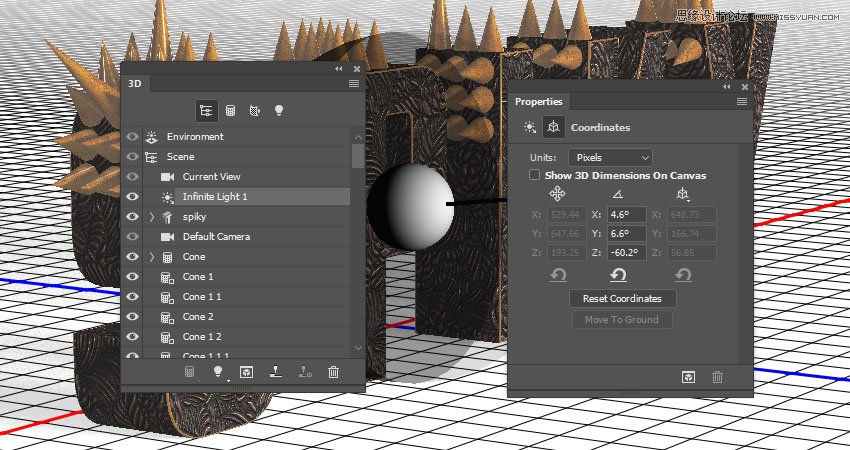
Step 2
Use the Move Tool or the Coordinates values to move the Infinite Light until you get a result you like.
Step 3
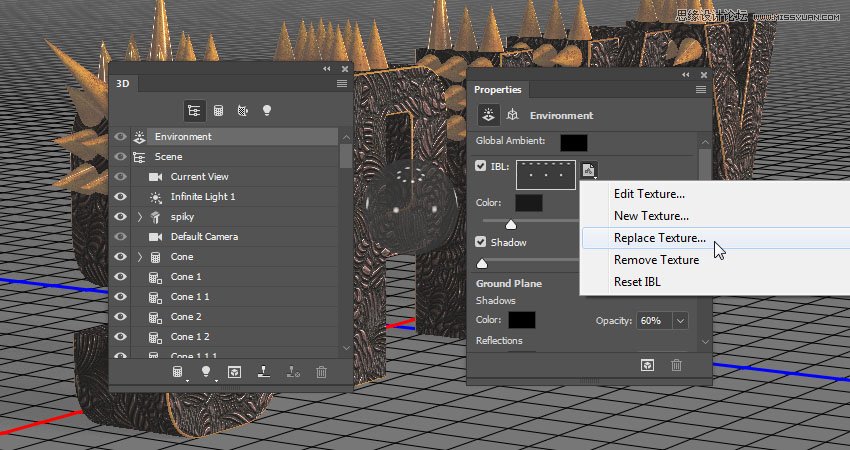
Select the Environment tab, click the IBL texture icon, choose Replace Texture, and open the Living Roomimage.
Step 4
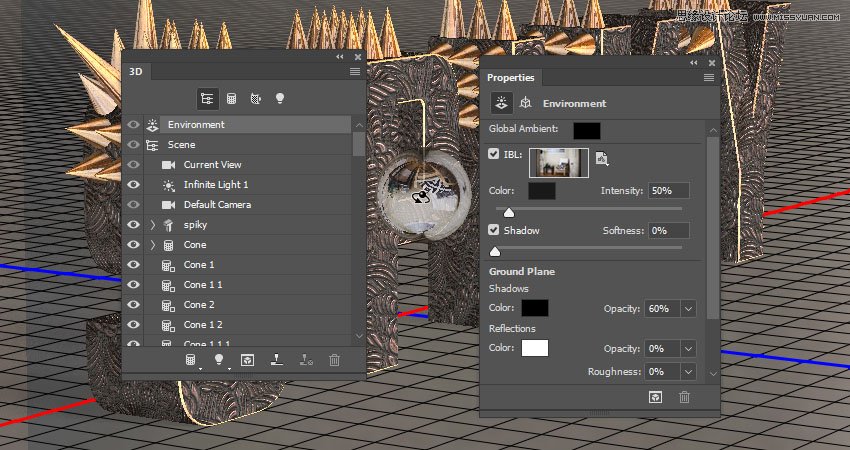
Change the Intensity to 50%, and move the image around to get a result you like.
You can go back and forth between the Infinite and Environment lights, and change their settings or move them around, until you achieve the result you want.
Step 5
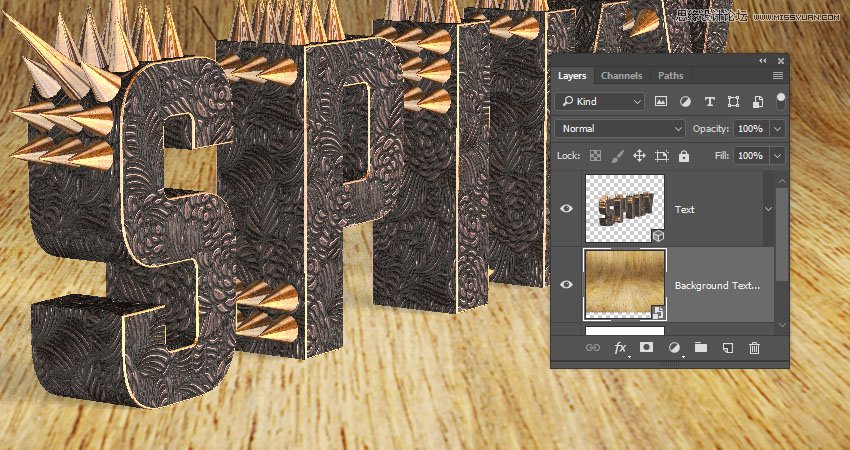
Place the Modern wood texture background design image below the 3D layer, rename its layer to Background Texture, resize it to fit within the document, and adjust the 3D scene's camera angle accordingly to choose a final camera view.
Don't worry about any empty areas that appear as we will crop them later on.
Step 6
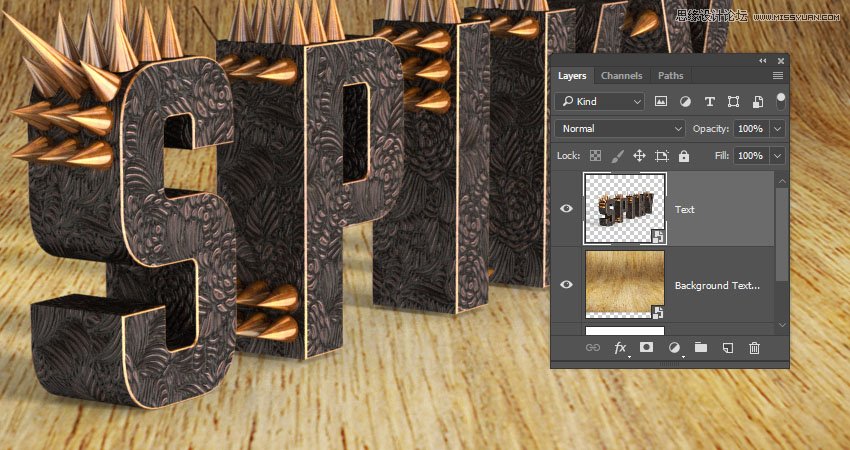
Once you like the final result, go to 3D > Render 3D Layer. The rendering might take a while, but you can stop it any time by pressing the Esc key.
After the rendering is done, right-click the 3D layer and choose Convert to Smart Object to avoid making any accidental changes.
15. How to Apply a Texture Overlay
Step 1
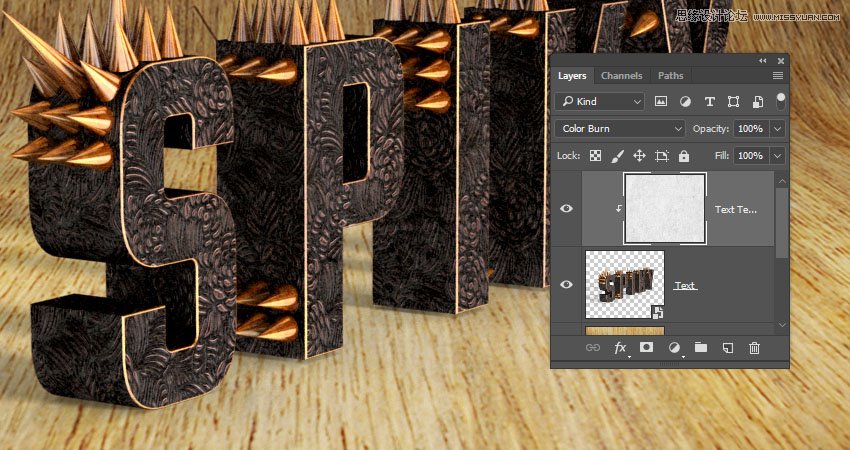
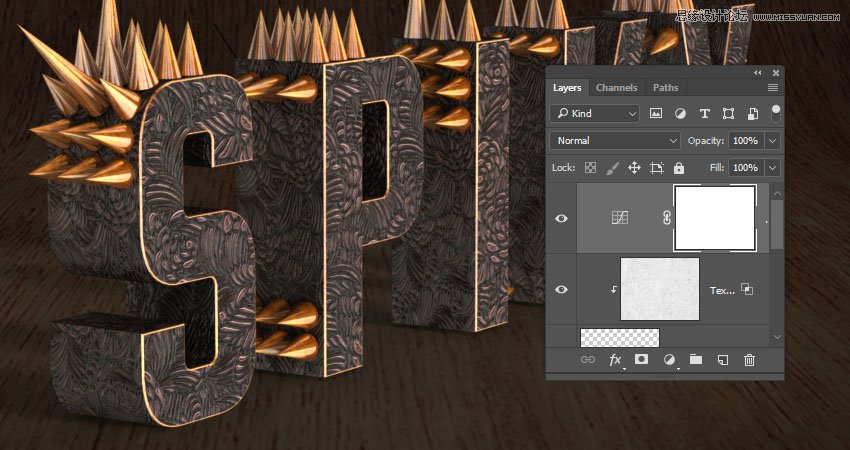
Place the Concrete rough texture image on top of the 3D layer, rename its layer to Texture Overlay, change its Blend Mode to Color Burn, resize it as needed, and right-click it to choose Create Clipping Mask.
Step 2
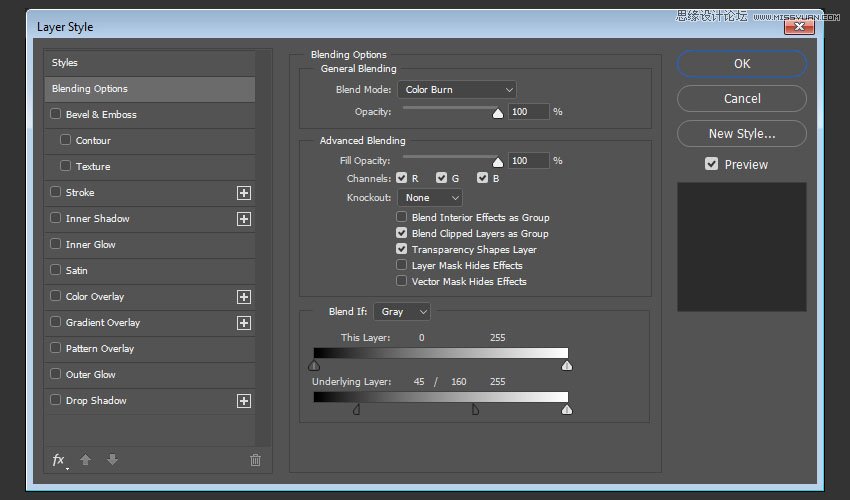
Double-click the Texture Overlay layer to get the Layer Style box.
We are going to adjust the Underlying Layer sliders under the Blend If section. Press-hold the Option key, and click-drag the left slider to split it. As you move the slider's ends, you'll notice how the texture starts to blend better with the text. What this slider does is protect the darker areas of the text from being affected by the texture.
16. How to Adjust a Background Texture
Step 1
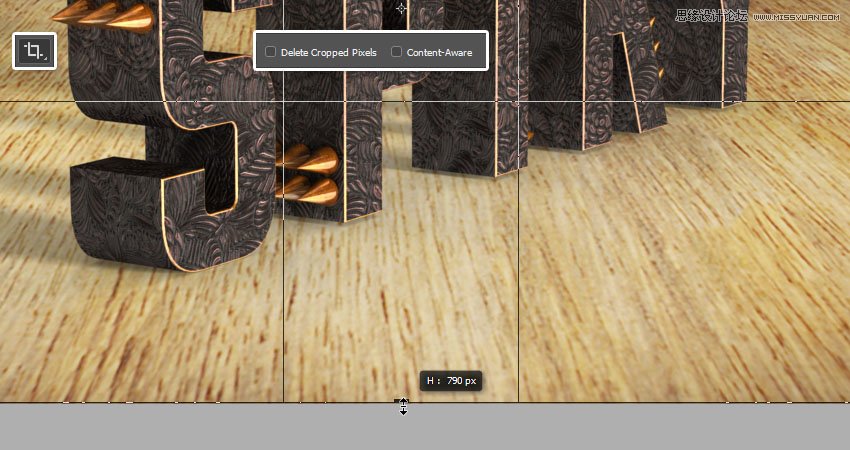
Select the Crop Tool, uncheck the Delete Cropped Pixels box in the Options bar, and drag the sides of the bounding box to get rid of any empty areas outside the background texture image.
Hit the Return key to apply the crop.
Step 2
Select the Background Texture layer, and go to Image > Adjustments > Levels. Change the Output Levels' Highlights value to 147.

Step 3
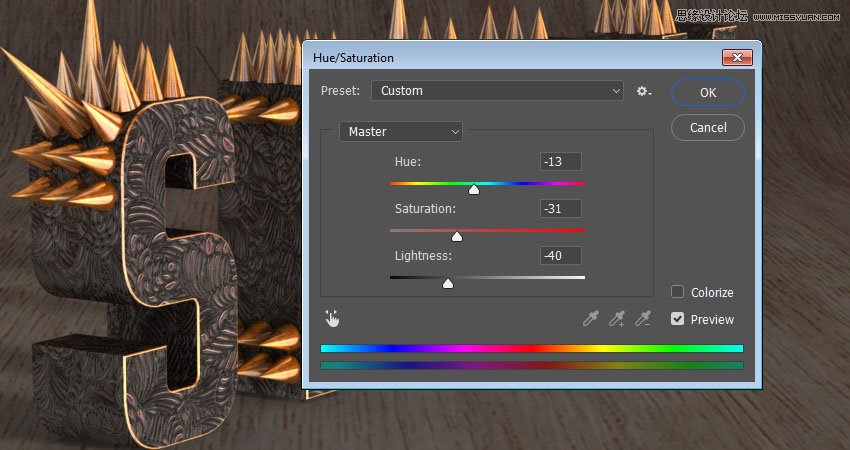
Go to Image > Adjustments > Hue/Saturation. Change the Hue to -13, the Saturation to -31, and the Lightness to -40.
Step 4
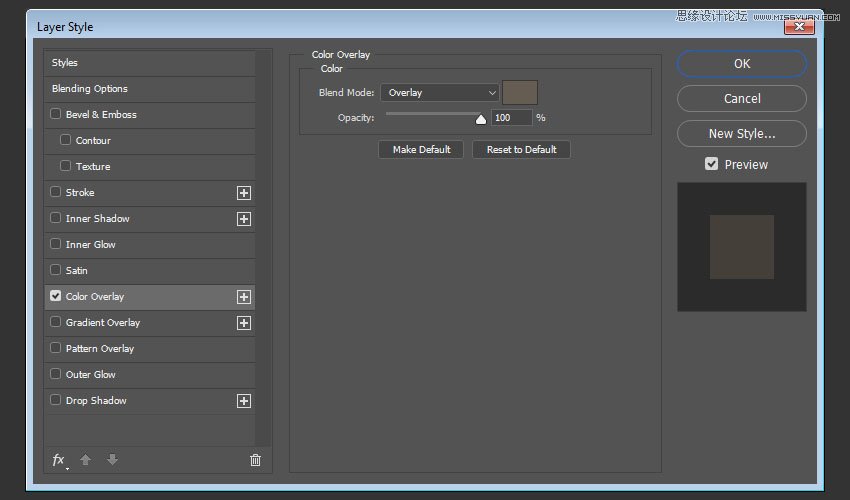
Double-click the Background Texture layer to apply a Color Overlay effect with these settings:
Color: #655d52
Blend Mode: Overlay
17. How to Add a Vignette
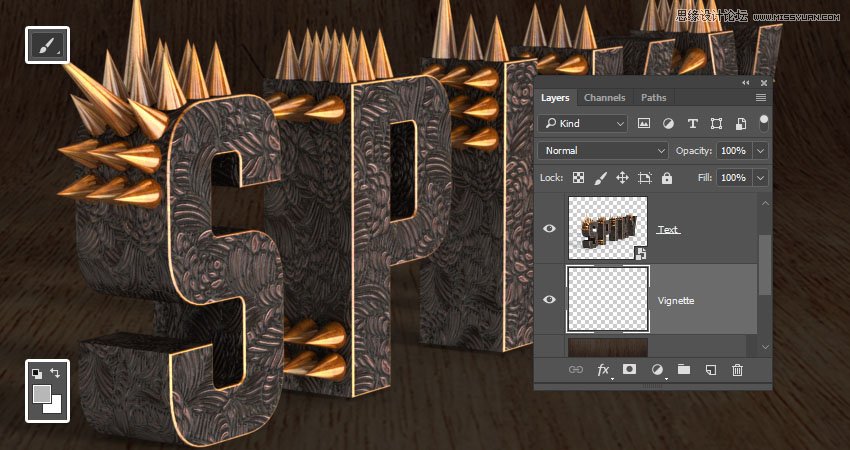
Step 1
Create a new layer on top of the Background Texture layer and name it Vignette.
Select the Brush Tool, and set the Foreground Color to #b7b7b7.
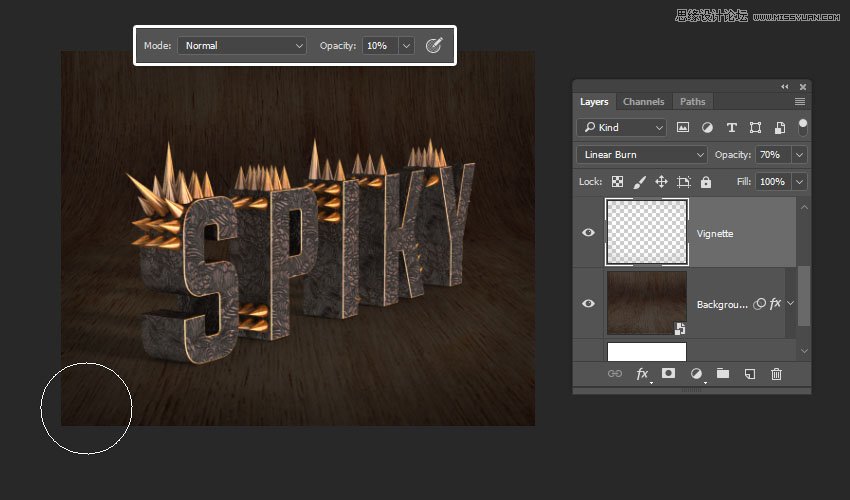
Step 2
Change the Vignette layer's Blend Mode to Linear Burn and its Opacity to 70%.
Pick a big soft round brush tip, and change its Opacity value in the Options bar to 10%. Paint around the document to add the vignette. You can change the Opacity values if you want a more subtle outcome.
18. How to Add a Quick Dodge and Burn
Step 1
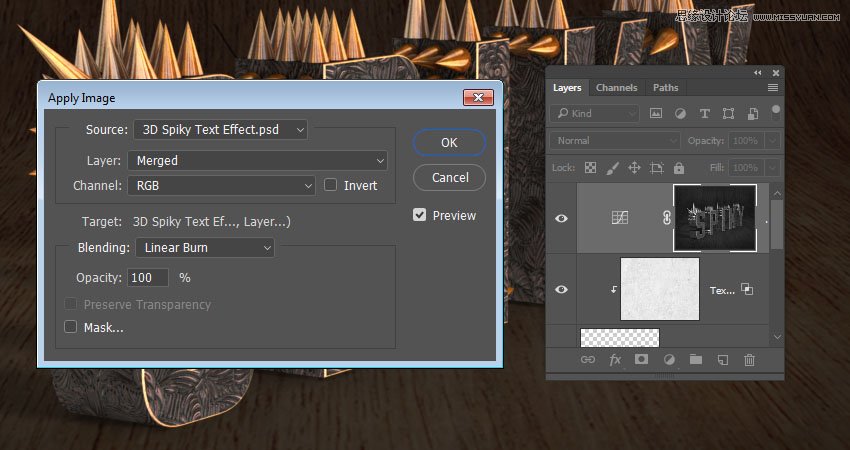
Add a new Curves adjustment layer on top of all layers, and select its mask's thumbnail.
Step 2
Go to Image > Apply Image. Set the Layer to Merged, the Channel to RGB, and the Blending to Linear Burn.
Step 3
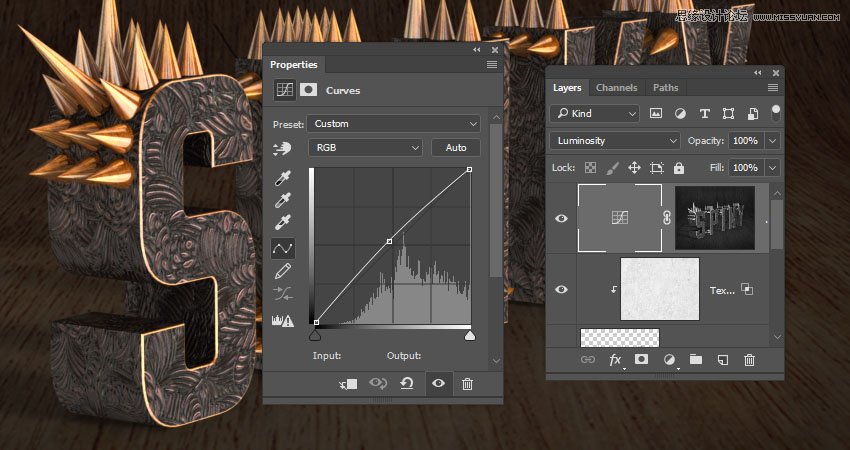
Change the Curves layer's Blend Mode to Luminosity, and drag the curve's center slightly upwards to brighten the lighter areas a little bit.
Step 4
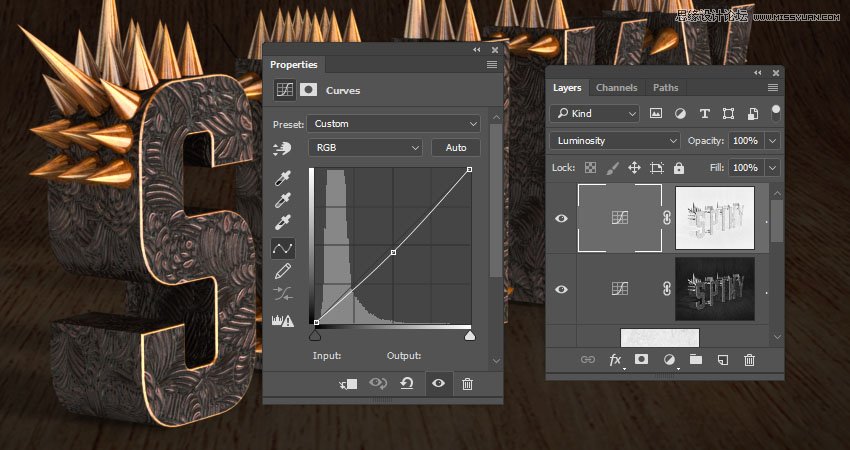
Duplicate the Curves layer, and drag the curve's center slightly downwards to darken the darker areas.
In order to affect the darker areas, you need to invert the mask. So click the mask's thumbnail, and press Command-I.
19. How to Apply High Pass and Noise Filters
Step 1
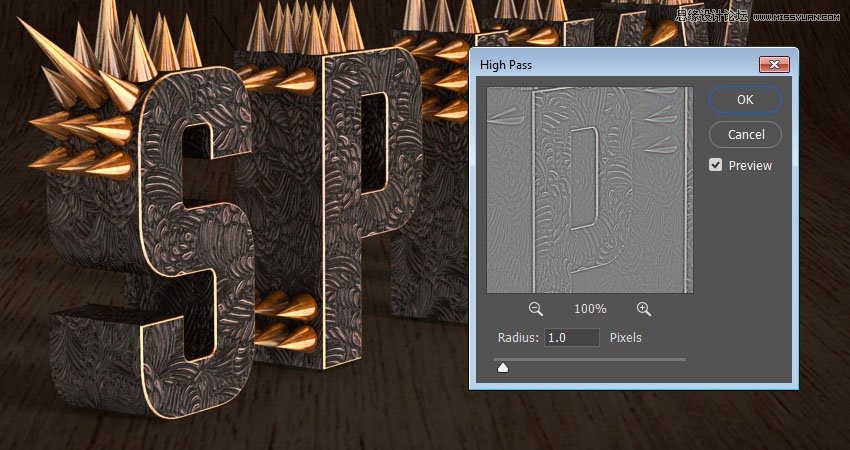
Create a new layer on top of all layers and name it High Pass.
Press the Shift-Option-Command-E keys to create a stamp, and change its Blend Mode to Soft Light.

Step 2
Go to Filter > Other > High Pass, and change the Radius to 1.
Step 3
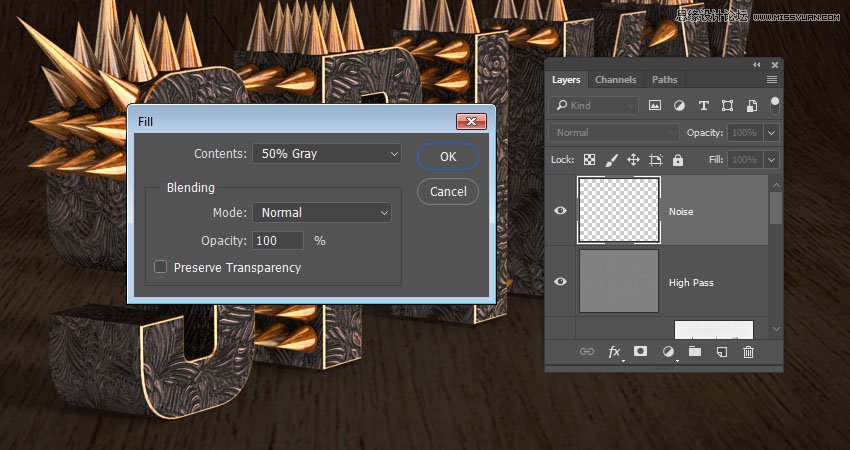
Create another new layer on top of all layers and name it Noise.
Go to Edit > Fill, change the Contents to 50% Gray, and click OK.
Step 4
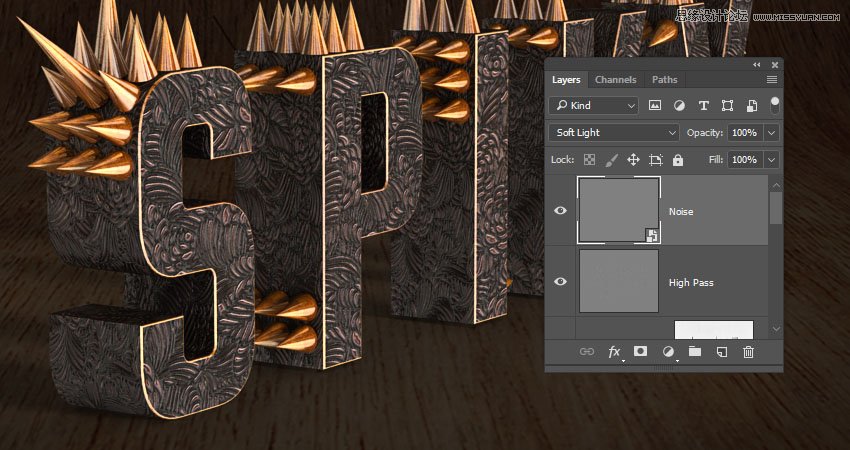
Convert the Noise layer to a Smart Object, and change its Blend Mode to Soft Light.
Step 5
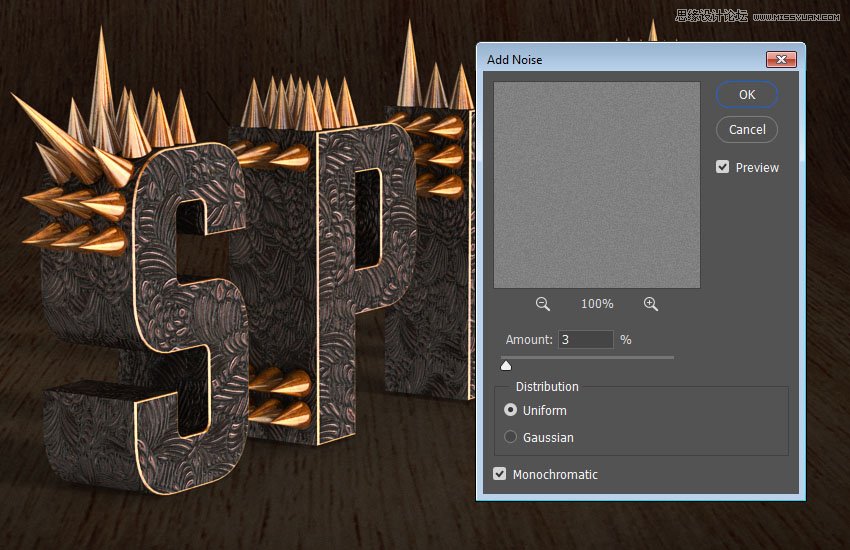
Go to Filter > Noise > Add Noise, change the Amount to 3 and the Distribution to Uniform, and check the Monochromatic box.
Advertisement
Step 6
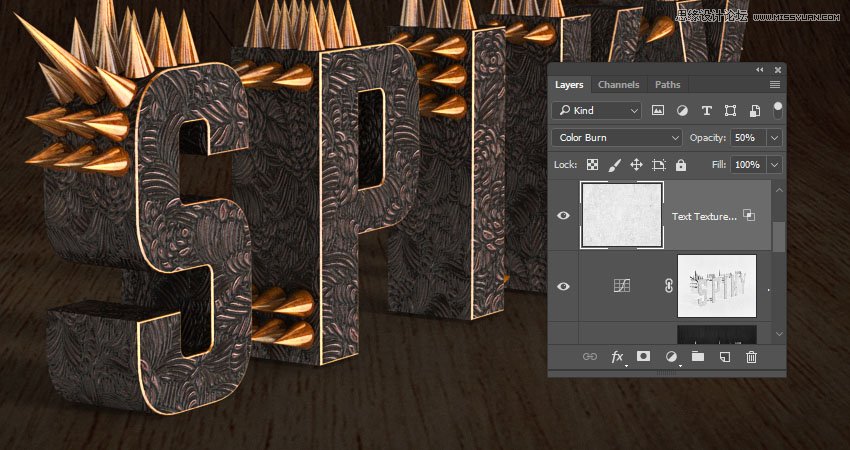
Duplicate the Texture Overlay layer, drag the copy on top of all layers, and change its Opacity to 50%.
Congratulations! You're Done
In this tutorial, we created 3D text and cone meshes, adjusted their settings, and created their materials.
Then, we adjusted the lighting, added a background, and rendered the 3D scene. After that, we used textures, adjustment layers, and layer styles to adjust the coloring and contrast of the effect.
Finally, we used high pass and noise filters to finish off the effect.
Please feel free to leave your comments, suggestions, and outcomes below.
 爱你不要你
爱你不要你
-
 Photoshop制作复古风格的老照片效果【英】2018-04-23
-
 Photoshop合成长着创意大树的长颈鹿【英】2018-04-23
-
 Photoshop合成冰冻特效的金鱼场景【英】2018-02-10
-
 Photoshop合成梦幻风格的森林场景【英】2018-02-10
-
 Photoshop合成正在施法的巫师【英】2018-02-10
-
 Photoshop制作金属质感的3D立体字【英】2018-01-09
-
 Photoshop设计火焰燃烧艺术字教程【英】2018-01-09
-
Photoshop制作复古风格的老照片效果【英】
相关文章11882018-04-23
-
 Photoshop制作黄金质感立体字【英】
相关文章7422018-02-10
Photoshop制作黄金质感立体字【英】
相关文章7422018-02-10
-
 Photoshop制作惊艳大气的3D立体字
相关文章14682018-02-10
Photoshop制作惊艳大气的3D立体字
相关文章14682018-02-10
-
 Photoshop制作复古双重曝光字体
相关文章6532018-01-09
Photoshop制作复古双重曝光字体
相关文章6532018-01-09
-
 Photoshop制作木地板LOGO刻印效果【英】
相关文章19272018-01-09
Photoshop制作木地板LOGO刻印效果【英】
相关文章19272018-01-09
-
 Photoshop制作复古花朵组成的艺术字【英】
相关文章3802018-01-09
Photoshop制作复古花朵组成的艺术字【英】
相关文章3802018-01-09
-
 Photoshop制作可爱的糖果饼干字【英】
相关文章6722017-12-25
Photoshop制作可爱的糖果饼干字【英】
相关文章6722017-12-25
-
 Photoshop制作梦幻耶稣光和高光背景【英】
相关文章6002017-12-16
Photoshop制作梦幻耶稣光和高光背景【英】
相关文章6002017-12-16
