Photoshop制作可爱的糖果饼干字【英】
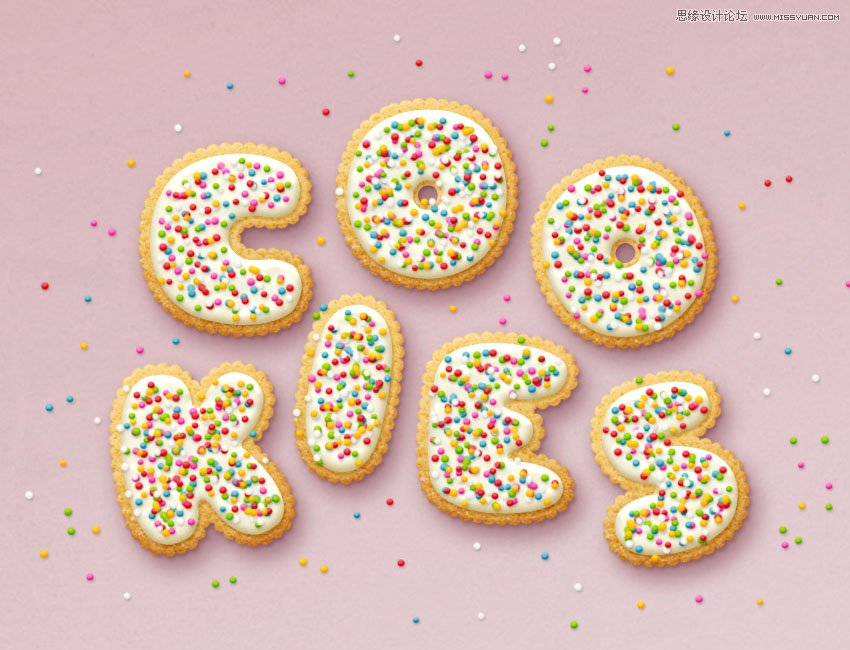
文章来源于 Tutsplus,感谢作者 Rose 给我们带来经精彩的文章!先看看效果图
This tutorial will show you how to use Photoshop's brush settings, layer styles, and adjustment layers to create a fun, bright glazed cookies text effect. Let's get started!
1. How to Create a Gradient Background and Text Layers
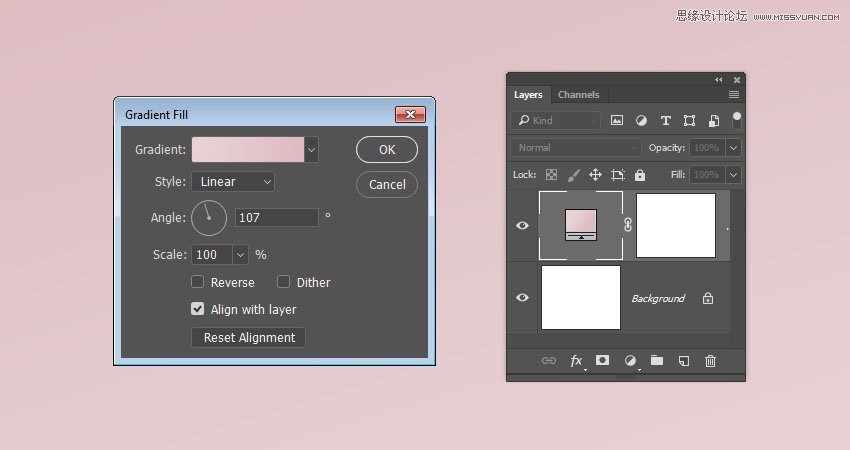
Step 1
Create a new 1000 x 800px document, and click the Create new fill or adjustment layer icon at the bottom of the Layers panel to add a Gradient layer.
Create the gradient fill using the Colors #e8d2d6 to the left and #ddbcc0 to the right, and change the Angle to 107.
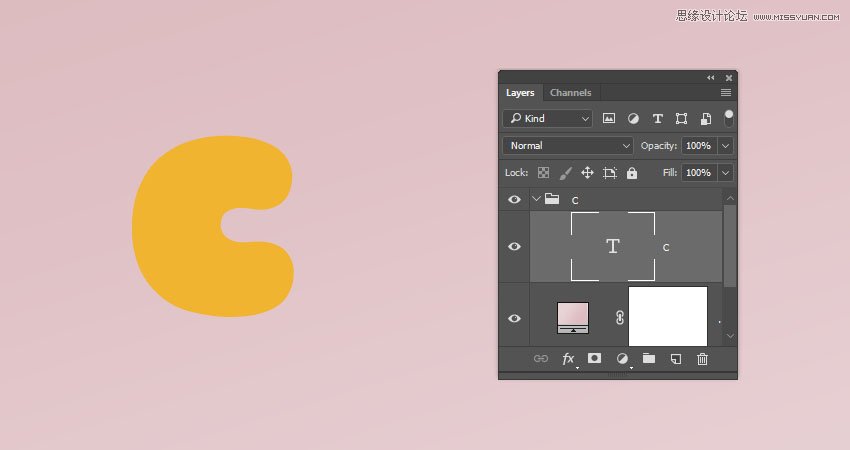
Step 2
Create the text in All Caps using the font Sniglet, and set the Size to 250 pt.
You can create the whole word at once, or, if you want a more dynamic result, create each letter on a separate layer.
If you are creating the letters separately, make sure to place each one's layer in a group with the letter's name.
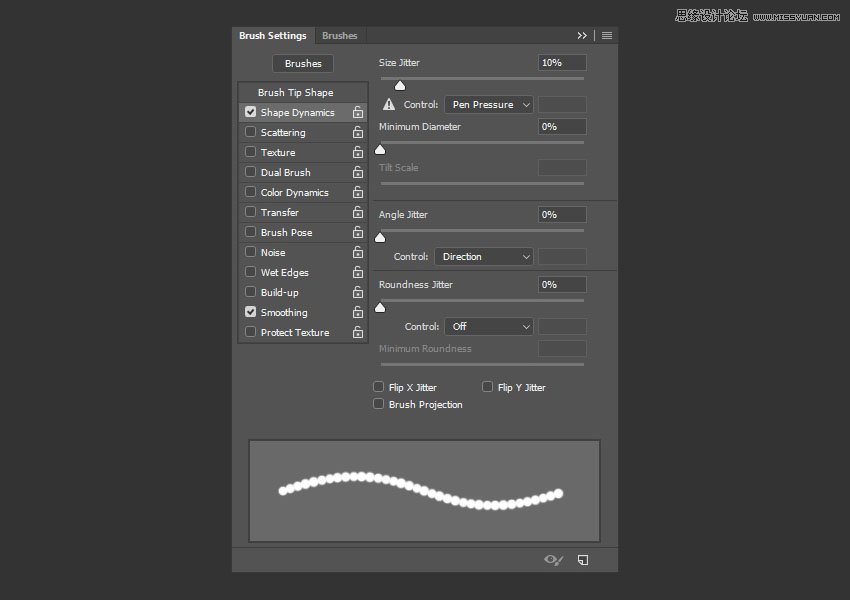
2. How to Create and Save a Stroke Brush Tip
Step 1
Pick the Brush Tool and open the Brush panel. Choose a hard round tip and use these settings:
Brush Tip Shape
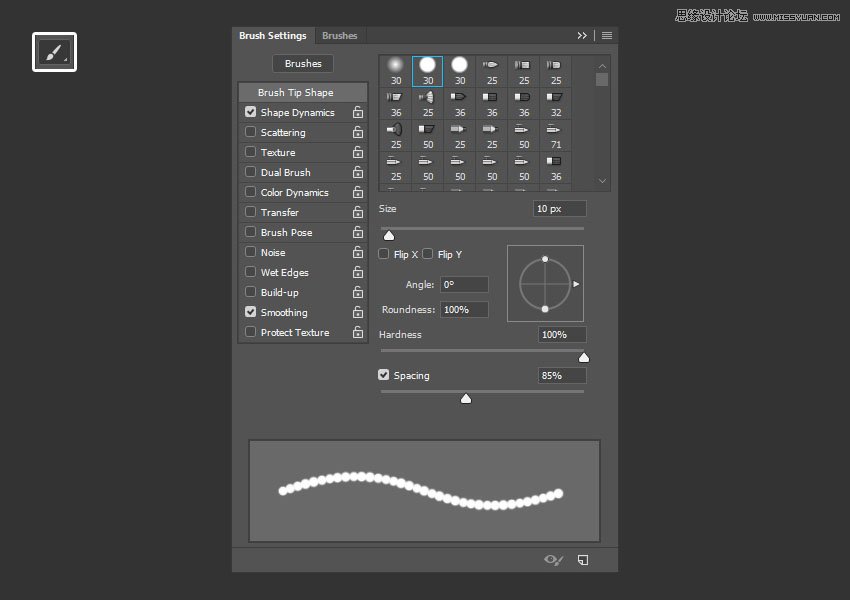
Shape Dynamics
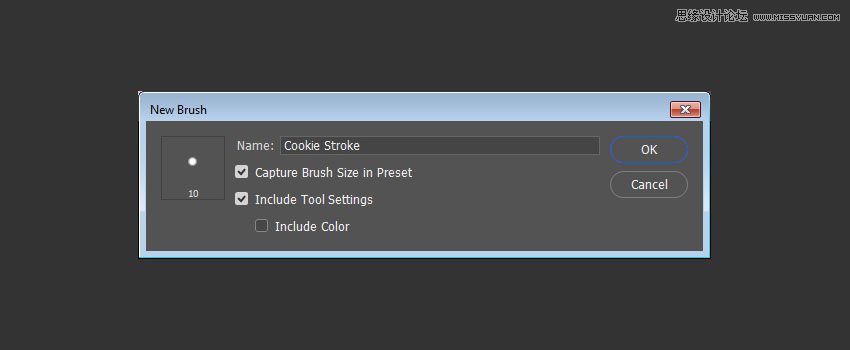
Step 2
Click the Create new brush icon in the bottom right corner of the panel, change the Name to Cookie Stroke, and click OK.
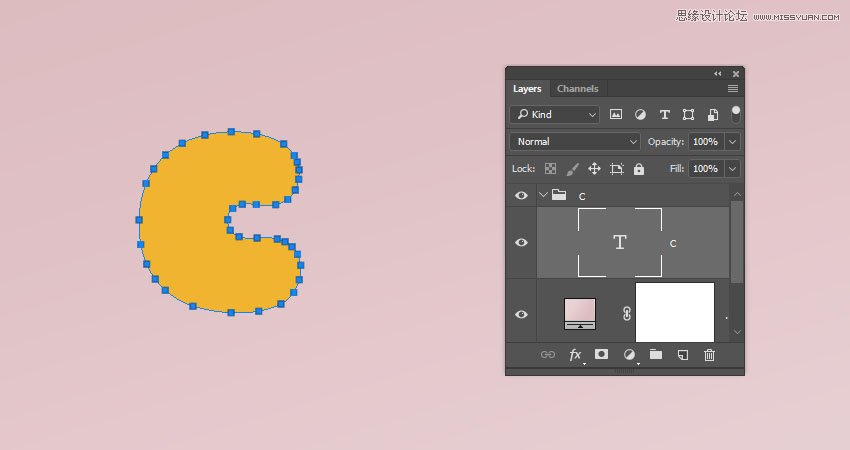
3. How to Create and Stroke a Work Path
Step 1
Right-click the text layer and choose Create Work Path.
 情非得已
情非得已
-
 Photoshop制作复古风格的老照片效果【英】2018-04-23
-
 Photoshop合成长着创意大树的长颈鹿【英】2018-04-23
-
 Photoshop合成冰冻特效的金鱼场景【英】2018-02-10
-
 Photoshop合成梦幻风格的森林场景【英】2018-02-10
-
 Photoshop合成正在施法的巫师【英】2018-02-10
-
 Photoshop制作金属质感的3D立体字【英】2018-01-09
-
 Photoshop设计火焰燃烧艺术字教程【英】2018-01-09
-
Photoshop制作复古风格的老照片效果【英】
相关文章11882018-04-23
-
Photoshop合成长着创意大树的长颈鹿【英】
相关文章13832018-04-23
-
Photoshop合成冰冻特效的金鱼场景【英】
相关文章34052018-02-10
-
 Photoshop制作黄金质感立体字【英】
相关文章7422018-02-10
Photoshop制作黄金质感立体字【英】
相关文章7422018-02-10
-
 Photoshop制作惊艳大气的3D立体字
相关文章14682018-02-10
Photoshop制作惊艳大气的3D立体字
相关文章14682018-02-10
-
Photoshop合成梦幻风格的森林场景【英】
相关文章24492018-02-10
-
Photoshop合成正在施法的巫师【英】
相关文章8372018-02-10
-
 Photoshop制作复古双重曝光字体
相关文章6532018-01-09
Photoshop制作复古双重曝光字体
相关文章6532018-01-09
