Photoshop制作可爱的糖果饼干字【英】(2)
文章来源于 Tutsplus,感谢作者 Rose 给我们带来经精彩的文章!Step 2
Create a new layer on top of the text layer, name it Stroke, make sure that the Brush Tool is still active, and hit the Return key to stroke the path.
Pick the Direct Selection Tool (A), and hit the Return key again to get rid of the work path.
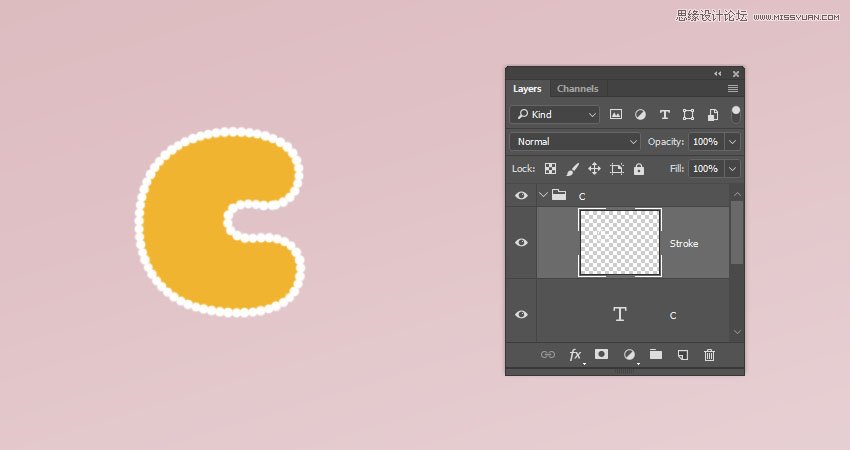
Step 3
Put both the text and Stroke layers in a group and name it Text and Stroke.
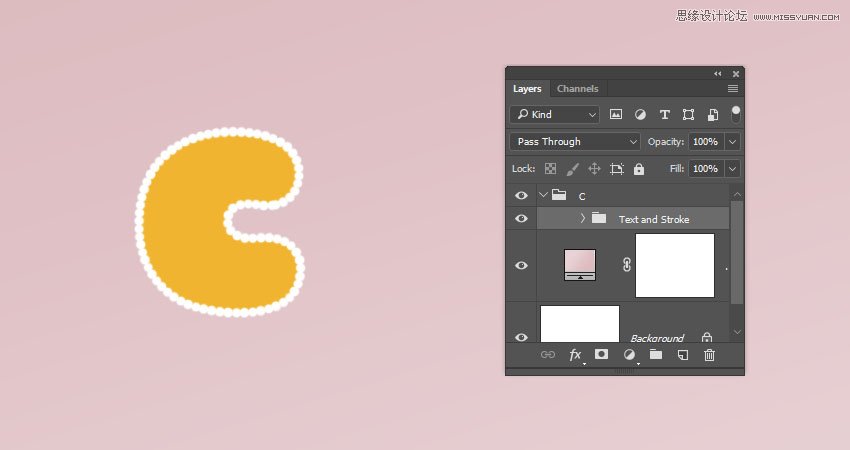
4. How to Style a Layer Group
Double-click the Text and Stroke group to apply the following layer style:
Step 1
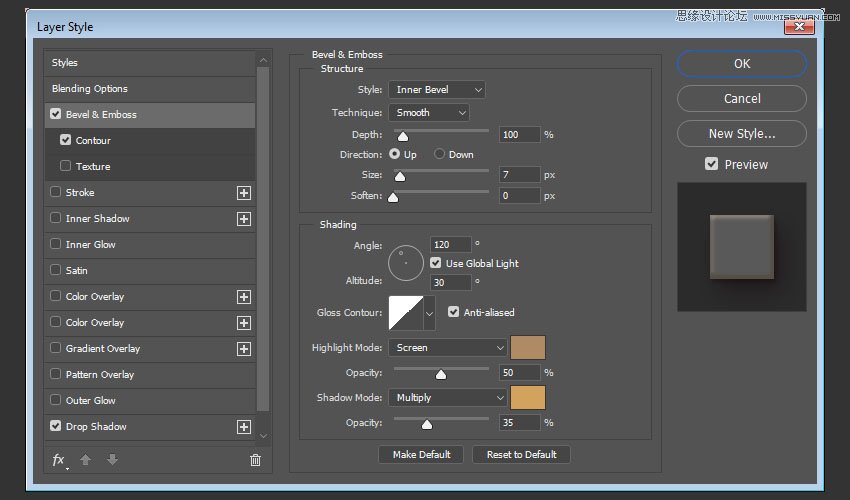
Add a Bevel and Emboss with these settings:
Size: 7
Check the Anti-aliased box
Highlight Mode:
Color: #b08965
Shadow Mode:
Color: #d3a35e
Opacity: 35%
Step 2
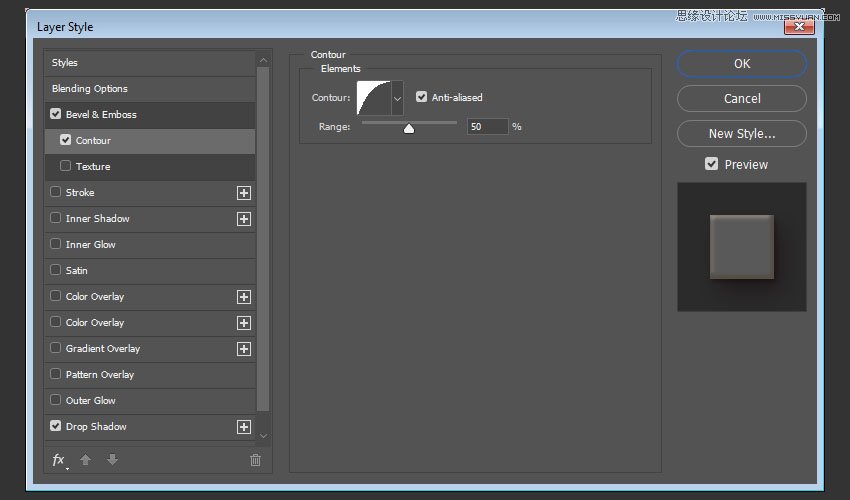
Add a Contour with these settings:
Contour: Half Round
Check the Anti-aliased box.
Step 3
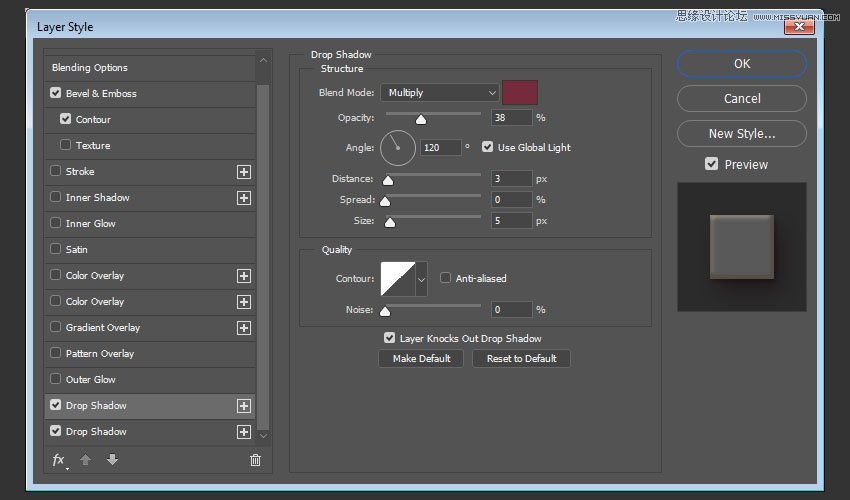
Add a Drop Shadow with these settings:
Color: #762b3d
Opacity: 38%
Distance: 3
Size: 5
Step 4
Add another Drop Shadow effect instance with these settings:
Color: #7d3848
Opacity: 50%
Distance: 15
Size: 25
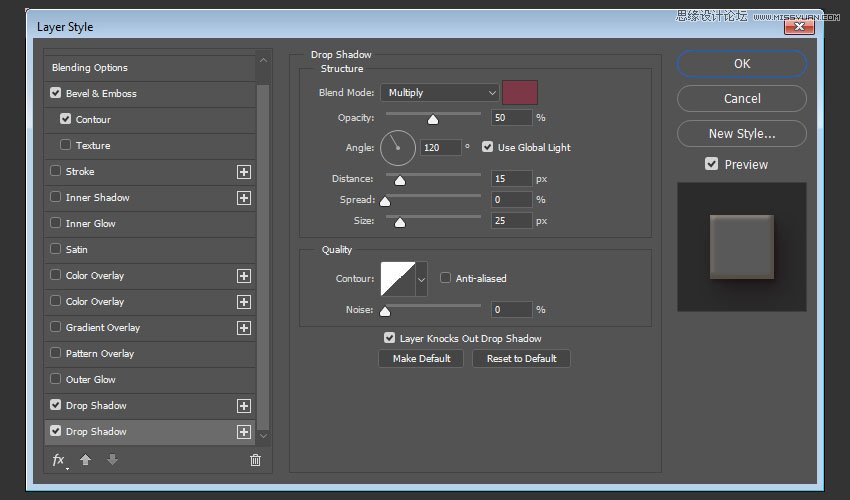
This will style the main cookie shape.

5. How to Add a Texture Image
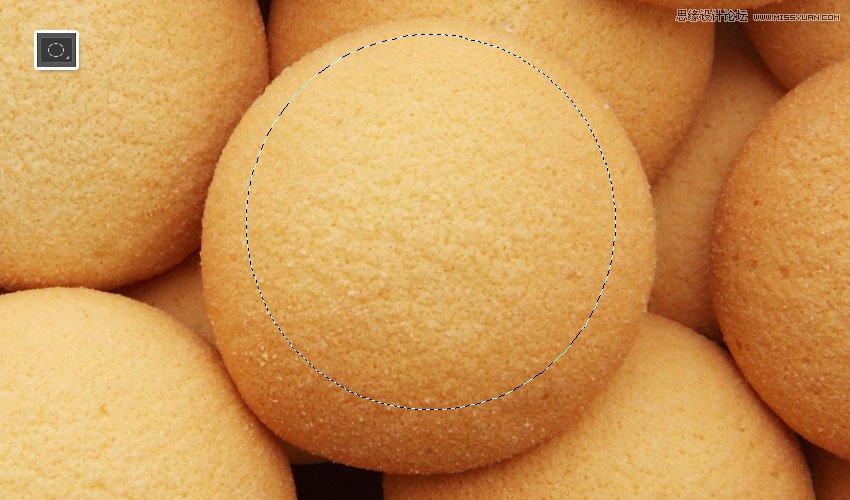
Step 1
Open the Biscuits image, and pick the Elliptical Marquee Tool to select one of the cookies in the image. You can select only the part you want to use as well.
Go to Edit > Copy to copy the selected part.
 情非得已
情非得已
-
 Photoshop制作复古风格的老照片效果【英】2018-04-23
-
 Photoshop合成长着创意大树的长颈鹿【英】2018-04-23
-
 Photoshop合成冰冻特效的金鱼场景【英】2018-02-10
-
 Photoshop合成梦幻风格的森林场景【英】2018-02-10
-
 Photoshop合成正在施法的巫师【英】2018-02-10
-
 Photoshop制作金属质感的3D立体字【英】2018-01-09
-
 Photoshop设计火焰燃烧艺术字教程【英】2018-01-09
-
Photoshop制作复古风格的老照片效果【英】
相关文章11882018-04-23
-
Photoshop合成长着创意大树的长颈鹿【英】
相关文章13832018-04-23
-
Photoshop合成冰冻特效的金鱼场景【英】
相关文章34052018-02-10
-
 Photoshop制作黄金质感立体字【英】
相关文章7422018-02-10
Photoshop制作黄金质感立体字【英】
相关文章7422018-02-10
-
 Photoshop制作惊艳大气的3D立体字
相关文章14682018-02-10
Photoshop制作惊艳大气的3D立体字
相关文章14682018-02-10
-
Photoshop合成梦幻风格的森林场景【英】
相关文章24492018-02-10
-
Photoshop合成正在施法的巫师【英】
相关文章8372018-02-10
-
 Photoshop制作复古双重曝光字体
相关文章6532018-01-09
Photoshop制作复古双重曝光字体
相关文章6532018-01-09
