Photoshop制作可爱的糖果饼干字【英】(7)
文章来源于 Tutsplus,感谢作者 Rose 给我们带来经精彩的文章!13. How to Add Global Adjustments
Step 1
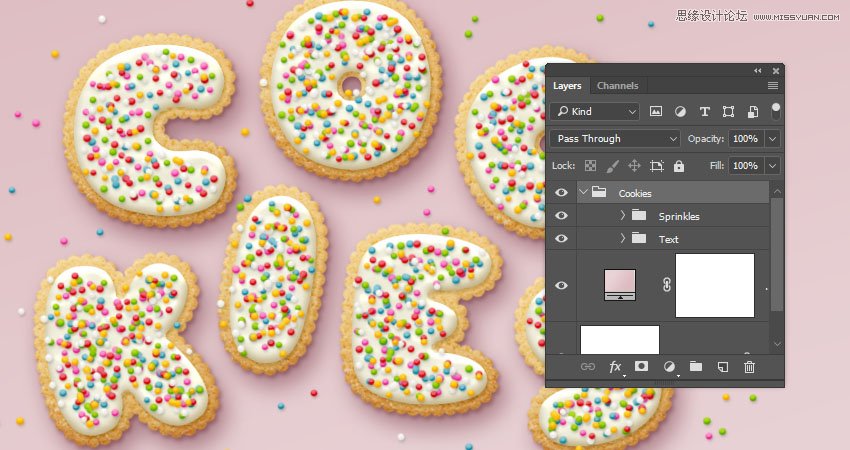
Once you're done adding the sprinkles, put the Text and Sprinkles groups in another new group and name it Cookies.
Step 2
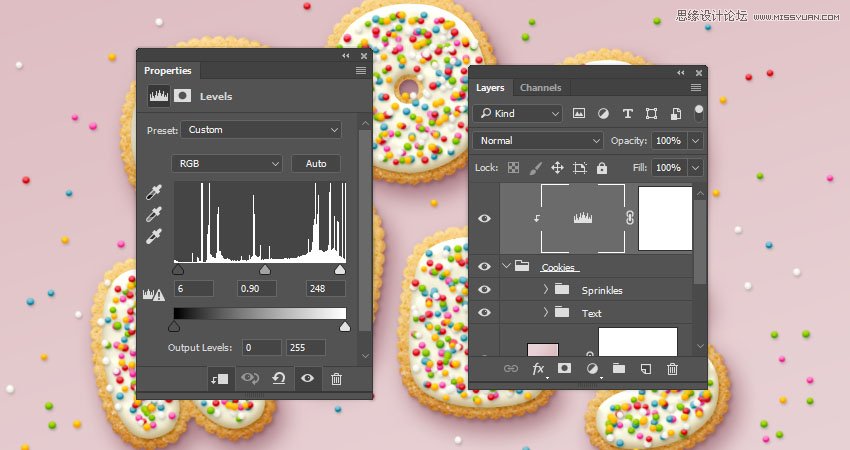
Add a Levels adjustments layer and clip it to the Cookies group.
Then, change the Highlights value to 6, the Gamma to 0.90, and the Shadows to 248.
Step 3
Add a Vibrance adjustments layer and clip it to the Cookies group, and change the Vibrance value to 20.

Step 4
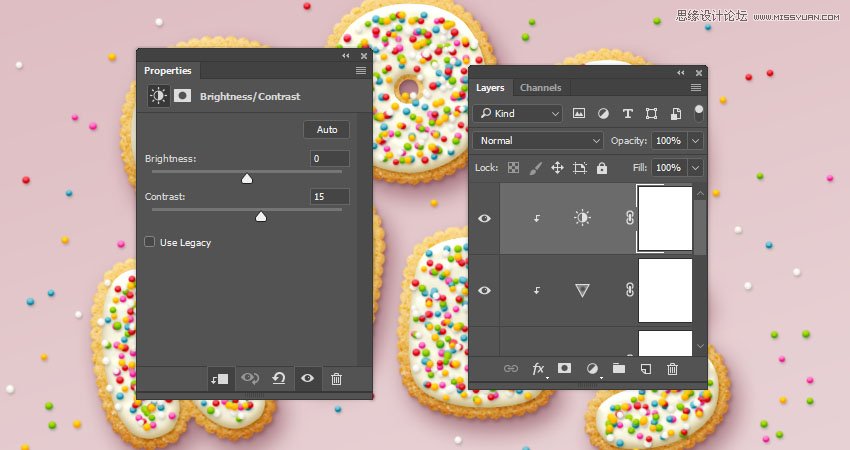
Add a Brightness/Contrast adjustments layer and clip it to the Cookies group, and change the Contrastvalue to 15.
Advertisement
Step 5
Place the Cement texture image on top of the Gradient fill layer, resize it to fit within the document, and rename its layer to Texture Overlay.
Change the Texture Overlay layer's Blend Mode to Linear Burn and its Opacity to 50%.

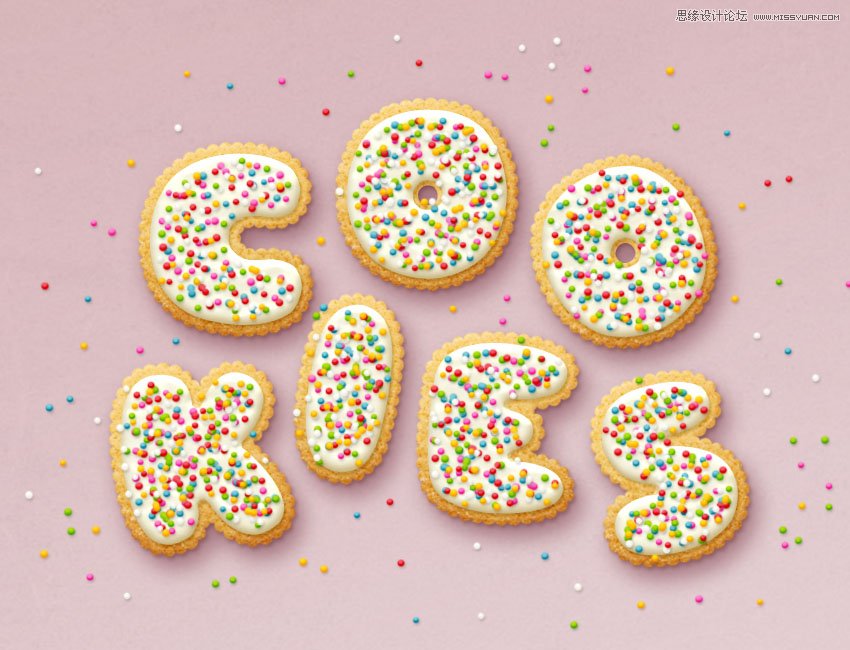
Congratulations! You're Done!
In this tutorial, we created a gradient background and text layers.
Then, we created a simple brush tip, used it to stroke the text, and styled the text and stroke layers to create the main cookie shape.
After that, we created and styled glaze layers, and created a sprinkles brush tip that we added on top of the glazed cookies and styled with different colors.
Finally, we used a couple of adjustment layers to add global adjustments to the effect.
Please feel free to leave your comments, suggestions, and outcomes below.
 情非得已
情非得已
-
 Photoshop制作复古风格的老照片效果【英】2018-04-23
-
 Photoshop合成长着创意大树的长颈鹿【英】2018-04-23
-
 Photoshop合成冰冻特效的金鱼场景【英】2018-02-10
-
 Photoshop合成梦幻风格的森林场景【英】2018-02-10
-
 Photoshop合成正在施法的巫师【英】2018-02-10
-
 Photoshop制作金属质感的3D立体字【英】2018-01-09
-
 Photoshop设计火焰燃烧艺术字教程【英】2018-01-09
-
Photoshop制作复古风格的老照片效果【英】
相关文章11882018-04-23
-
Photoshop合成长着创意大树的长颈鹿【英】
相关文章13832018-04-23
-
Photoshop合成冰冻特效的金鱼场景【英】
相关文章34052018-02-10
-
 Photoshop制作黄金质感立体字【英】
相关文章7422018-02-10
Photoshop制作黄金质感立体字【英】
相关文章7422018-02-10
-
 Photoshop制作惊艳大气的3D立体字
相关文章14682018-02-10
Photoshop制作惊艳大气的3D立体字
相关文章14682018-02-10
-
Photoshop合成梦幻风格的森林场景【英】
相关文章24492018-02-10
-
Photoshop合成正在施法的巫师【英】
相关文章8372018-02-10
-
 Photoshop制作复古双重曝光字体
相关文章6532018-01-09
Photoshop制作复古双重曝光字体
相关文章6532018-01-09
