Photoshop制作复古双重曝光字体
文章来源于 Tutsplus.com,感谢作者 Rose 给我们带来经精彩的文章!教程所需要的素材:双重曝光字体设计PS教程素材
Use a texture image and a gradient map, with some adjustment layers and filters, to create a super quick and easy duotone text effect. Let's get started!
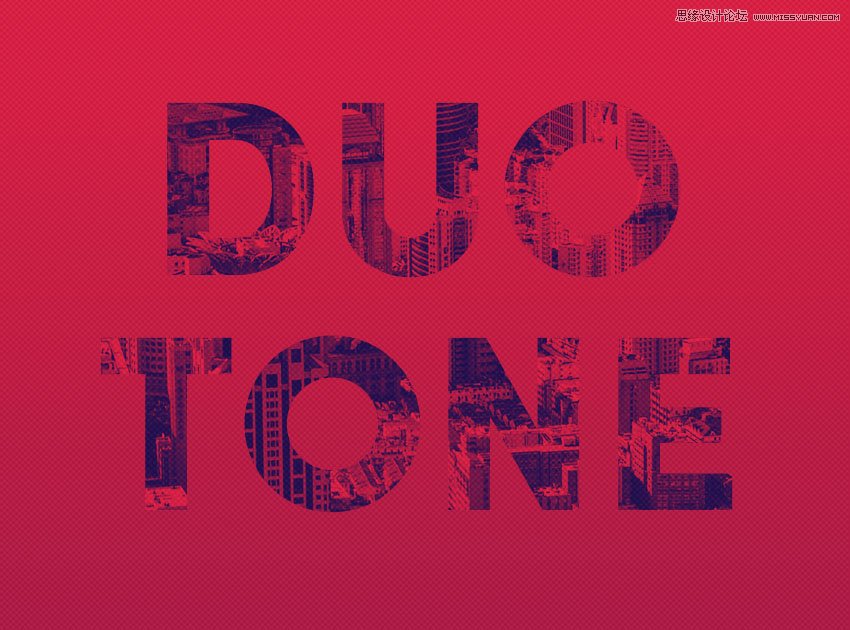
先看看效果图
1. How to Create the Background and Text Layers
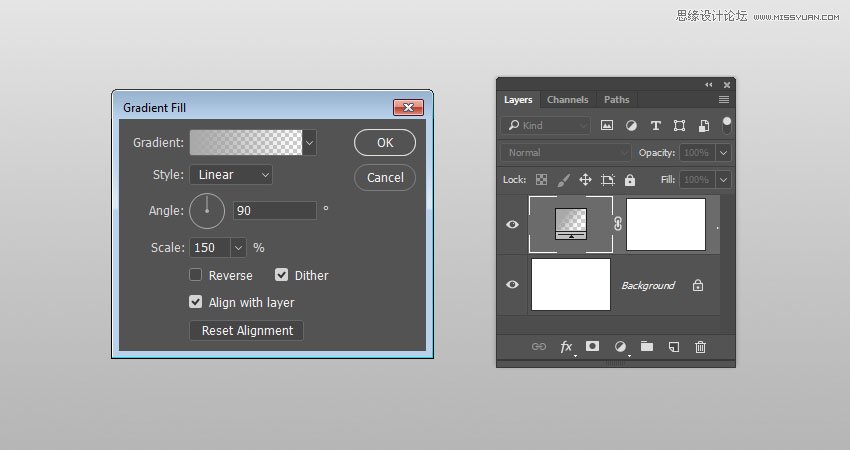
Step 1
Create a new 1000 x 650 px document with a White Background. Click the Create new fill or adjustment layer icon at the bottom of the Layers panel, and choose Gradient.
Create a Fill Color to Transparent gradient fill using the Colors #a9a9a9 to the left and #868686 to the right.
Change the Scale to 150% and check the Dither box.
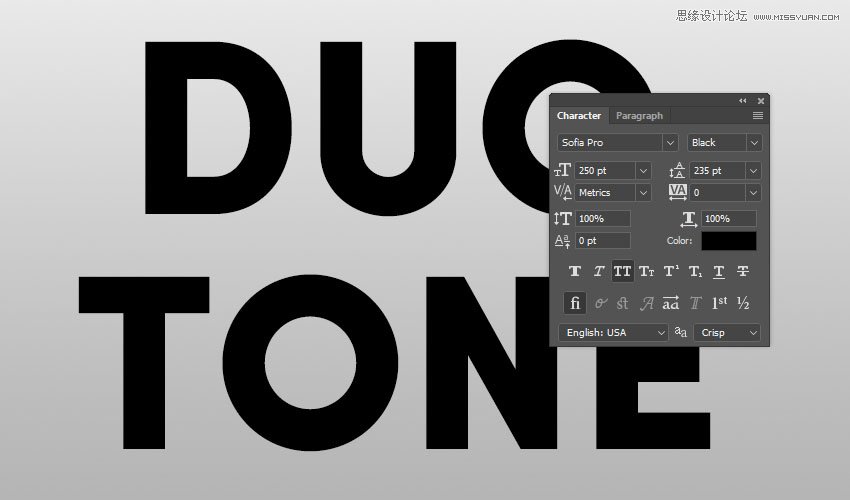
Step 2
Create the text in All Caps using the font Sofia Pro Black. Set the Size to 250 pt, and if you have more than one line of text, set the Leading to 235.
2. How to Create a Duotone Effect
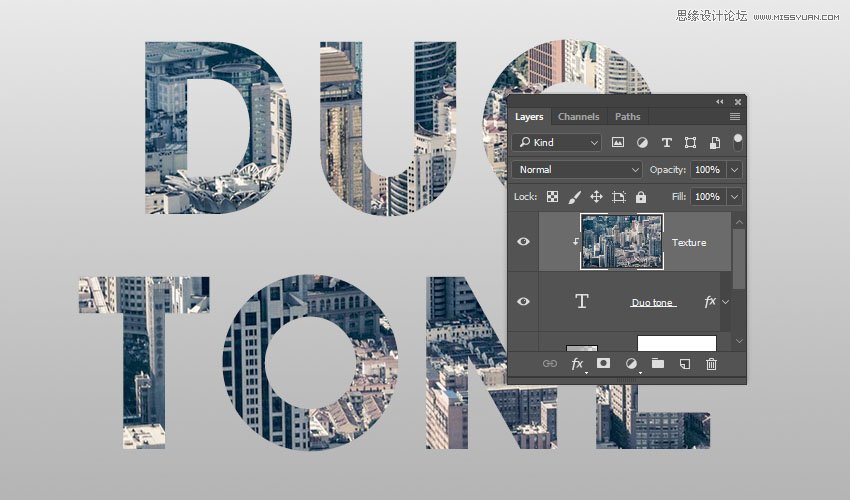
Step 1
Place the Image Texture on top of the text layer, rename its layer to Texture, and right-click it to choose Create Clipping Mask.
You can try using different images if you like, but it's important that the image has some details to get a nice duotone effect.
Step 2
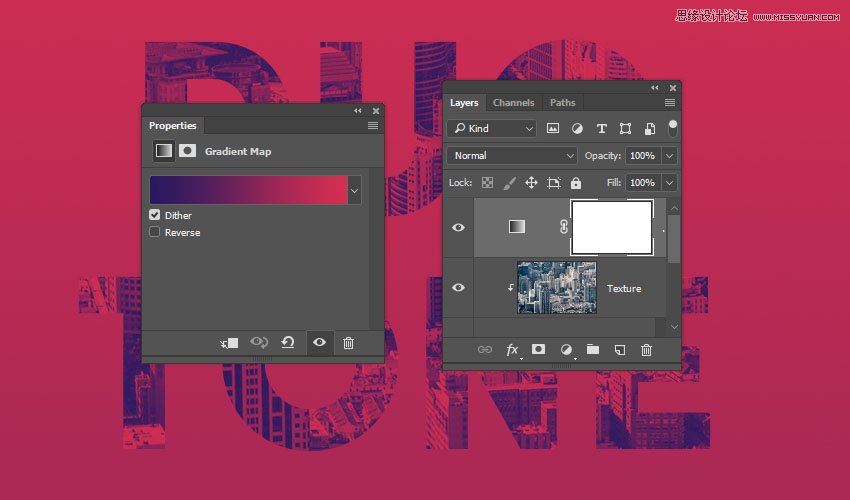
Click the Create new fill or adjustment layer icon at the bottom of the Layers panel, and choose Gradient Map.
Check the Dither box, and click the gradient fill box to create the gradient using the Colors #281960 to the left and #d52e51 to the right.
What the Gradient Map does is it maps the equivalent grayscale range of an image to the colors of the gradient fill you create. So the left endpoint of the gradient fill replaces the shadows in the image, and the right endpoint replaces the highlights.
You can try different colors for each endpoint to get different results.
 爱你不要你
爱你不要你
-
 Photoshop制作复古风格的老照片效果【英】2018-04-23
-
 Photoshop合成长着创意大树的长颈鹿【英】2018-04-23
-
 Photoshop合成冰冻特效的金鱼场景【英】2018-02-10
-
 Photoshop合成梦幻风格的森林场景【英】2018-02-10
-
 Photoshop合成正在施法的巫师【英】2018-02-10
-
 Photoshop制作金属质感的3D立体字【英】2018-01-09
-
 Photoshop设计火焰燃烧艺术字教程【英】2018-01-09
-
 Photoshop制作毛茸茸的圣诞节字体【英】
相关文章8882017-12-16
Photoshop制作毛茸茸的圣诞节字体【英】
相关文章8882017-12-16
