Photoshop制作可爱的糖果饼干字【英】(6)
文章来源于 Tutsplus,感谢作者 Rose 给我们带来经精彩的文章!Double-click the new layer to apply the following layer style:
Step 2
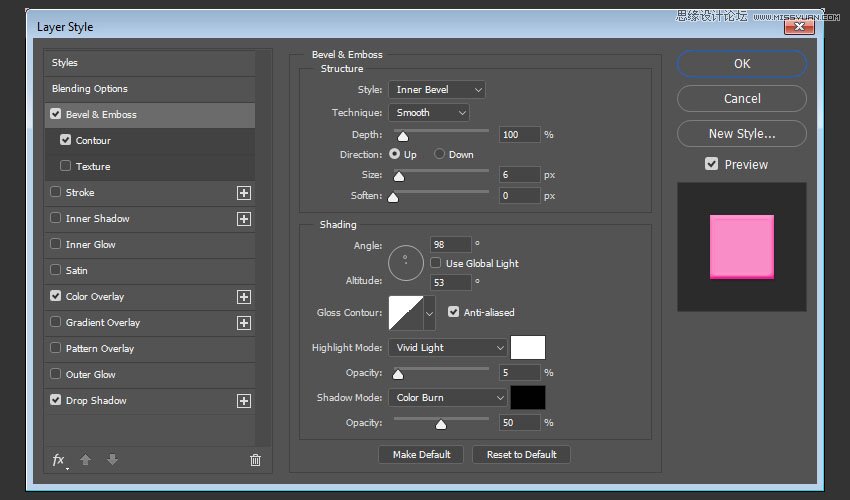
Add a Bevel and Emboss with these settings:
Size: 6
Uncheck the Use Global Light box
Angle: 98
Altitude: 53
Check the Anti-aliased box
Highlight Mode: Vivid Light
Opacity: 5%
Shadow Mode: Color Burn
Step 3
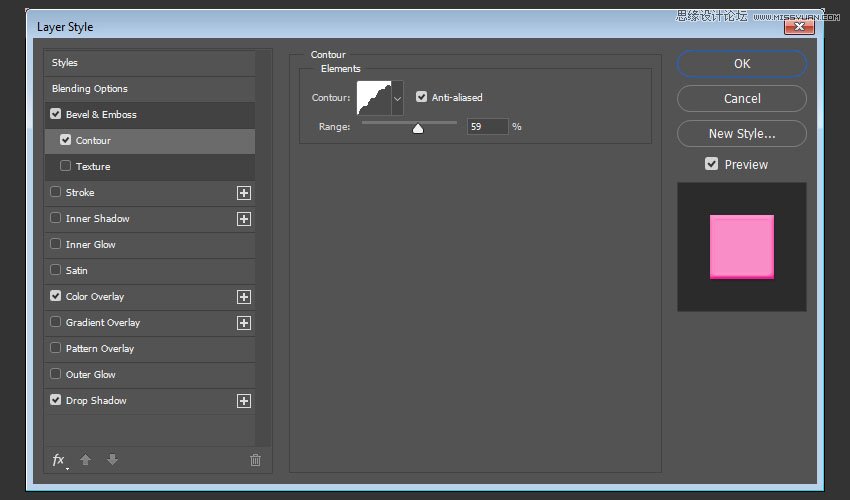
Add a Contour with these settings:
Contour: Rounded Steps
Check the Anti-aliased box.
Range: 59%
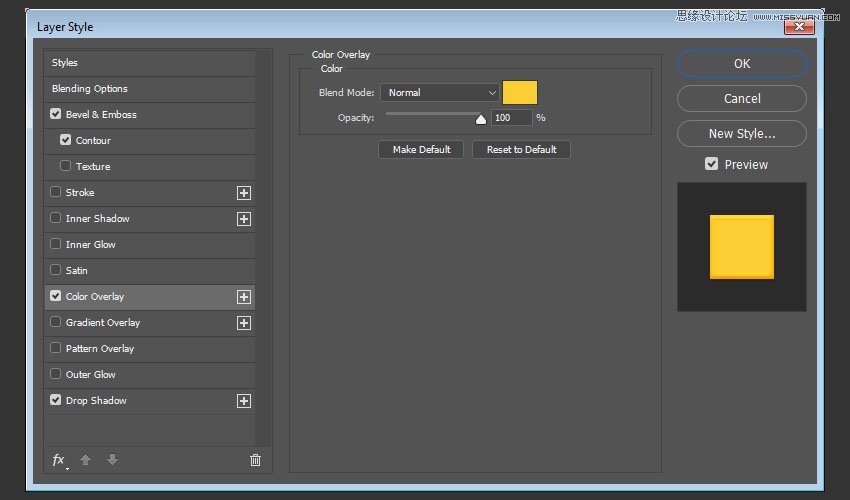
Step 4
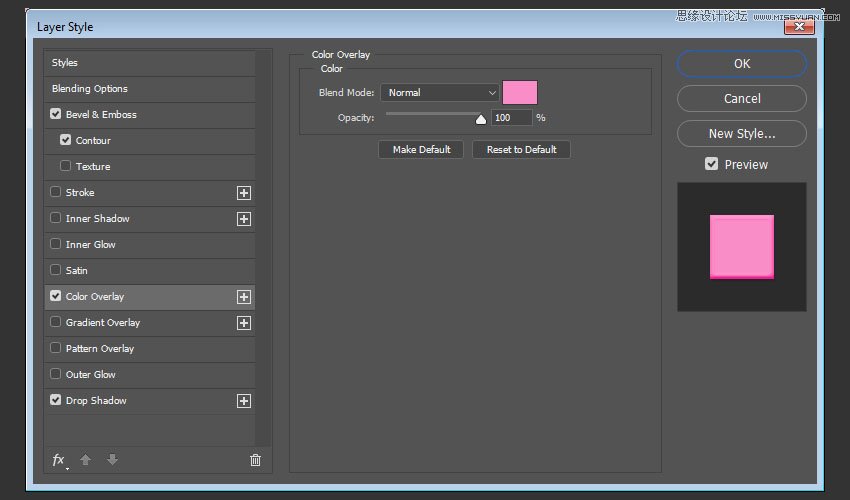
Add a Color Overlay with these settings:
Color: #f88dc7
This is where you can choose the color of the sprinkles on the styled layer, so you can choose any color you like.
Step 5
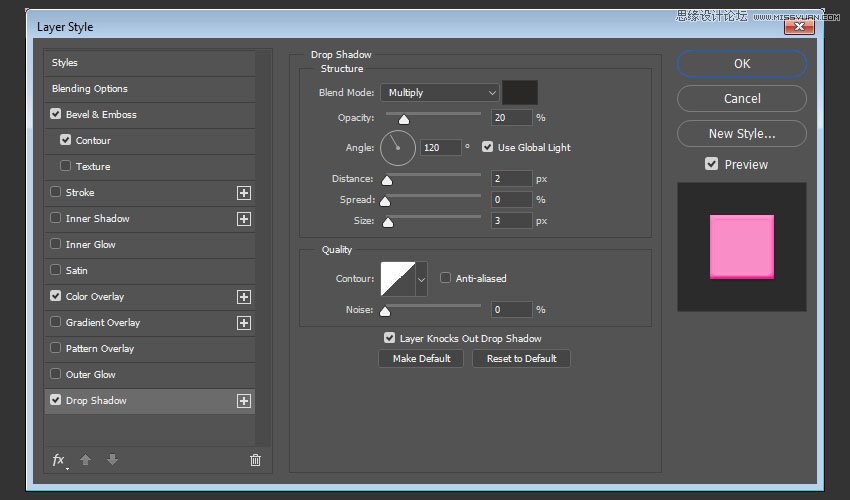
Add a Drop Shadow with these settings:
Color: #2a2826
Opacity: 20%
Distance: 2
Size: 3
12. How to Add Sprinkles
Step 1
Rename the styled layer to the color you chose for the Color Overlay effect, and copy its layer style.
Click-drag slightly over the letters to add the sprinkles. You can change the brush tip's Spacing and Scattering values as needed to create an effect you like.
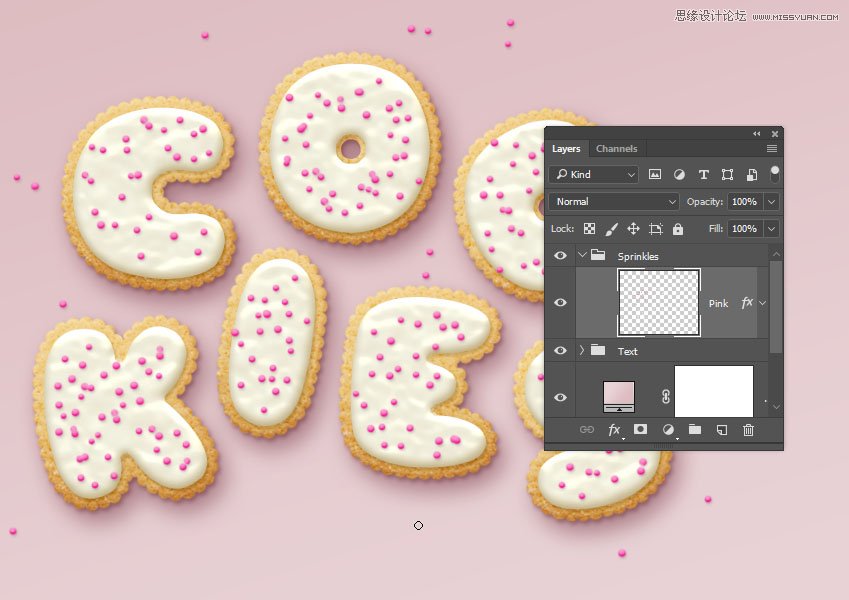
Step 2
Create new layers, name each one with the color you want its sprinkles to be, and paste the layer style to it.
All you need to do to change the sprinkles' color is double-click the sprinkles layer, and choose a new Color value for the Color Overlay effect.
Step 3
You can add as many sprinkle layers and colors as you like to fill the text with.

 情非得已
情非得已
-
 Photoshop制作复古风格的老照片效果【英】2018-04-23
-
 Photoshop合成长着创意大树的长颈鹿【英】2018-04-23
-
 Photoshop合成冰冻特效的金鱼场景【英】2018-02-10
-
 Photoshop合成梦幻风格的森林场景【英】2018-02-10
-
 Photoshop合成正在施法的巫师【英】2018-02-10
-
 Photoshop制作金属质感的3D立体字【英】2018-01-09
-
 Photoshop设计火焰燃烧艺术字教程【英】2018-01-09
-
Photoshop制作复古风格的老照片效果【英】
相关文章11882018-04-23
-
Photoshop合成长着创意大树的长颈鹿【英】
相关文章13832018-04-23
-
Photoshop合成冰冻特效的金鱼场景【英】
相关文章34052018-02-10
-
 Photoshop制作黄金质感立体字【英】
相关文章7422018-02-10
Photoshop制作黄金质感立体字【英】
相关文章7422018-02-10
-
 Photoshop制作惊艳大气的3D立体字
相关文章14682018-02-10
Photoshop制作惊艳大气的3D立体字
相关文章14682018-02-10
-
Photoshop合成梦幻风格的森林场景【英】
相关文章24492018-02-10
-
Photoshop合成正在施法的巫师【英】
相关文章8372018-02-10
-
 Photoshop制作复古双重曝光字体
相关文章6532018-01-09
Photoshop制作复古双重曝光字体
相关文章6532018-01-09
