Photoshop制作木地板LOGO刻印效果【英】
文章来源于 Tutsplus,感谢作者 Tom Piccarreda 给我们带来经精彩的文章!素材下载地址:LOGO刻印效果展示模板PS教程素材
Learn how to take advantage of Photoshop's Smart Objects to mock up your logo with photorealistic results. Thanks to the use of multiple layer styles, we'll carve your logo into wood!
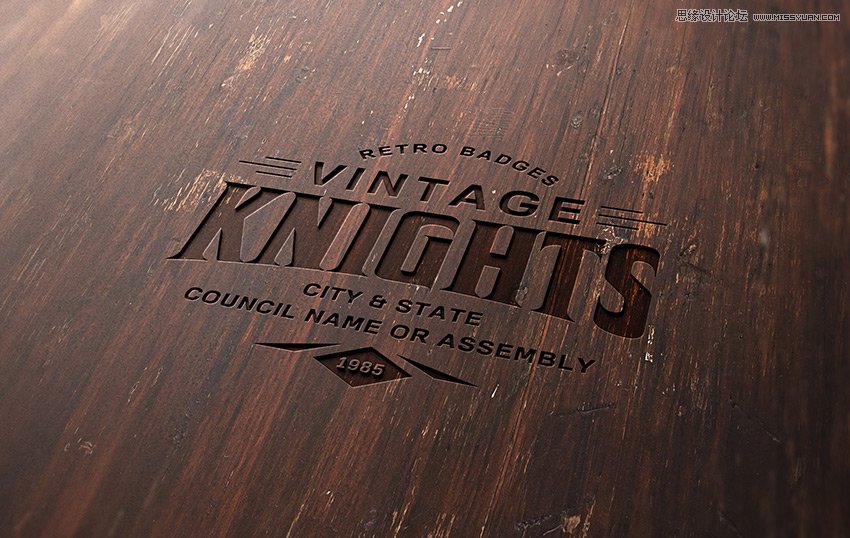
先看看效果图
1. How to Create a Smart Object With the Right Perspective
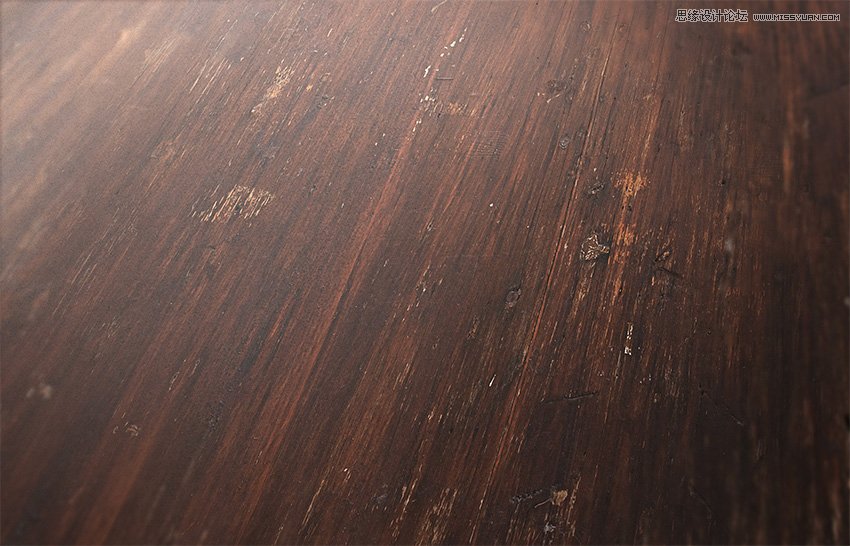
Step 1
Download the Wood Texture and open it with Photoshop.
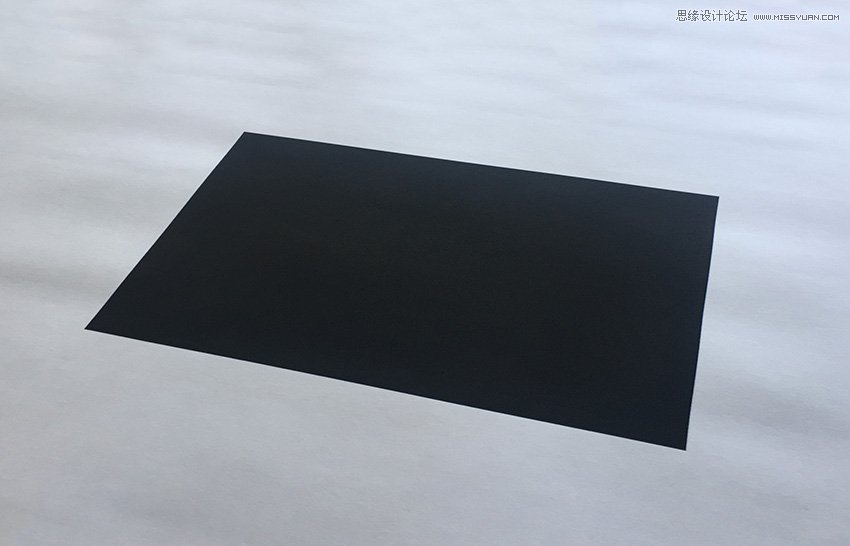
Step 2
Download the Perspective Image and open it with Photoshop.
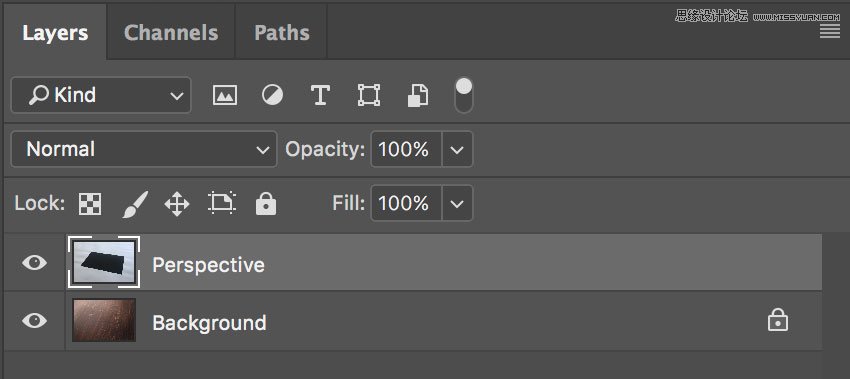
Step 3
In the top menu, choose Select > All and then Edit > Copy to copy the selection to the clipboard.
Go back to the background document and choose, in the top menu, Edit > Paste to paste the perspective image over the background.
Rename the layer by double-clicking directly on the layer's name in the Layers panel and changing it to "Perspective".
Step 4
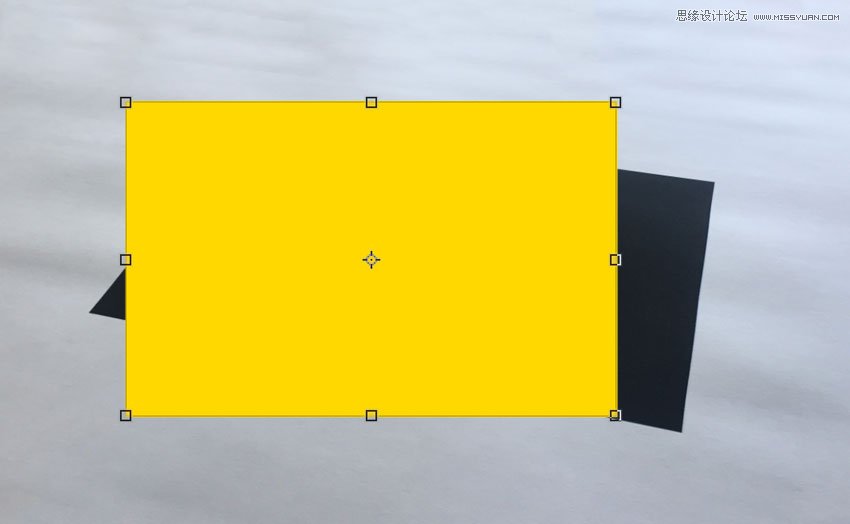
Set the foreground color to yellow (any color different from black is good).
Then choose the Rectangle Tool, move the cursor over the canvas, and click. You’ll open a small dialog box that allows you to enter precise dimensions for your new shape. Type 1267 x 814 px and then click the OK button.
Rename the layer by double-clicking directly on the layer's name in the Layers panel and changing it to "Smart Object".
With the "Smart Object" layer selected, choose, in the top menu, Layer > Smart Object > Convert to Smart Object.
Step 5
Choose Edit > Transform > Distort and move the top right corner point to align it with the top right corner of the black rectangle
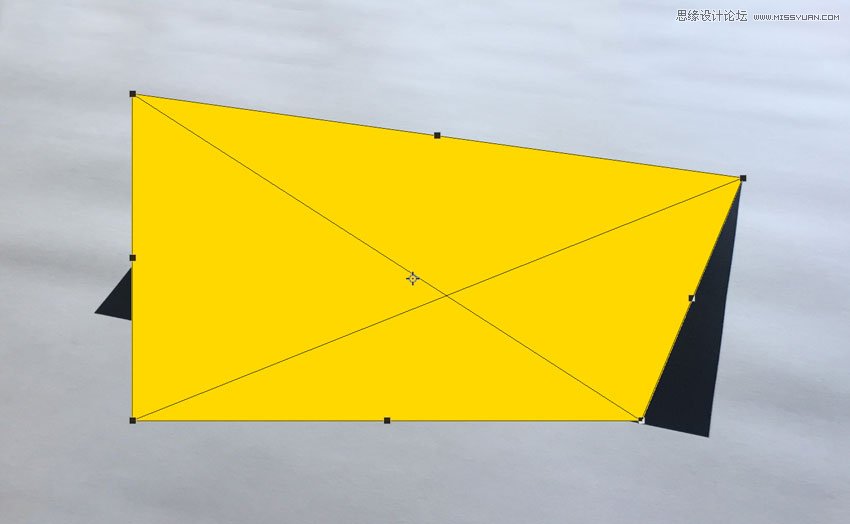
Step 6
Keep dragging the corner points until you align all the corners of the yellow rectangle with the black perspective image and cover the whole area:

 爱你不要你
爱你不要你
-
 Photoshop制作复古风格的老照片效果【英】2018-04-23
-
 Photoshop合成长着创意大树的长颈鹿【英】2018-04-23
-
 Photoshop合成冰冻特效的金鱼场景【英】2018-02-10
-
 Photoshop合成梦幻风格的森林场景【英】2018-02-10
-
 Photoshop合成正在施法的巫师【英】2018-02-10
-
 Photoshop制作金属质感的3D立体字【英】2018-01-09
-
 Photoshop设计火焰燃烧艺术字教程【英】2018-01-09
-
Photoshop制作复古风格的老照片效果【英】
相关文章11882018-04-23
-
Photoshop合成长着创意大树的长颈鹿【英】
相关文章13832018-04-23
-
Photoshop合成冰冻特效的金鱼场景【英】
相关文章34052018-02-10
-
 Photoshop制作黄金质感立体字【英】
相关文章7422018-02-10
Photoshop制作黄金质感立体字【英】
相关文章7422018-02-10
-
 Photoshop制作惊艳大气的3D立体字
相关文章14682018-02-10
Photoshop制作惊艳大气的3D立体字
相关文章14682018-02-10
-
Photoshop合成梦幻风格的森林场景【英】
相关文章24492018-02-10
-
Photoshop合成正在施法的巫师【英】
相关文章8372018-02-10
-
 Photoshop制作复古双重曝光字体
相关文章6532018-01-09
Photoshop制作复古双重曝光字体
相关文章6532018-01-09
