Photoshop制作木地板LOGO刻印效果【英】(2)
文章来源于 Tutsplus,感谢作者 Tom Piccarreda 给我们带来经精彩的文章!Step 7
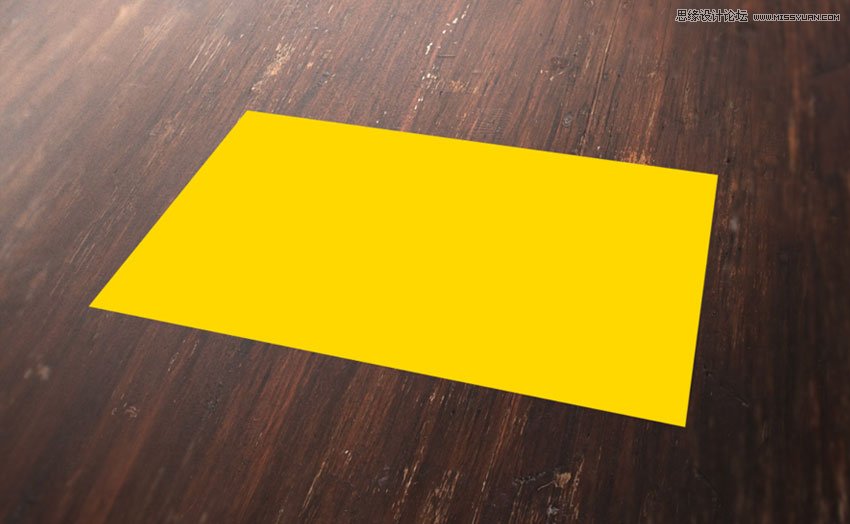
Now you can remove the "Perspective" layer by selecting it in the Layers panel and choosing Layer > Delete > Layer.
2. How to Prepare the Badge With Illustrator
Step 1
We need a logo or badge to complete the scene. This badge will be a prominent element that later will be engraved in the wood texture.
Fortunately, Envato Elements offers a wide range of high-quality badges and vector elements ready for use. Subscribe to unlock unlimited badges, templates, photos and more for one monthly fee!
In this tutorial we'll use a badge that comes from Badges and Logos Vol.01. Download it and open with Illustrator.

Step 2
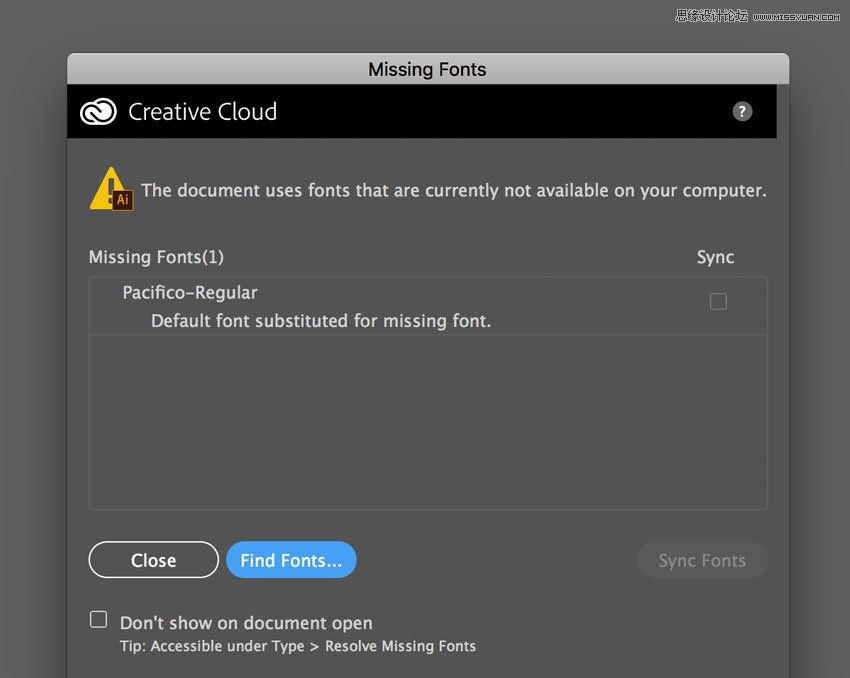
Open the vector .ai file with Adobe Illustrator. While you open the file, a window may pop up alerting you that the document uses fonts that are currently not available on your computer. No worries about that—all the fonts are free for use, and you can find a text file inside the folder with all the references and links to download each font.
For the purpose of this tutorial, I used the following free fonts for the badge:
Familiar Pro Font
Corleone Font
Step 3
Once you're done with fonts, choose the Selection Tool (V). Now select the "Vintage Knights" badge (or whatever badge you like).
Copy the badge by going to Edit > Copy or pressing Command-C.
Create a new 350 x 350 px document in Adobe Illustrator.
Finally, paste the badge just copied by choosing Edit > Paste or pressing Command-V.

Step 4
With the Selection Tool (V), move the badge over the grey area, out of the white canvas.

Step 5
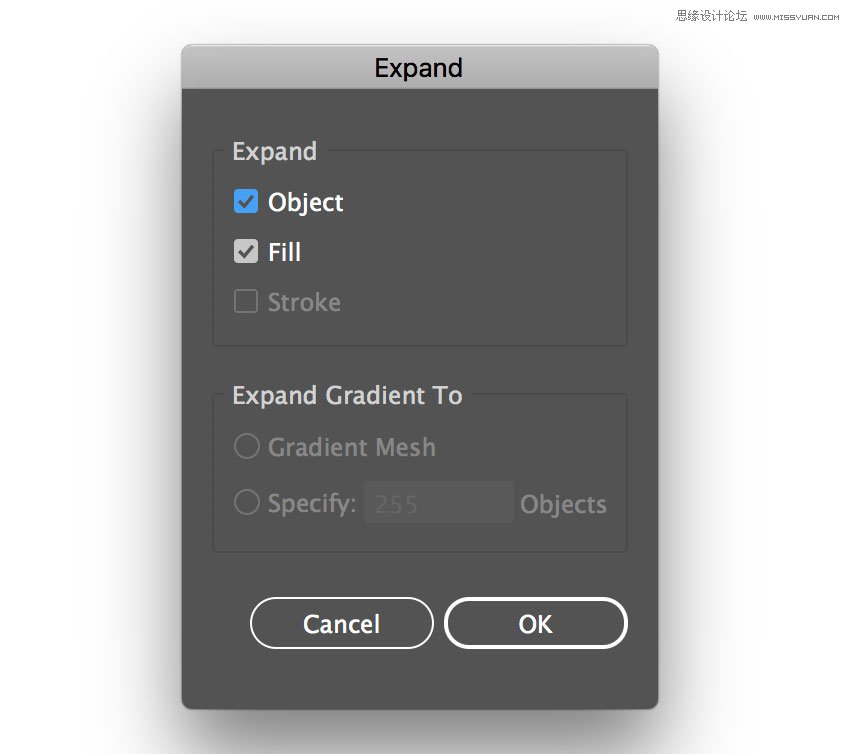
Before importing the badge into our scene in Photoshop, we need to expand the appearance, convert all the text to vector shapes, and remove the white area revealed now that we've moved the badge to the grey area.
If the badge is not selected, select it by clicking on it with the Selection Tool (V).
In the top menu, choose Object > Expand Appearance.
Again, choose Object > Expand. A dialog window will appear; select Object and Fill and press OK:
Step 6
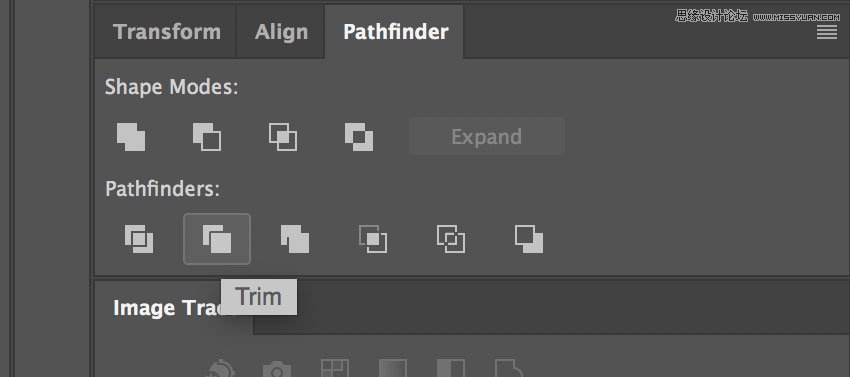
Locate the Pathfinder panel. If you can't see the panel, open it by choosing Window > Pathfinder.
Choose Trim.
 爱你不要你
爱你不要你
-
 Photoshop制作复古风格的老照片效果【英】2018-04-23
-
 Photoshop合成长着创意大树的长颈鹿【英】2018-04-23
-
 Photoshop合成冰冻特效的金鱼场景【英】2018-02-10
-
 Photoshop合成梦幻风格的森林场景【英】2018-02-10
-
 Photoshop合成正在施法的巫师【英】2018-02-10
-
 Photoshop制作金属质感的3D立体字【英】2018-01-09
-
 Photoshop设计火焰燃烧艺术字教程【英】2018-01-09
-
Photoshop制作复古风格的老照片效果【英】
相关文章11882018-04-23
-
Photoshop合成长着创意大树的长颈鹿【英】
相关文章13832018-04-23
-
Photoshop合成冰冻特效的金鱼场景【英】
相关文章34052018-02-10
-
 Photoshop制作黄金质感立体字【英】
相关文章7422018-02-10
Photoshop制作黄金质感立体字【英】
相关文章7422018-02-10
-
 Photoshop制作惊艳大气的3D立体字
相关文章14682018-02-10
Photoshop制作惊艳大气的3D立体字
相关文章14682018-02-10
-
Photoshop合成梦幻风格的森林场景【英】
相关文章24492018-02-10
-
Photoshop合成正在施法的巫师【英】
相关文章8372018-02-10
-
 Photoshop制作复古双重曝光字体
相关文章6532018-01-09
Photoshop制作复古双重曝光字体
相关文章6532018-01-09
