Photoshop制作木地板LOGO刻印效果【英】(4)
文章来源于 Tutsplus,感谢作者 Tom Piccarreda 给我们带来经精彩的文章!Step 5
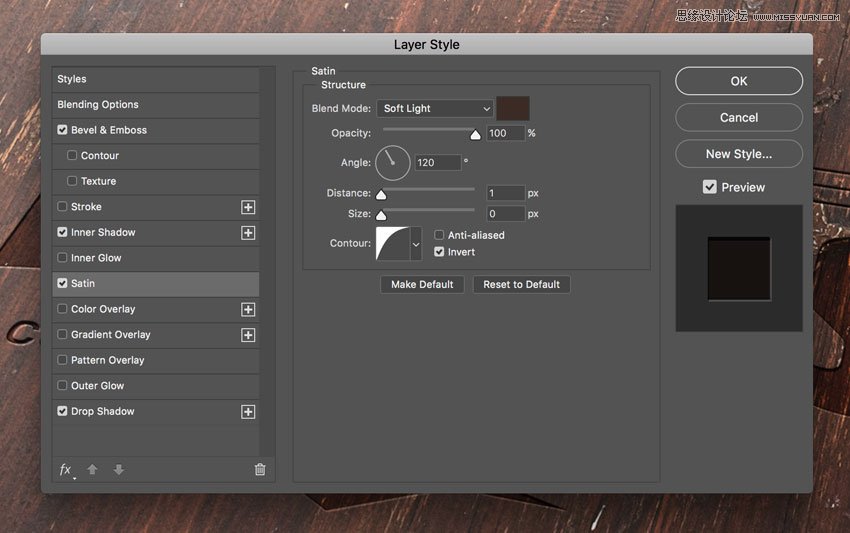
Add a new Satin effect, set the color for the Blend Mode to #3b2b25, and set the rest as follows:
Step 6
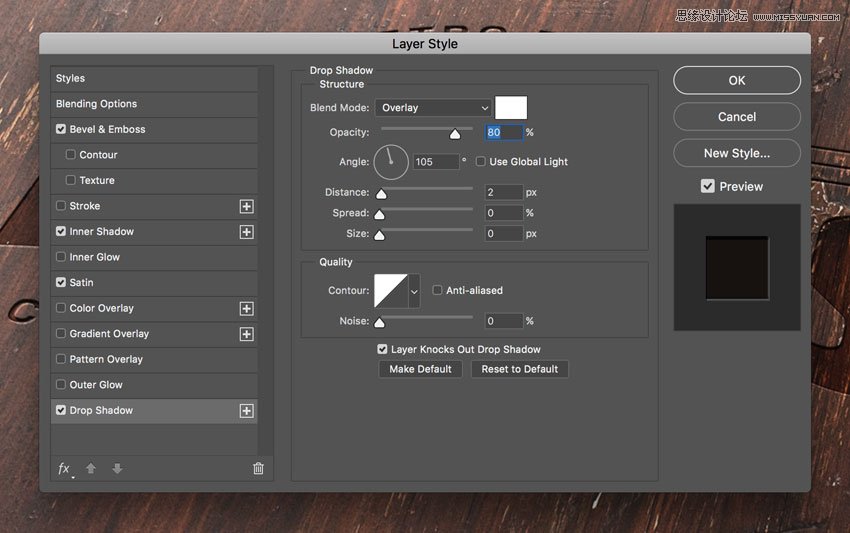
Add a new Drop Shadow effect, set the color for the Blend Mode to #ffffff, and set the rest as follows:
Step 7
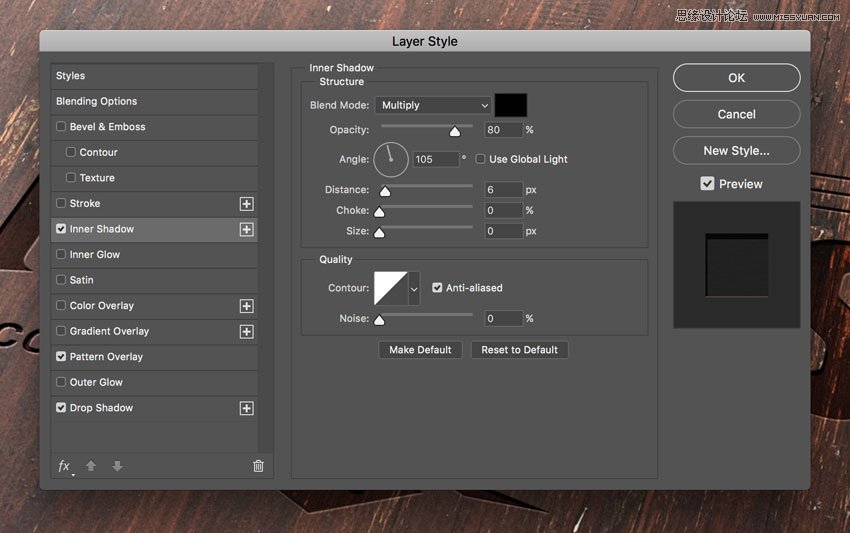
Now let's add some layer styles to the "Effect 4" layer.
Open the Layer Style panel and add a new Inner Shadow effect, set the Blend Mode color to #000000, and set the rest as follows:
Step 8
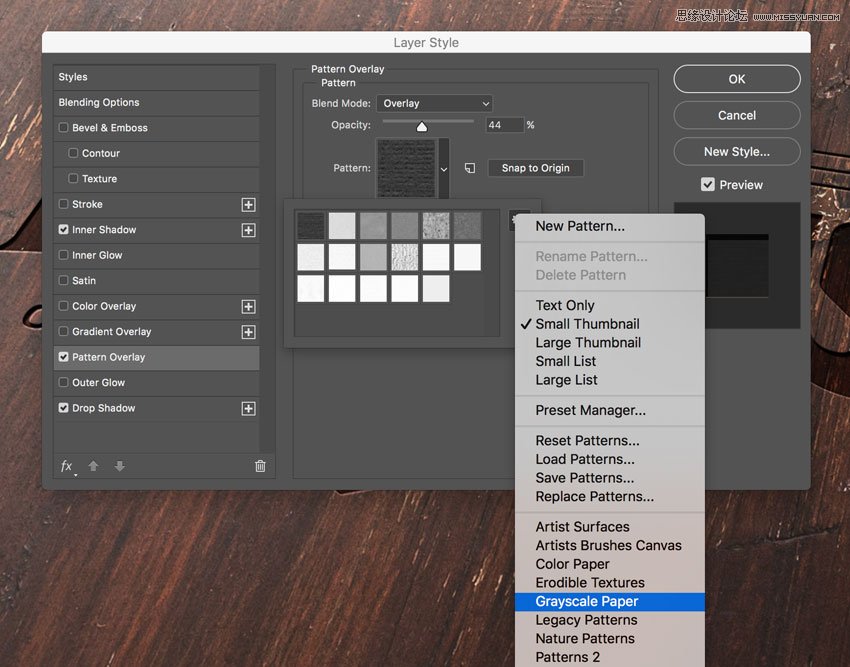
Add a new Pattern Overlay effect and set the options as shown in the image below:
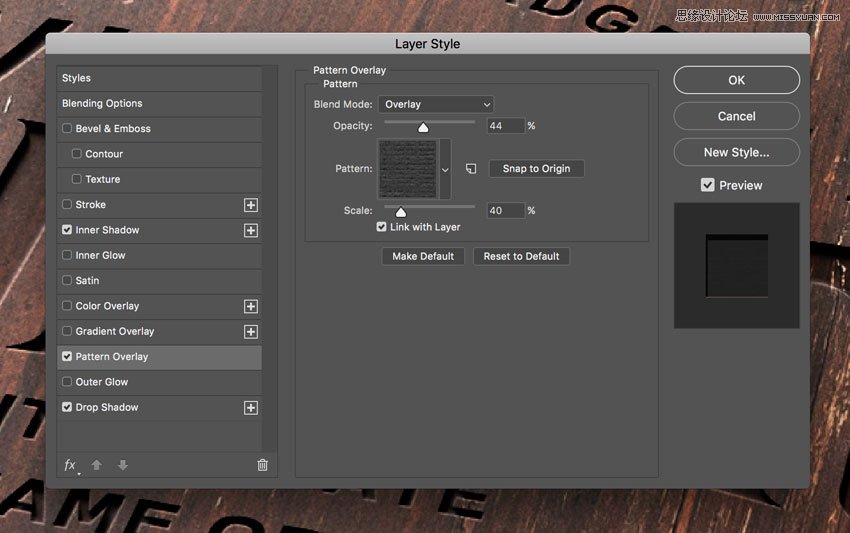
Click on the pattern thumbnail, and then click on the small gear to open the cascade menu. Choose Grayscale Paper and then click on the first pattern named Black Weaved.
Step 9
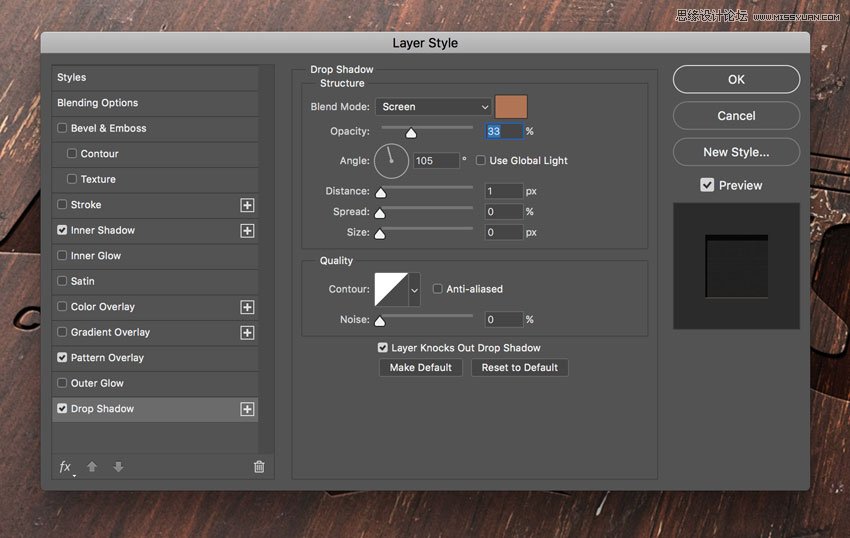
Add a new Drop Shadow effect, set the Blend Mode color to #b07555, and set the rest as follows:
Step 10
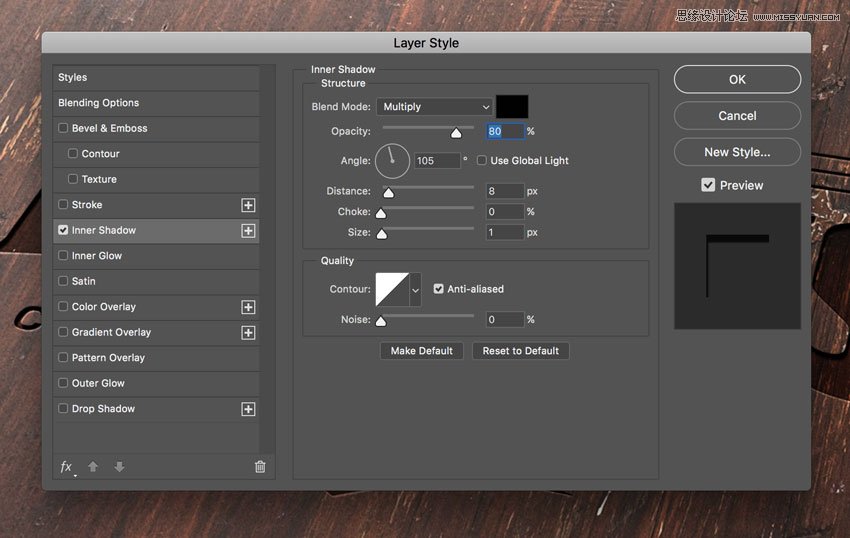
Let's add a layer style to the "Effect 3" layer.
Open the Layer Style panel and add a new Inner Shadow effect, set the Blend Mode color to #000000, and set the rest as follows:
 爱你不要你
爱你不要你
-
 Photoshop制作复古风格的老照片效果【英】2018-04-23
-
 Photoshop合成长着创意大树的长颈鹿【英】2018-04-23
-
 Photoshop合成冰冻特效的金鱼场景【英】2018-02-10
-
 Photoshop合成梦幻风格的森林场景【英】2018-02-10
-
 Photoshop合成正在施法的巫师【英】2018-02-10
-
 Photoshop制作金属质感的3D立体字【英】2018-01-09
-
 Photoshop设计火焰燃烧艺术字教程【英】2018-01-09
-
Photoshop制作复古风格的老照片效果【英】
相关文章11882018-04-23
-
Photoshop合成长着创意大树的长颈鹿【英】
相关文章13832018-04-23
-
Photoshop合成冰冻特效的金鱼场景【英】
相关文章34052018-02-10
-
 Photoshop制作黄金质感立体字【英】
相关文章7422018-02-10
Photoshop制作黄金质感立体字【英】
相关文章7422018-02-10
-
 Photoshop制作惊艳大气的3D立体字
相关文章14682018-02-10
Photoshop制作惊艳大气的3D立体字
相关文章14682018-02-10
-
Photoshop合成梦幻风格的森林场景【英】
相关文章24492018-02-10
-
Photoshop合成正在施法的巫师【英】
相关文章8372018-02-10
-
 Photoshop制作复古双重曝光字体
相关文章6532018-01-09
Photoshop制作复古双重曝光字体
相关文章6532018-01-09
