Photoshop合成长着创意大树的长颈鹿【英】(6)
文章来源于 Tutsplus.com,感谢作者 Jenny Le 给我们带来经精彩的文章!设计教程/国外教程/国外教程2018-04-23
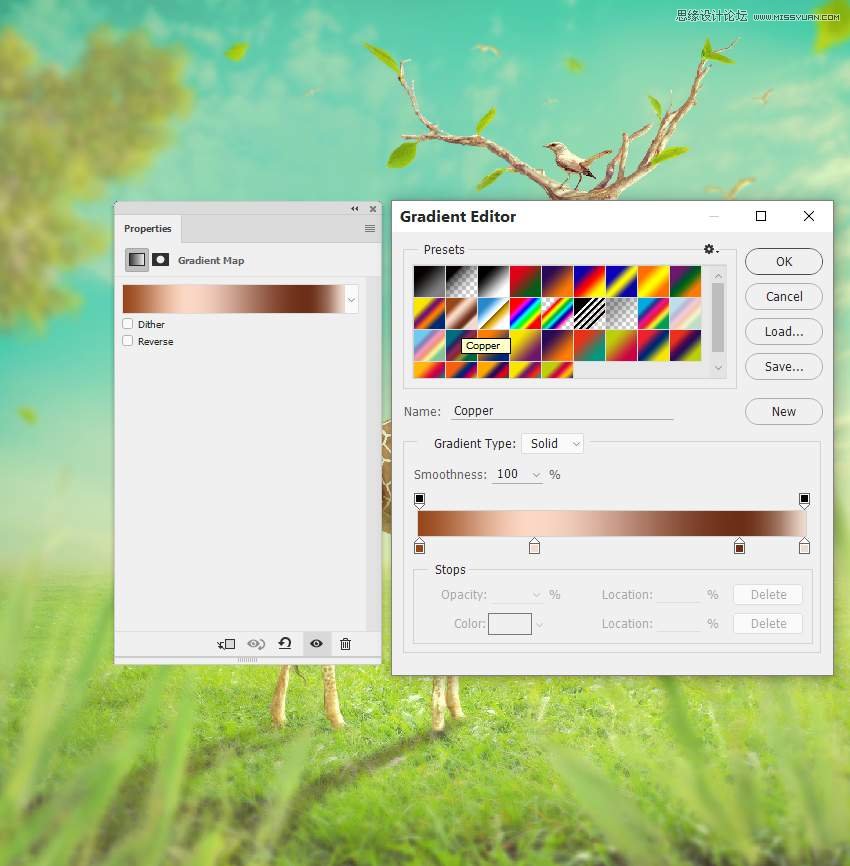
Step 4 Create another Gradient Map adjustment layer and pick Copper from the Presets. Change this layer mode to Hard Light 10%. Step 5 Make a Curves adjustment layer and decrease the lightness a bit.
Step 4
Create another Gradient Map adjustment layer and pick Copper from the Presets. Change this layer mode to Hard Light 10%.
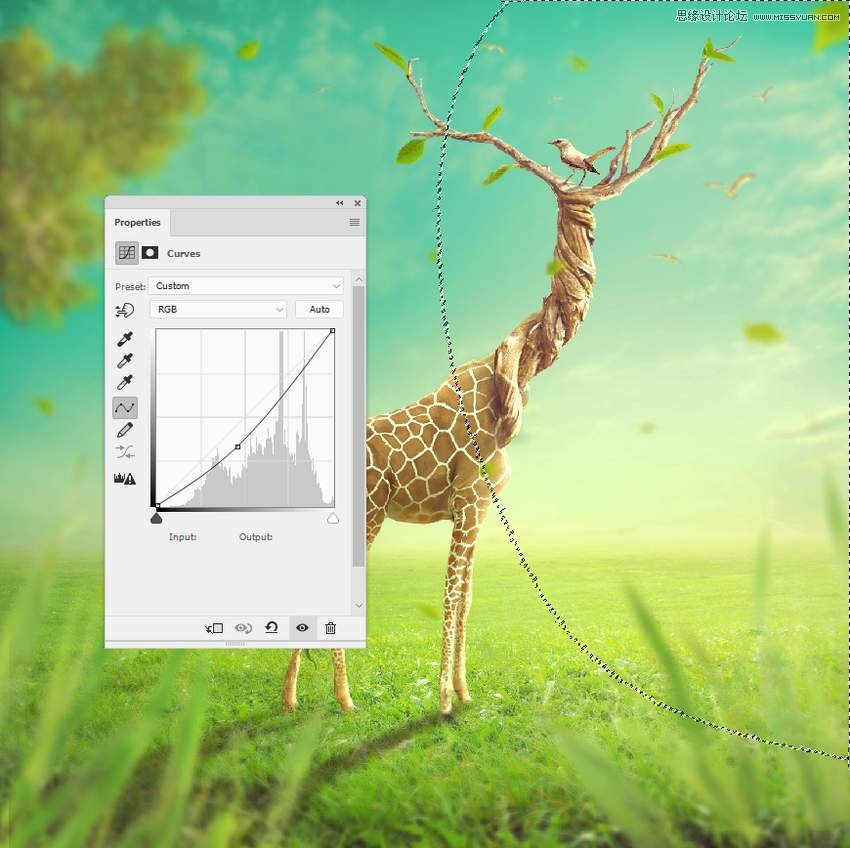
Step 5
Make a Curves adjustment layer and decrease the lightness a bit. Use a soft black brush to erase the right (the main light) so it won't be affected by this adjustment layer.
Advertisement
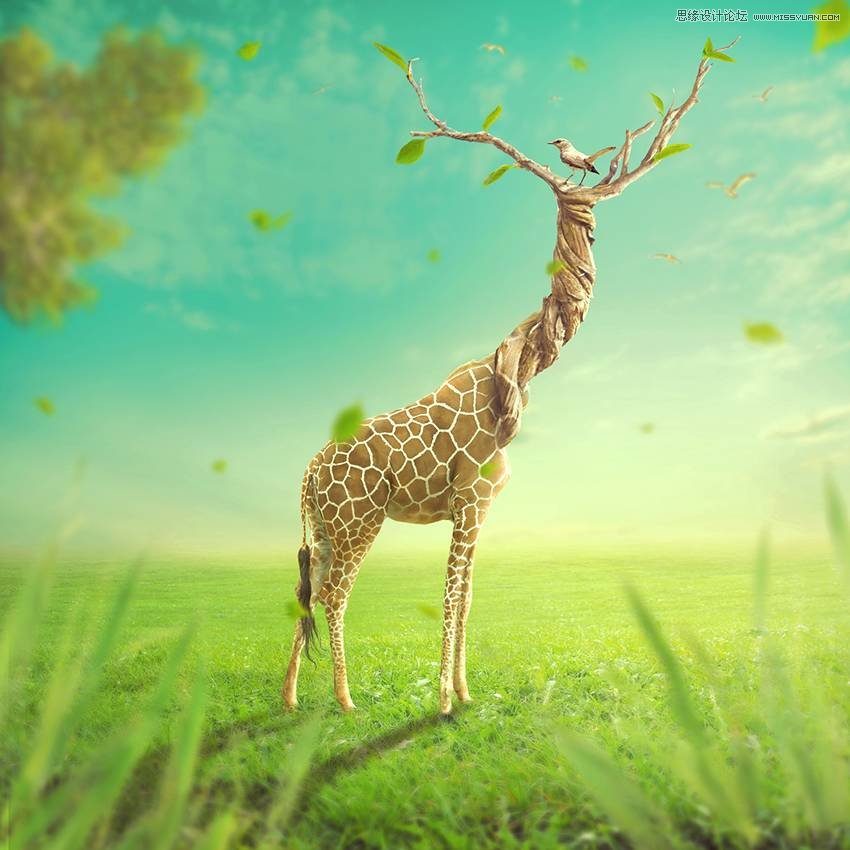
Step 6
Add a Selective Color adjustment layer and alter the Reds values to desaturate the giraffe, neck, and branches a bit.

Congratulations, You're Done!
I hope that you've enjoyed the tutorial and learned something new for your own projects. Feel free to share your results or leave comments in the box below. Enjoy Photoshopping!
 情非得已
情非得已
推荐文章
-
 Photoshop制作复古风格的老照片效果【英】2018-04-23
-
 Photoshop合成长着创意大树的长颈鹿【英】2018-04-23
-
 Photoshop合成冰冻特效的金鱼场景【英】2018-02-10
-
 Photoshop合成梦幻风格的森林场景【英】2018-02-10
-
 Photoshop合成正在施法的巫师【英】2018-02-10
-
 Photoshop制作金属质感的3D立体字【英】2018-01-09
-
 Photoshop设计火焰燃烧艺术字教程【英】2018-01-09
热门文章
-
Photoshop制作复古风格的老照片效果【英】
相关文章11882018-04-23
-
Photoshop合成冰冻特效的金鱼场景【英】
相关文章34052018-02-10
-
 Photoshop制作黄金质感立体字【英】
相关文章7422018-02-10
Photoshop制作黄金质感立体字【英】
相关文章7422018-02-10
-
 Photoshop制作惊艳大气的3D立体字
相关文章14682018-02-10
Photoshop制作惊艳大气的3D立体字
相关文章14682018-02-10
-
Photoshop合成梦幻风格的森林场景【英】
相关文章24492018-02-10
-
Photoshop合成正在施法的巫师【英】
相关文章8372018-02-10
-
 Photoshop制作复古双重曝光字体
相关文章6532018-01-09
Photoshop制作复古双重曝光字体
相关文章6532018-01-09
-
 Photoshop制作木地板LOGO刻印效果【英】
相关文章19272018-01-09
Photoshop制作木地板LOGO刻印效果【英】
相关文章19272018-01-09
