Photoshop合成梦幻风格的森林场景【英】(2)
文章来源于 Tutsplus.com,感谢作者 Jenny Le 给我们带来经精彩的文章!设计教程/国外教程/国外教程2018-02-10
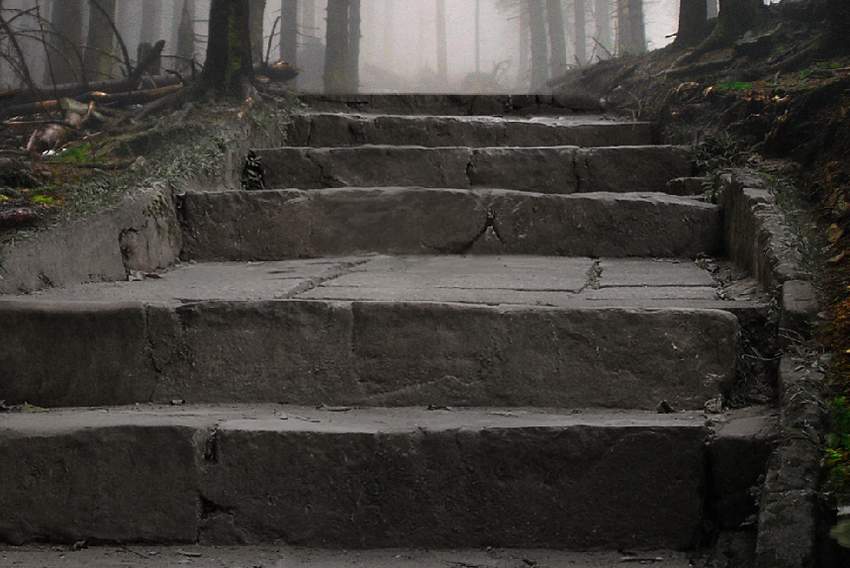
Step 5 Drag the forest 1 image into our main document using the Move Tool. Click the second icon at the bottom of the Layers panel to add a mask to this layer. Select a soft round brush with black co
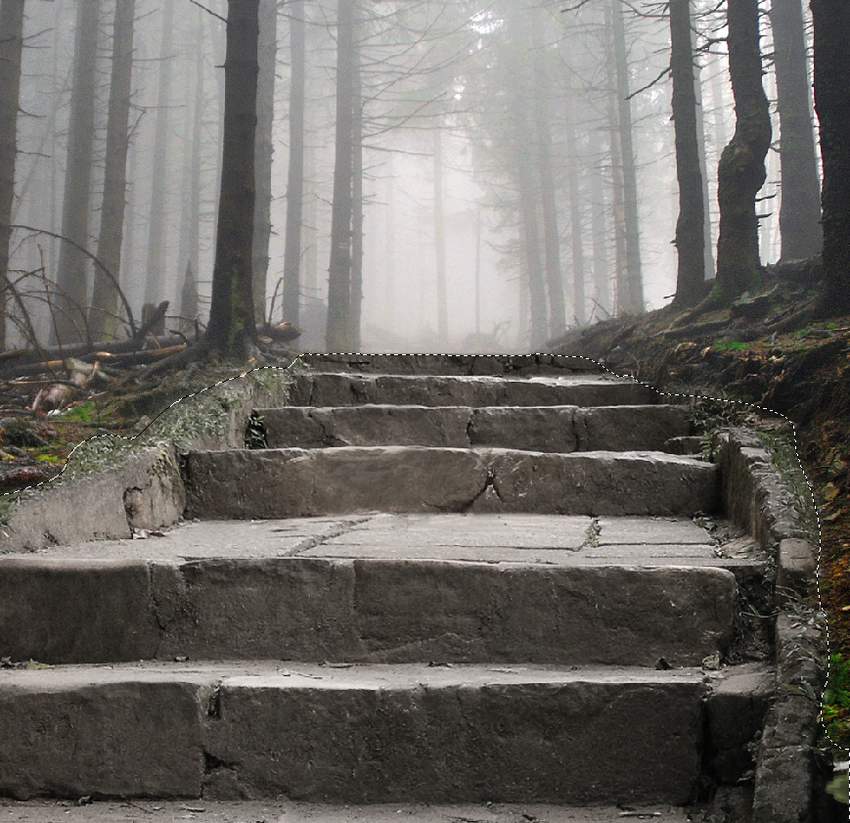
Step 5
Drag the forest 1 image into our main document using the Move Tool. Click the second icon at the bottom of the Layers panel to add a mask to this layer. Select a soft round brush with black color (soft black brush) to erase the bottom and reveal the steps.
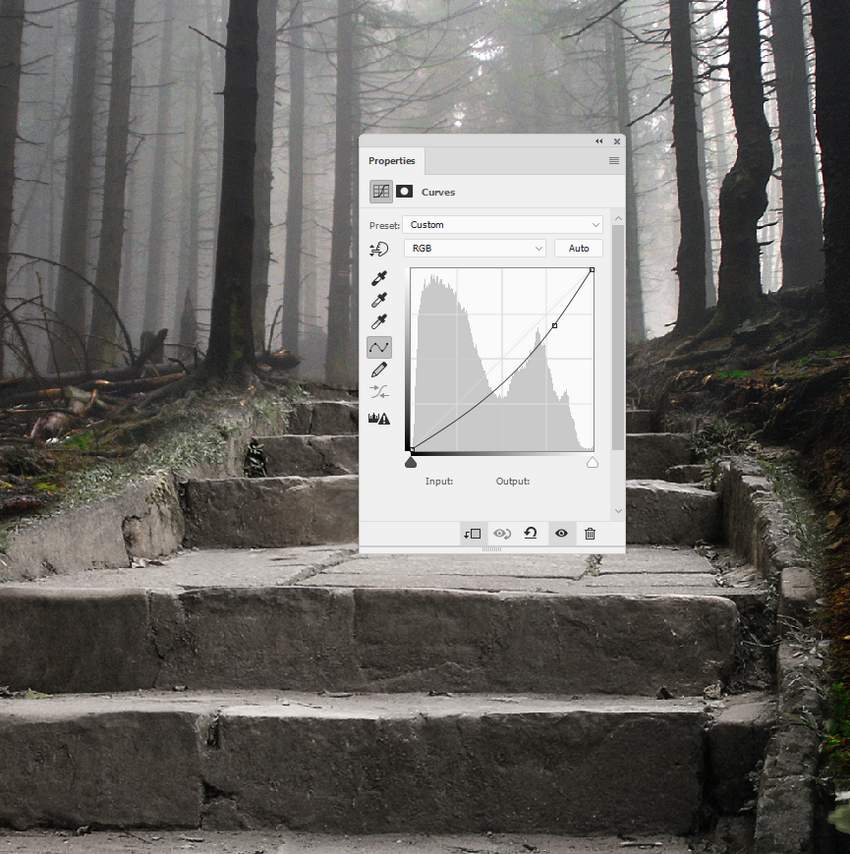
Step 6
Make a Curves adjustment layer to darken the forest a little.
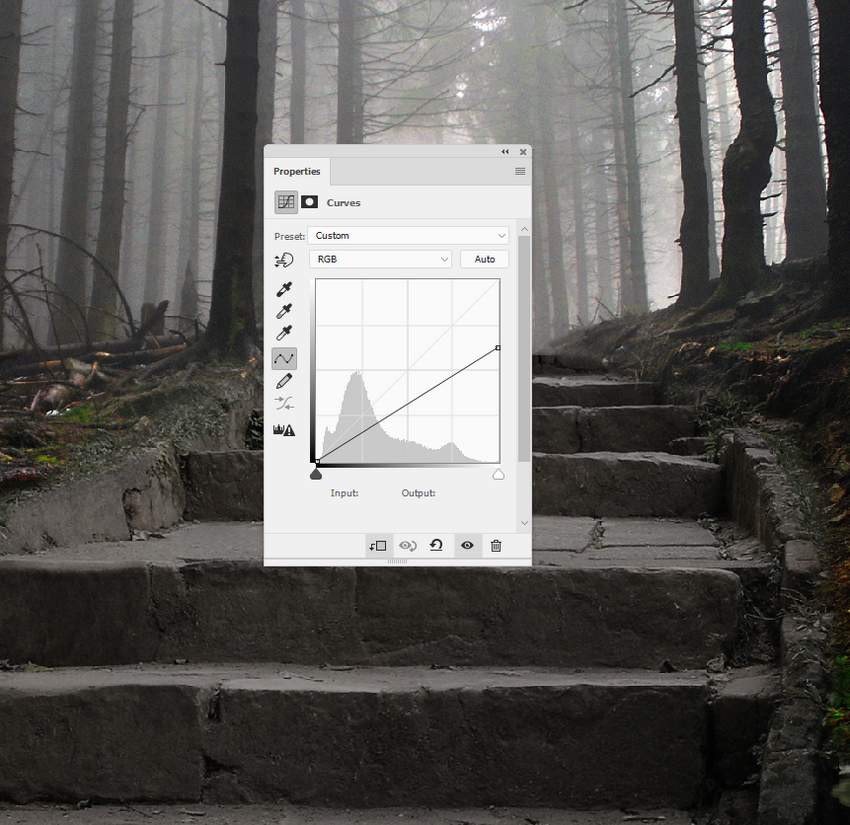
Step 7
Go back to the stairs and create a Curves adjustment layer above the Hue/Saturation adjustment one. On this layer mask, use a soft black brush with a lowered opacity (about 15-30%) to refine the lightness on the steps. You can see the results on the mask and on the picture.

 情非得已
情非得已
推荐文章
-
 Photoshop制作复古风格的老照片效果【英】2018-04-23
-
 Photoshop合成长着创意大树的长颈鹿【英】2018-04-23
-
 Photoshop合成冰冻特效的金鱼场景【英】2018-02-10
-
 Photoshop合成梦幻风格的森林场景【英】2018-02-10
-
 Photoshop合成正在施法的巫师【英】2018-02-10
-
 Photoshop制作金属质感的3D立体字【英】2018-01-09
-
 Photoshop设计火焰燃烧艺术字教程【英】2018-01-09
热门文章
-
Photoshop制作复古风格的老照片效果【英】
相关文章11882018-04-23
-
Photoshop合成冰冻特效的金鱼场景【英】
相关文章34052018-02-10
-
 Photoshop合成城市被流星攻击场景【英】
相关文章7142017-12-12
Photoshop合成城市被流星攻击场景【英】
相关文章7142017-12-12
-
 Photoshop合成创意的英雄战斗场景教程【英】
相关文章5802017-12-12
Photoshop合成创意的英雄战斗场景教程【英】
相关文章5802017-12-12
