Photoshop制作毛茸茸的圣诞节字体【英】(11)
文章来源于 Tutsplus.com,感谢作者 Rose 给我们带来经精彩的文章!13. How to Add Finishing Touches
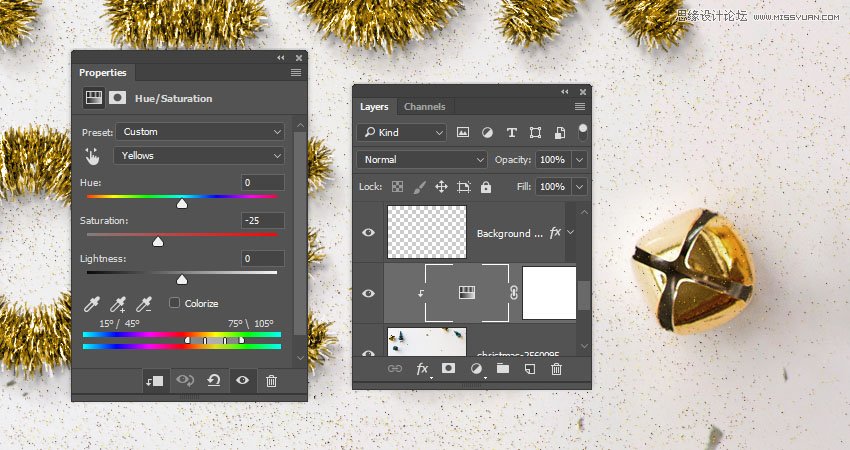
Step 1
Add a Hue/Saturation adjustment layer and clip it to the Background Image layer.
Choose the Yellows channel, and change the Saturation value to -25.
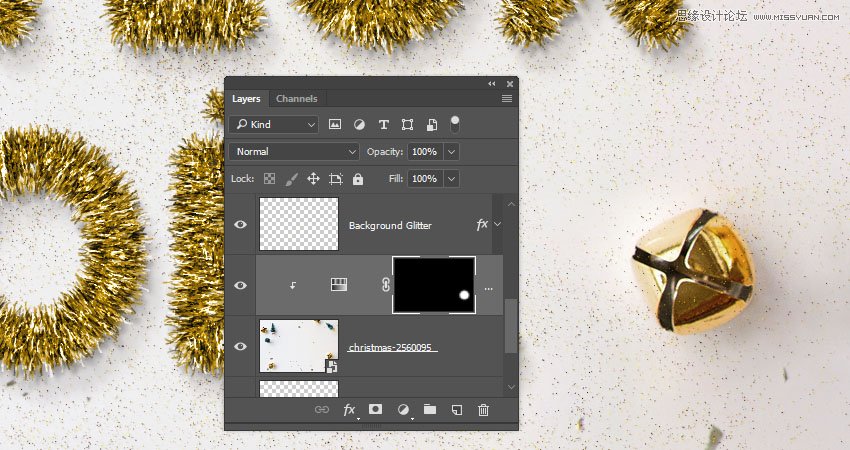
Step 2
We need the Hue/Saturation layer to affect only the bells in the image.
So fill the Hue/Saturation layer mask with Black, set the Foreground Color to White, and use a soft round brush tip to brush over the bells.
Advertisement
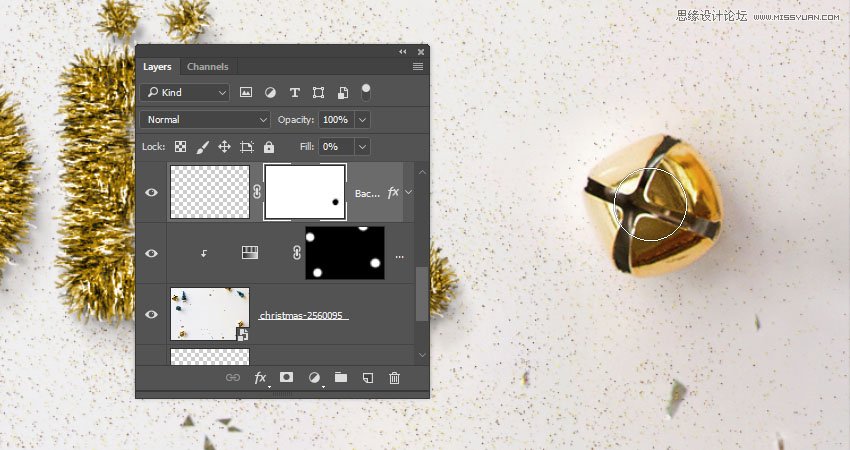
Step 3
Select the Background Glitter layer and click the Add layer mask icon at the bottom of the Layers panel.
Set the Foreground Color to Black, and paint over the areas you want to remove the glitter from, like the bells and the trees, since the glitter is supposed to be under them.
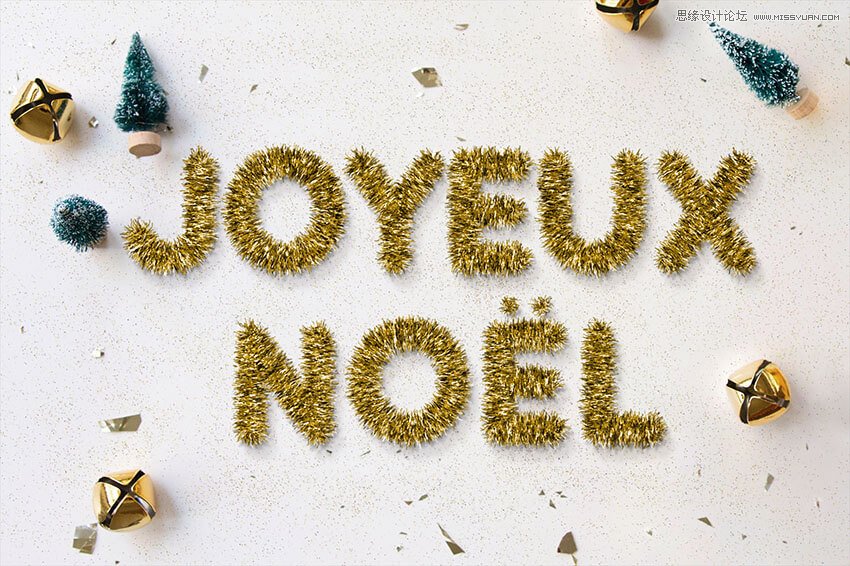
Congratulations! You're Done
In this tutorial, we created a simple brush tip and adjusted its settings to create the main tinsel effect.
Then, we styled the many layers used in creating the effect to achieve the final result. After that, we added glitter, modified the background image, and added global adjustments to the effect.
Finally, we used some more adjustment layers and layer masks to add final touches.
Please feel free to leave your comments, suggestions, and outcomes below.
 爱你不要你
爱你不要你
-
 Photoshop制作复古风格的老照片效果【英】2018-04-23
-
 Photoshop合成长着创意大树的长颈鹿【英】2018-04-23
-
 Photoshop合成冰冻特效的金鱼场景【英】2018-02-10
-
 Photoshop合成梦幻风格的森林场景【英】2018-02-10
-
 Photoshop合成正在施法的巫师【英】2018-02-10
-
 Photoshop制作金属质感的3D立体字【英】2018-01-09
-
 Photoshop设计火焰燃烧艺术字教程【英】2018-01-09
-
Photoshop制作复古风格的老照片效果【英】
相关文章11882018-04-23
-
 Photoshop制作黄金质感立体字【英】
相关文章7422018-02-10
Photoshop制作黄金质感立体字【英】
相关文章7422018-02-10
-
 Photoshop制作惊艳大气的3D立体字
相关文章14682018-02-10
Photoshop制作惊艳大气的3D立体字
相关文章14682018-02-10
-
 Photoshop制作复古双重曝光字体
相关文章6532018-01-09
Photoshop制作复古双重曝光字体
相关文章6532018-01-09
-
 Photoshop制作木地板LOGO刻印效果【英】
相关文章19272018-01-09
Photoshop制作木地板LOGO刻印效果【英】
相关文章19272018-01-09
-
Photoshop制作金属质感的3D立体字【英】
相关文章4612018-01-09
-
Photoshop设计火焰燃烧艺术字教程【英】
相关文章7612018-01-09
-
 Photoshop制作复古花朵组成的艺术字【英】
相关文章3802018-01-09
Photoshop制作复古花朵组成的艺术字【英】
相关文章3802018-01-09
