Photoshop制作复古风格的老照片效果【英】(2)
文章来源于 站酷,感谢作者 Melody Nieves 给我们带来经精彩的文章!Step 6
Now open the Painting image in a separate document.
Unhide the Visibility of the picture frame and model layers.
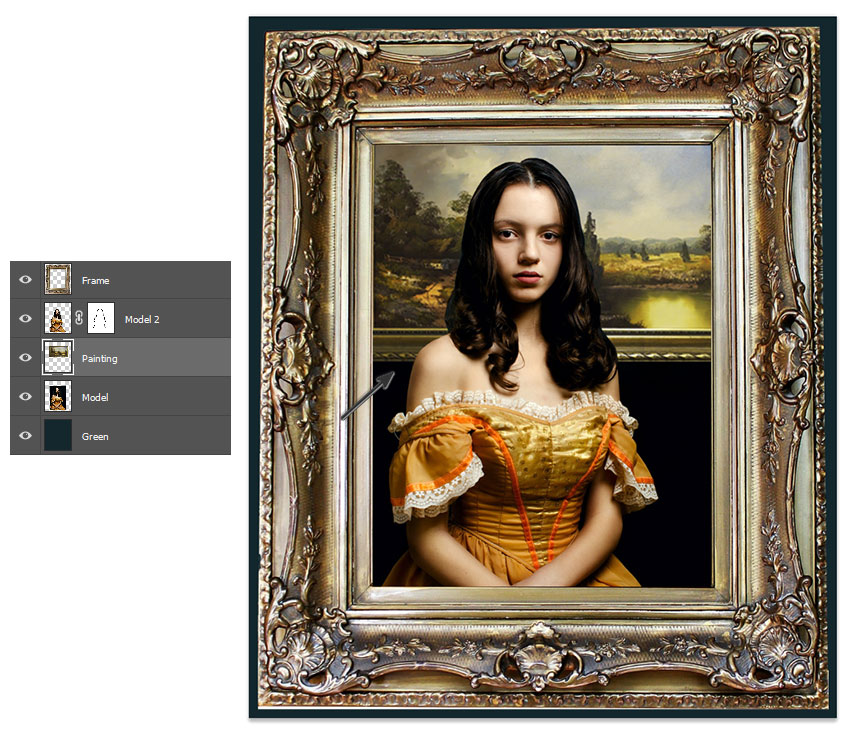
Use the Rectangular Marquee Tool (M) to select the painting image. Then Copy and Paste it onto a New Layer beneath the Model 2 layer.
Use the Free Transform Tool (Control-T) to resize the painting and place it behind her as shown above. She should now appear in front of it to help build the scene.
Step 7
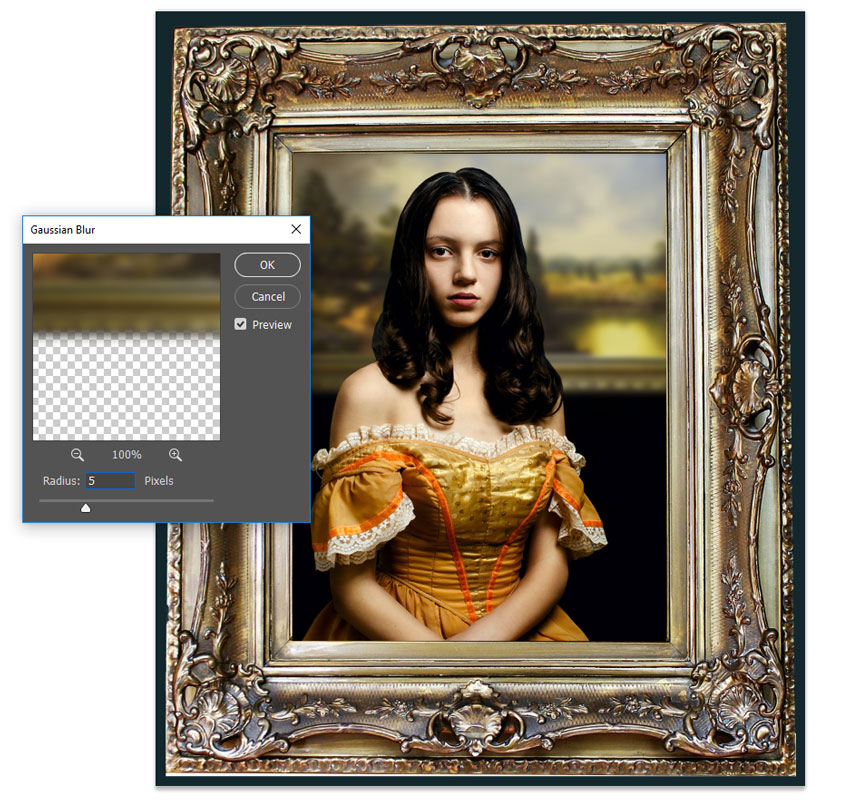
For more depth, let's blur the painting.
Select the painting layer and go to Filter > Blur > Gaussian Blur.
Add a Radius of 5 pixels and hit OK.
Step 8
Looking great so far!
Now let's add the violin.
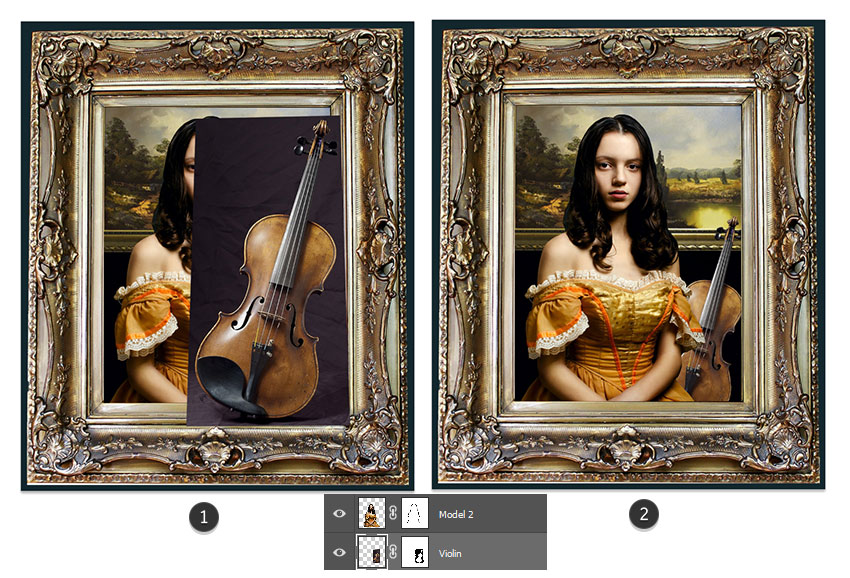
Create a rough extraction of the violin with the Polygonal Lasso Tool (L). Copy and Paste it onto a New Layer.
Position this layer beneath the model 2 layer but above the painting layer. Add a Layer Mask to the violin and follow the same step as before to mask out the background using a Hard Round Brush (100% Hardness/100% Opacity).
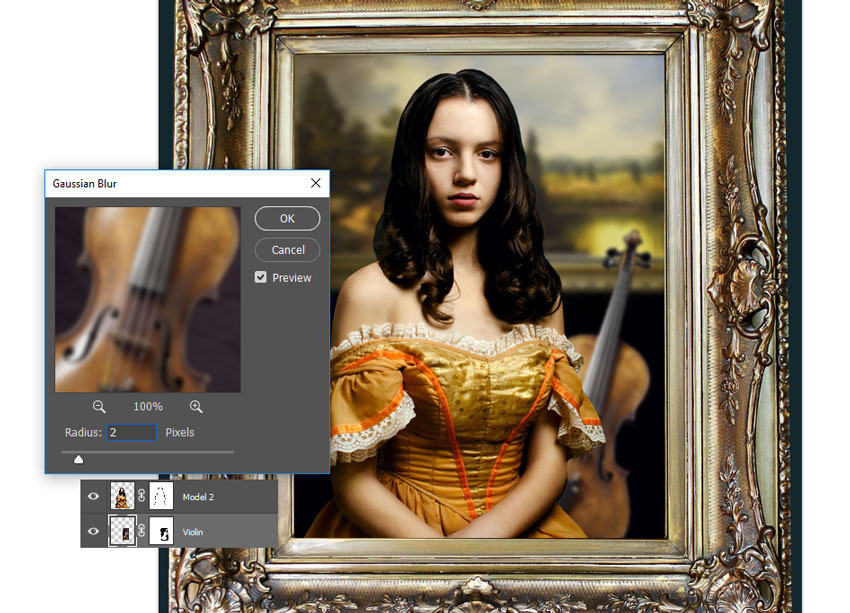
Let's blur the violin.
With the violin layer selected, go to Filter > Blur > Gaussian Blur.
Add a Radius of 2 pixels and hit OK.
2. How to Add Shadow and Vintage Coloring
The next part of this tutorial will focus on aging the photo and creating dramatic lighting. Then we'll finish by adding more shadow and texture to the entire scene.
Here is what we have so far for this composition.
Let's take a look!

 情非得已
情非得已
-
 Photoshop制作复古风格的老照片效果【英】2018-04-23
-
 Photoshop合成长着创意大树的长颈鹿【英】2018-04-23
-
 Photoshop合成冰冻特效的金鱼场景【英】2018-02-10
-
 Photoshop合成梦幻风格的森林场景【英】2018-02-10
-
 Photoshop合成正在施法的巫师【英】2018-02-10
-
 Photoshop制作金属质感的3D立体字【英】2018-01-09
-
 Photoshop设计火焰燃烧艺术字教程【英】2018-01-09
-
 Photoshop制作黄金质感立体字【英】
相关文章7422018-02-10
Photoshop制作黄金质感立体字【英】
相关文章7422018-02-10
-
 Photoshop制作惊艳大气的3D立体字
相关文章14682018-02-10
Photoshop制作惊艳大气的3D立体字
相关文章14682018-02-10
-
Photoshop合成梦幻风格的森林场景【英】
相关文章24492018-02-10
-
 Photoshop制作复古双重曝光字体
相关文章6532018-01-09
Photoshop制作复古双重曝光字体
相关文章6532018-01-09
-
 Photoshop制作木地板LOGO刻印效果【英】
相关文章19272018-01-09
Photoshop制作木地板LOGO刻印效果【英】
相关文章19272018-01-09
-
Photoshop制作金属质感的3D立体字【英】
相关文章4612018-01-09
-
 Photoshop制作复古花朵组成的艺术字【英】
相关文章3802018-01-09
Photoshop制作复古花朵组成的艺术字【英】
相关文章3802018-01-09
-
 Photoshop制作可爱的糖果饼干字【英】
相关文章6722017-12-25
Photoshop制作可爱的糖果饼干字【英】
相关文章6722017-12-25
