Photoshop合成冰冻特效的金鱼场景【英】(4)
文章来源于 Tutsplus.com,感谢作者 Jenny Le 给我们带来经精彩的文章!Step 6
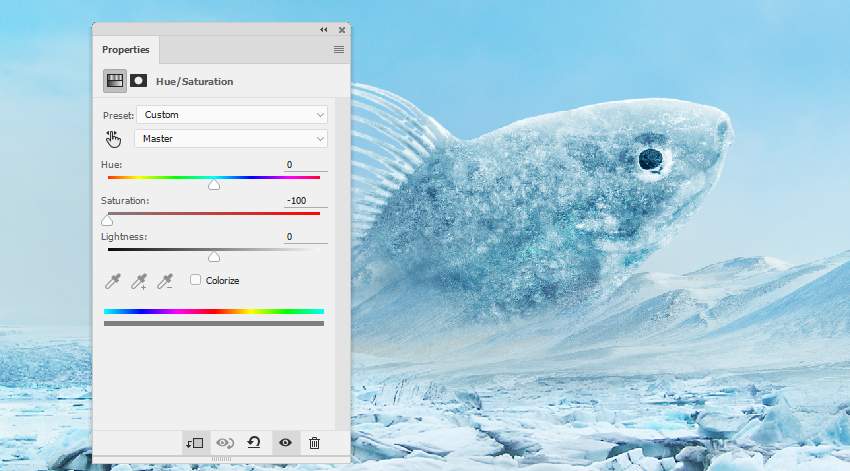
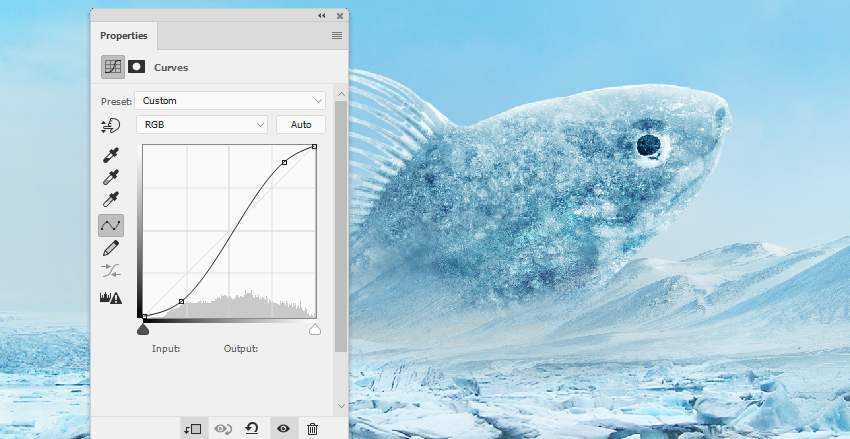
Make a Hue/Saturation and Curves adjustment layers to match the color and contrast of the effect with the existing one.
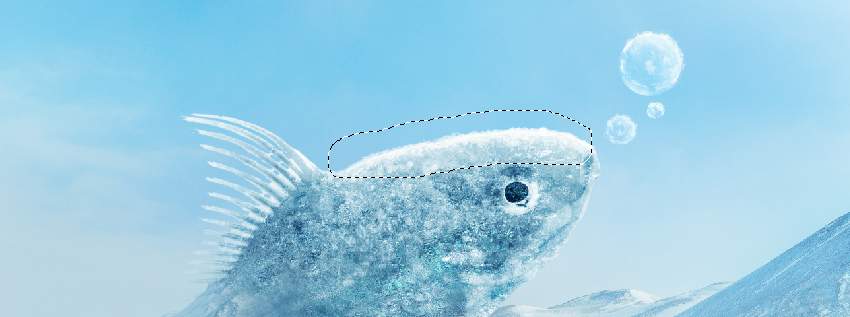
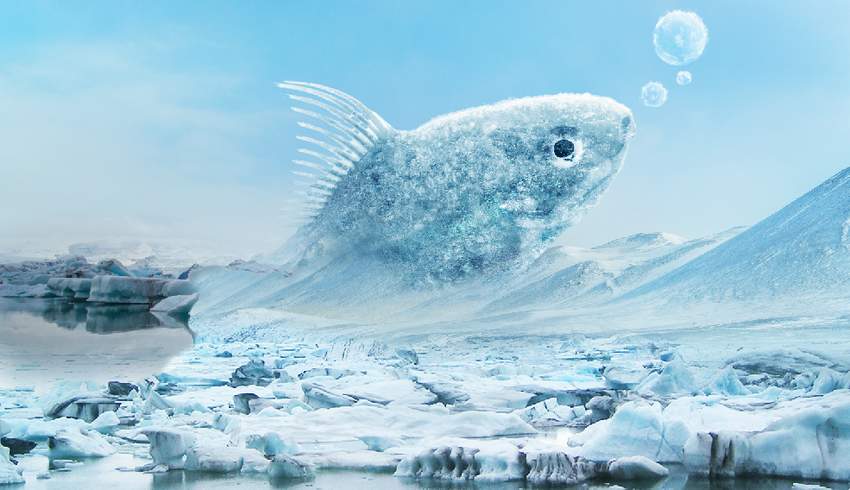
4. How to Paint the Icy Bubbles
Step 1
Create a new layer on top of the layers and use the Elliptical Marquee Tool (M) to grab three circles with different sizes above the fish's right. After this, fill them with the color #fbfcfc and lower the opacity of this layer to 60%.

Add a mask to this layer and use a small medium-soft black brush to paint inside the circles, revealing some transparency so they look like bubbles.

Step 2
Make a new layer and use a small soft brush with the color #fbfcfc to paint more snowy effects inside and outside the bubbles, as well as on the top of the fish.
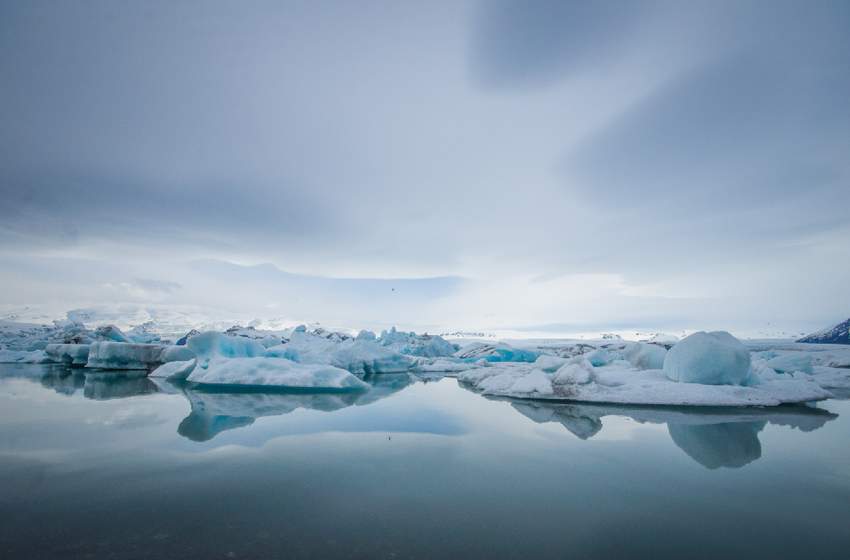
5. How to Complete the Icy Ground
Step 1
Move the ice 2 image to our working document and mask it off to show a part of the left corner only.
 情非得已
情非得已
-
 Photoshop制作复古风格的老照片效果【英】2018-04-23
-
 Photoshop合成长着创意大树的长颈鹿【英】2018-04-23
-
 Photoshop合成冰冻特效的金鱼场景【英】2018-02-10
-
 Photoshop合成梦幻风格的森林场景【英】2018-02-10
-
 Photoshop合成正在施法的巫师【英】2018-02-10
-
 Photoshop制作金属质感的3D立体字【英】2018-01-09
-
 Photoshop设计火焰燃烧艺术字教程【英】2018-01-09
-
Photoshop合成长着创意大树的长颈鹿【英】
相关文章13832018-04-23
-
Photoshop合成梦幻风格的森林场景【英】
相关文章24492018-02-10
-
Photoshop合成正在施法的巫师【英】
相关文章8372018-02-10
-
 Photoshop合成绚丽空中翱翔的仙子【英】
相关文章7412018-01-05
Photoshop合成绚丽空中翱翔的仙子【英】
相关文章7412018-01-05
-
 Photoshop合成恐怖特效的万圣节人像【英】
相关文章6702018-01-05
Photoshop合成恐怖特效的万圣节人像【英】
相关文章6702018-01-05
-
 Photoshop合成被树妖困住的女孩【英】
相关文章7152018-01-05
Photoshop合成被树妖困住的女孩【英】
相关文章7152018-01-05
-
 Photoshop合成在天空中飞行的天使【英】
相关文章4622017-12-25
Photoshop合成在天空中飞行的天使【英】
相关文章4622017-12-25
-
 Photoshop合成城市被流星攻击场景【英】
相关文章7142017-12-12
Photoshop合成城市被流星攻击场景【英】
相关文章7142017-12-12
