Photoshop合成被树妖困住的女孩【英】
文章来源于 photoshoptutorials,感谢作者 ANTAKA NGUYEN 给我们带来经精彩的文章!教程源文件和素材:森林中被困住的女孩场景PS教程素材
This tutorial will show you how to create a dark, mystic photo manipulation. Along the way you will learn some interesting tricks and techniques such as working with tree branches and ivies, advanced blending and coloring techniques. Lets get to it!
Preview of Final Results

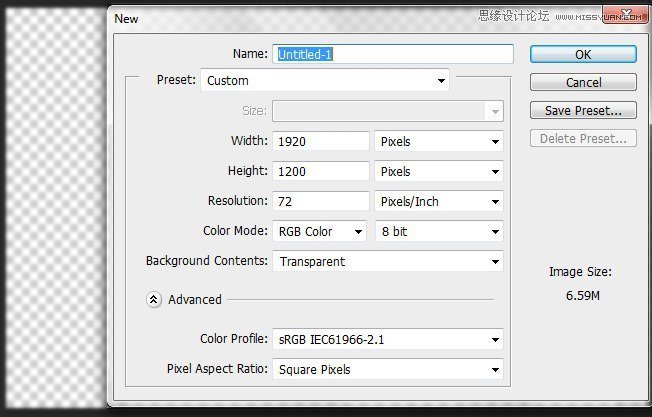
Step 1 – Create A New Document
Create a new document with the following attribute : Width 1920 – Height 1200| Background Contents : Transparent.
Step 2 – Extract The Forest
Open the Forest stock image. As you can see we want to create a mystic and dark piece so we can’t leave the bright sky like this, so we will get rid of it instead of trying to turn it dark. Select all the image with Ctrl + A then go to Select -> Color Range…
Hold Shift and left click on the sky part of the image until all the forest part are turned to black. You can adjust the Fuzziness for more accurate selection but I recommend keeping it below 80, as keeping high Fuzziness will cause Photoshop to select unnecessary part.
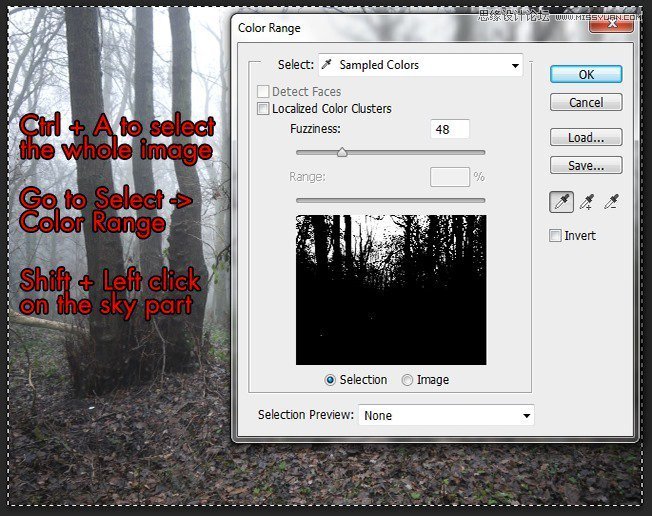
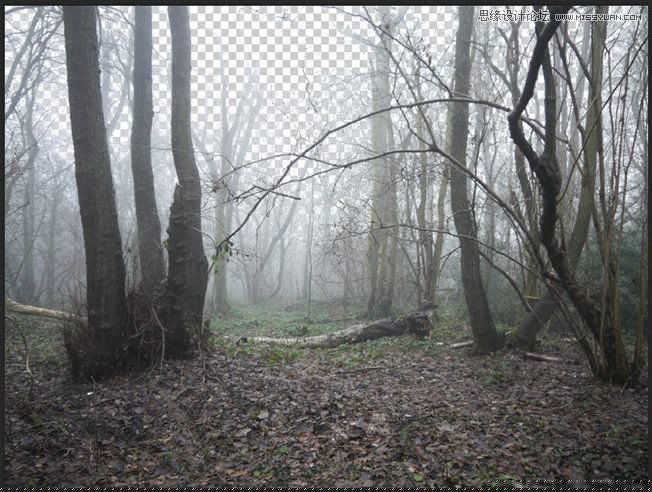
With the help of Color Range the forest has been extracted easily. This tool is a great choice for extracting detailed composition such as forest, trees, hair.
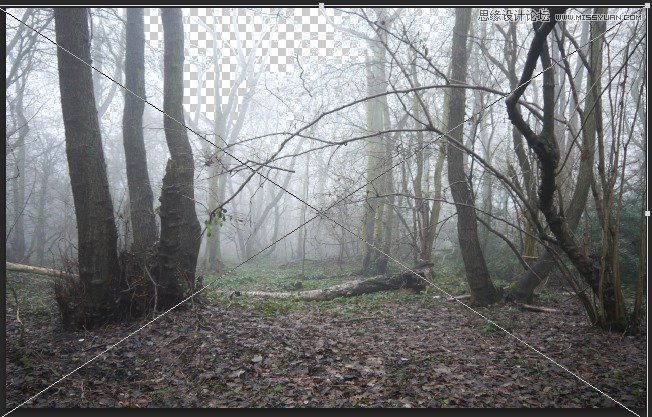
Step 3 – From Day to Night
Bring the extracted forest into our document. Resize it like the image below.
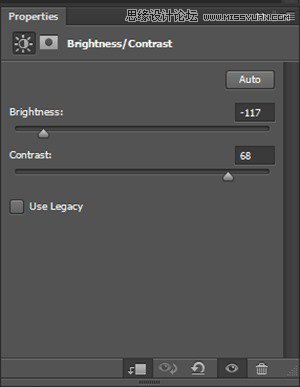
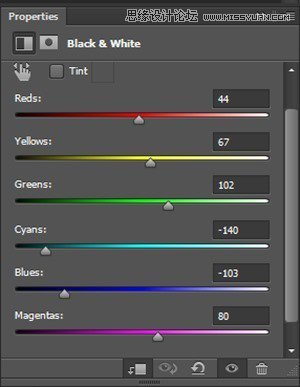
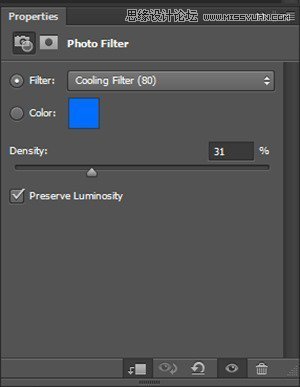
Begin adding this chain of Adjustment Layers to the forest. Remember to tick Create Clipping Mask on those adjustment layers so that they will only affect on the forest layer.
Brightness/Contrast -> Levels -> Black&White -> Photo Filter.

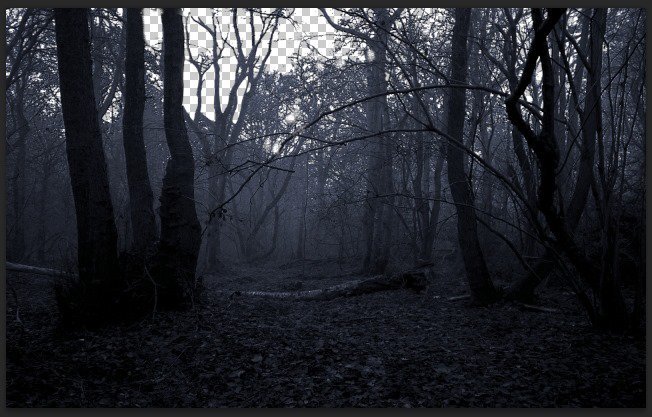
And here is the result :
Step 4
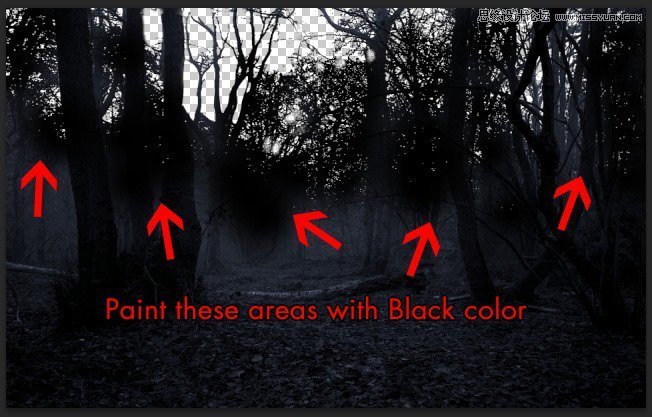
We need to add some extra shadow in order to fully turn our forest into a dark forest. Create a new layer, grab a soft brush with Black color and paint on these parts
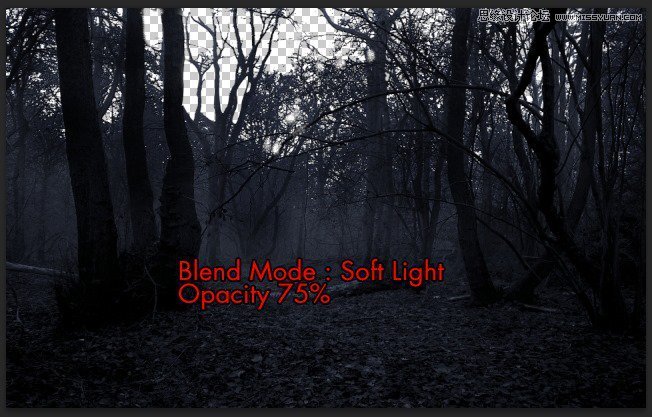
Switch the Blend Mode to Soft Light and low down the Opacity to 75%
Step 5
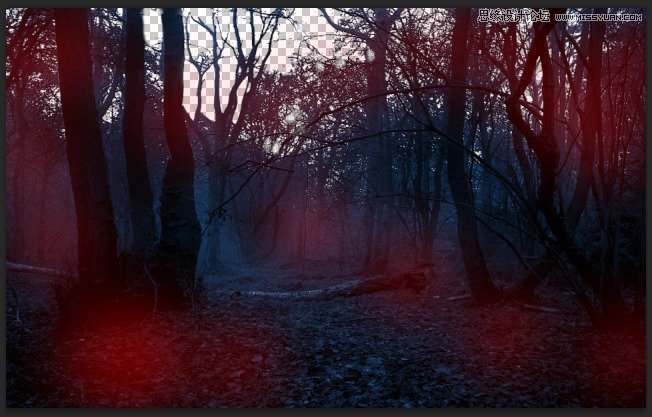
Dark blue is the main theme we want for our piece so we will begin to fill in the base color for the forest. Go to Layer -> New Fill Layer -> Solid Color then choose the color #4273b0, change the Blend Mode to Color with 77% Opacity, 78% Fill. By this simple step the forest will be blended with a nice dark blue color.

Add some Layer Mask to the Solid Color layer as some parts turned way too much blue than we needed.
 爱你不要你
爱你不要你
-
 Photoshop制作复古风格的老照片效果【英】2018-04-23
-
 Photoshop合成长着创意大树的长颈鹿【英】2018-04-23
-
 Photoshop合成冰冻特效的金鱼场景【英】2018-02-10
-
 Photoshop合成梦幻风格的森林场景【英】2018-02-10
-
 Photoshop合成正在施法的巫师【英】2018-02-10
-
 Photoshop制作金属质感的3D立体字【英】2018-01-09
-
 Photoshop设计火焰燃烧艺术字教程【英】2018-01-09
-
Photoshop制作复古风格的老照片效果【英】
相关文章11882018-04-23
-
Photoshop合成长着创意大树的长颈鹿【英】
相关文章13832018-04-23
-
Photoshop合成冰冻特效的金鱼场景【英】
相关文章34052018-02-10
-
 Photoshop制作黄金质感立体字【英】
相关文章7422018-02-10
Photoshop制作黄金质感立体字【英】
相关文章7422018-02-10
-
 Photoshop制作惊艳大气的3D立体字
相关文章14682018-02-10
Photoshop制作惊艳大气的3D立体字
相关文章14682018-02-10
-
Photoshop合成梦幻风格的森林场景【英】
相关文章24492018-02-10
-
Photoshop合成正在施法的巫师【英】
相关文章8372018-02-10
-
 Photoshop制作复古双重曝光字体
相关文章6532018-01-09
Photoshop制作复古双重曝光字体
相关文章6532018-01-09
