Photoshop合成被树妖困住的女孩【英】(5)
文章来源于 photoshoptutorials,感谢作者 ANTAKA NGUYEN 给我们带来经精彩的文章!Step 18
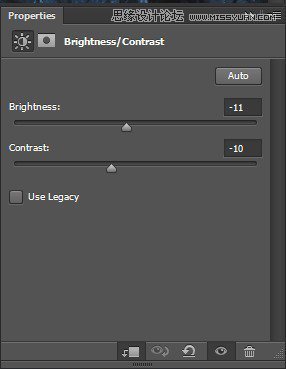
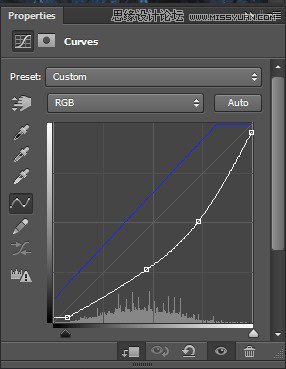
Group all the branch layers into one group (Hold Shift and Left Click on the branch layer at the top then click the branch layer at the bottom of the list to select all of them, Ctrl + G to group). Apply these adjustment layers to the group.
Brightness/Contrast -> Curves
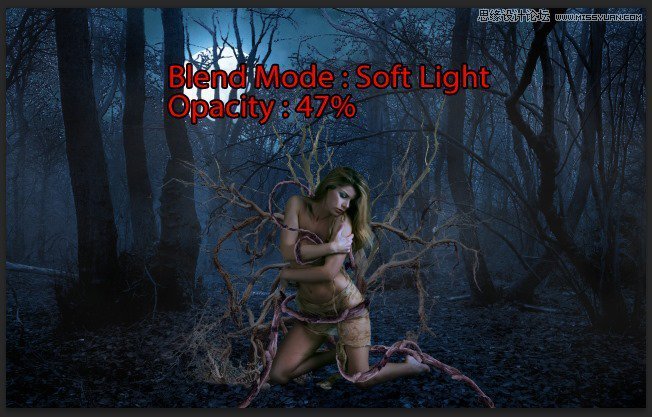
Also we want some extra shadow on those branches so create a new layer, Create Clipping Mask with the group and paint some black on the branches.
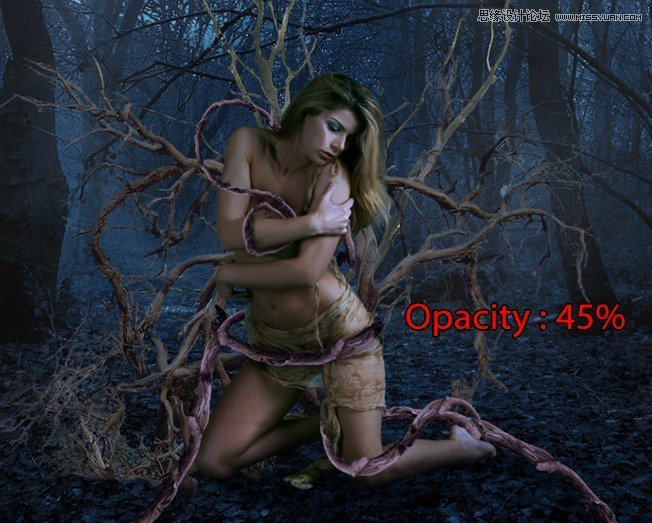
Change the Blend Mode to Soft Light, Opacity 47%
Step 19
Create more shadow at the bottom of the model and the branches on the ground with Black soft brush.
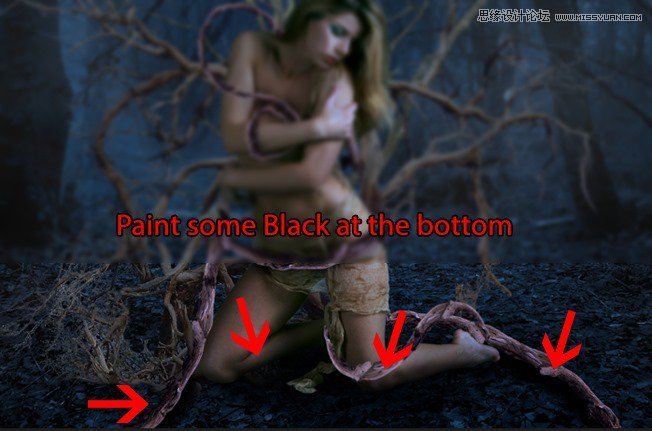
Opacity 45%
Step 20
We had fun with the branches, now its time to have fun with ivies. Open the Ivy stock which has been rendered nicely for you to use. Place it behind the model.

Place more and transform them as your will as well. The more the merrier! Make them follow the branches.

Step 21
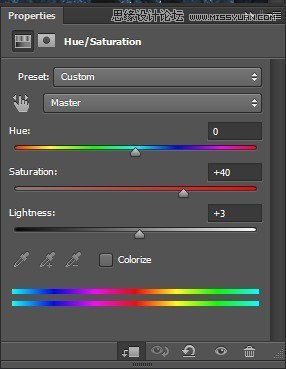
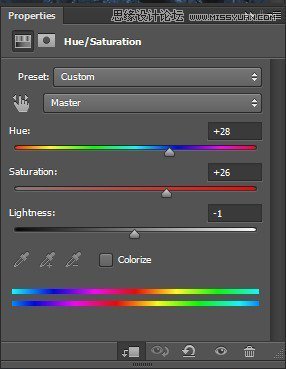
Add this Hue/Saturation adjustment layer to the ivies. Group them into one before doing this!
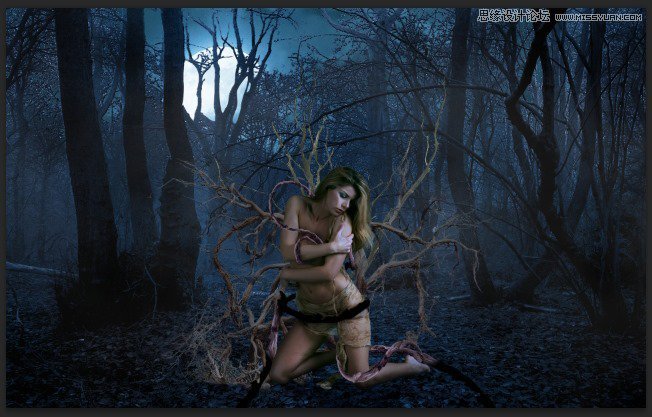
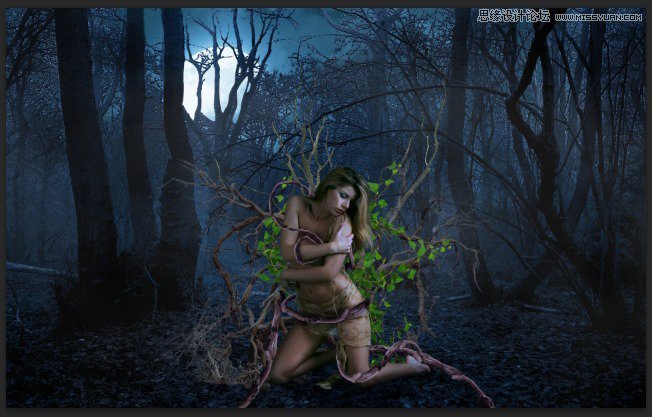
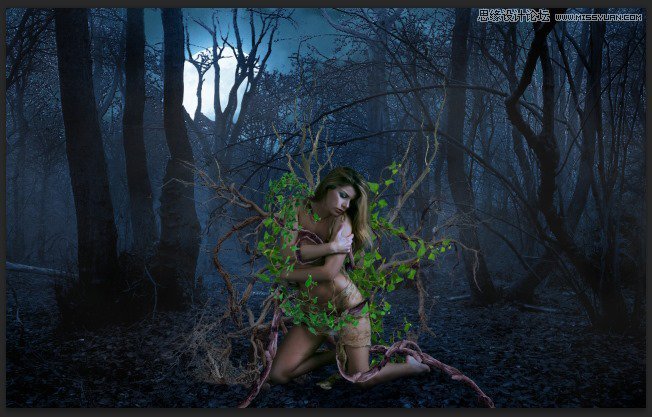
Our result so far.
Step 22
Bring more ivies to the front of the model and make them follow the branches on her body.

![]()
Step 23
Similar with step 21, add a Hue/Saturation adjustment layer to all the ivies at the front.
 爱你不要你
爱你不要你
-
 Photoshop制作复古风格的老照片效果【英】2018-04-23
-
 Photoshop合成长着创意大树的长颈鹿【英】2018-04-23
-
 Photoshop合成冰冻特效的金鱼场景【英】2018-02-10
-
 Photoshop合成梦幻风格的森林场景【英】2018-02-10
-
 Photoshop合成正在施法的巫师【英】2018-02-10
-
 Photoshop制作金属质感的3D立体字【英】2018-01-09
-
 Photoshop设计火焰燃烧艺术字教程【英】2018-01-09
-
Photoshop制作复古风格的老照片效果【英】
相关文章11882018-04-23
-
Photoshop合成长着创意大树的长颈鹿【英】
相关文章13832018-04-23
-
Photoshop合成冰冻特效的金鱼场景【英】
相关文章34052018-02-10
-
 Photoshop制作黄金质感立体字【英】
相关文章7422018-02-10
Photoshop制作黄金质感立体字【英】
相关文章7422018-02-10
-
 Photoshop制作惊艳大气的3D立体字
相关文章14682018-02-10
Photoshop制作惊艳大气的3D立体字
相关文章14682018-02-10
-
Photoshop合成梦幻风格的森林场景【英】
相关文章24492018-02-10
-
Photoshop合成正在施法的巫师【英】
相关文章8372018-02-10
-
 Photoshop制作复古双重曝光字体
相关文章6532018-01-09
Photoshop制作复古双重曝光字体
相关文章6532018-01-09
