Photoshop合成被树妖困住的女孩【英】(4)
文章来源于 photoshoptutorials,感谢作者 ANTAKA NGUYEN 给我们带来经精彩的文章!Step 14
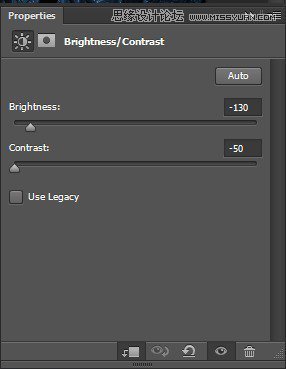
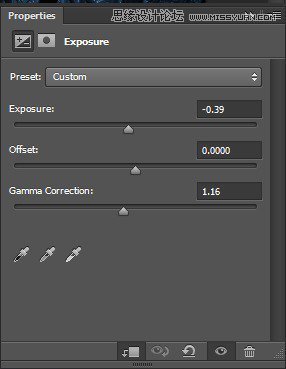
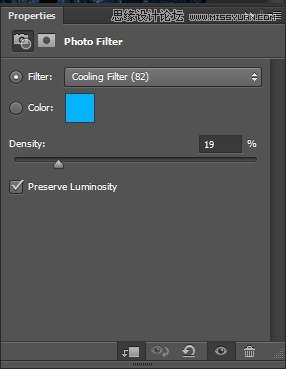
Apply following adjustment layers to the dead tree.
Brightness/Contrast -> Exposure -> Photo Filter
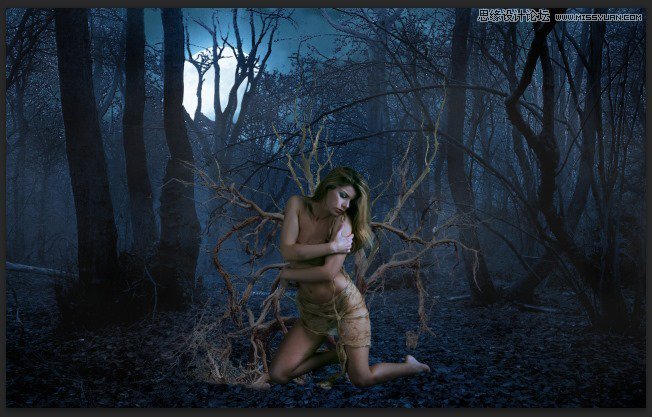
Here is the result

Step 15
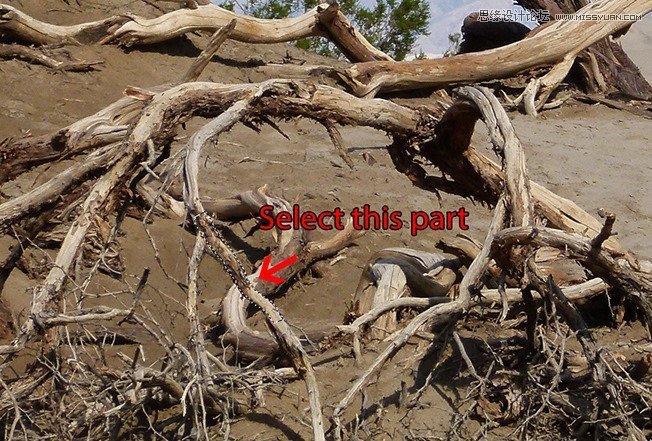
Open the Dead Tree 2 and extract the following part
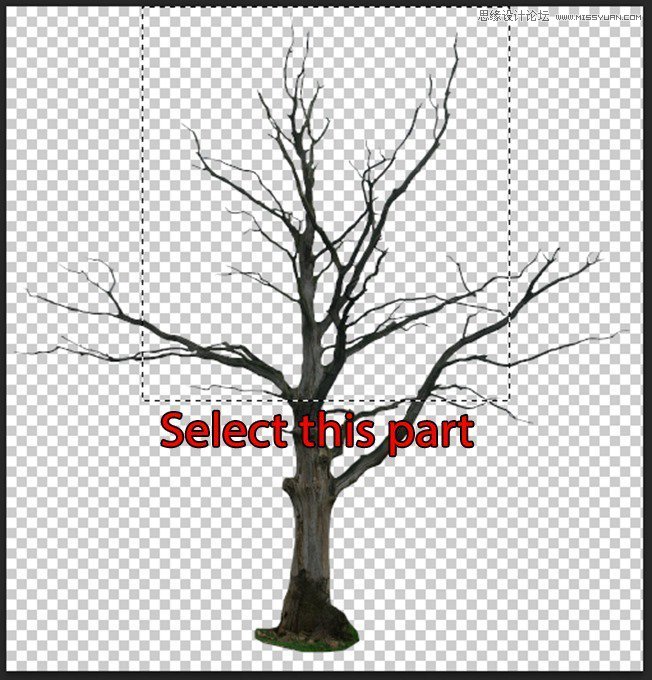
Place it behind the model.
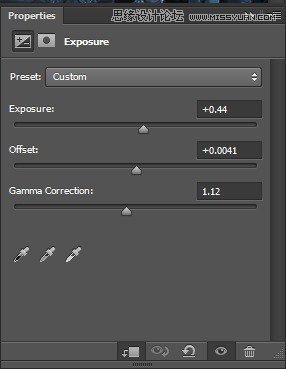
Add an Exposure adjustment layer
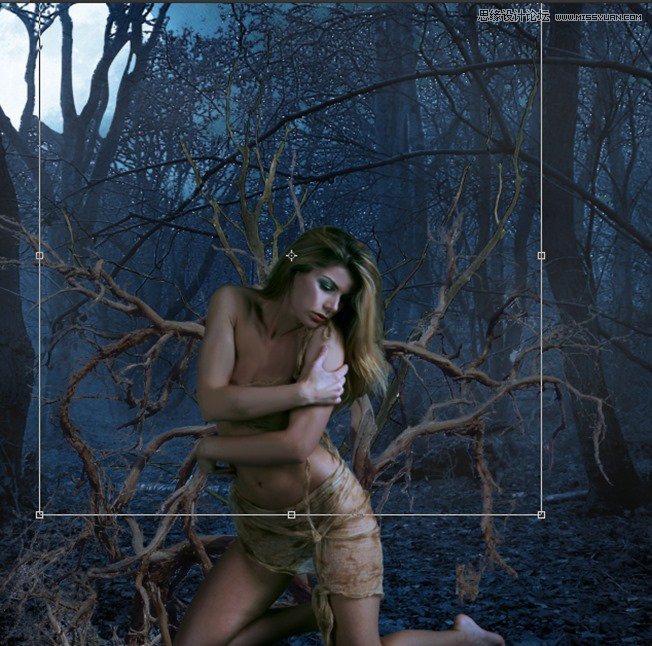
And we have some extra dead tree for the girl!
Step 16
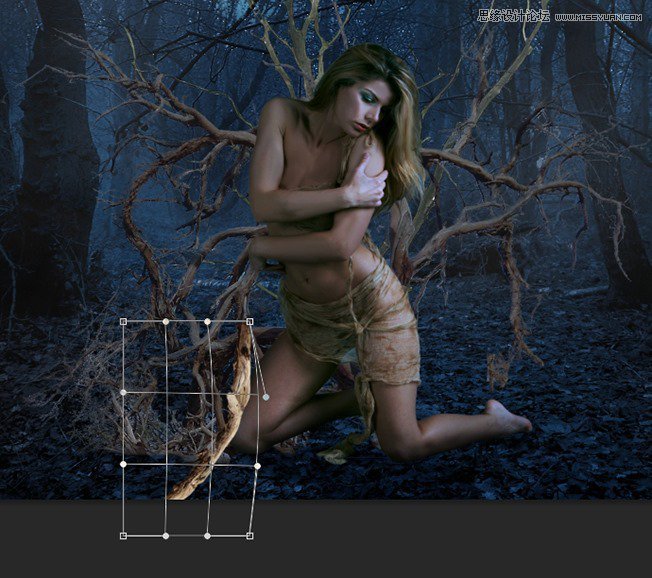
This is a very interesting step and I recommend you try it out by your free will. We will make the model being tangled by the dead tree’s branches. Open the Dead Tree 1 stock again and get any piece of branch you want. For example this one
Paste it to our document, right click on its layer and choose Convert To Smart Object, by this way we can transform the branch freely without fearing the quality reduction.
Now you can bend, twist the branch at your free will. Hit Ctrl + T to bring up the Transform tool, right click to choose the option. In this picture I use Warp to bend the branch.
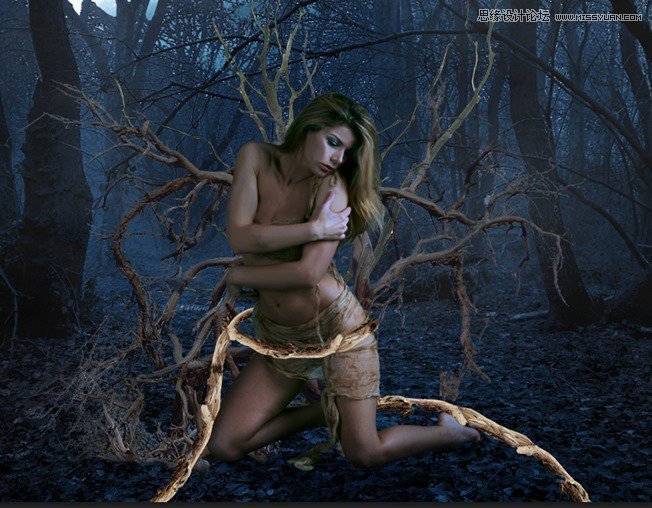
Continue duplicate and bend the branches. Make them twist around the model.
Step 17
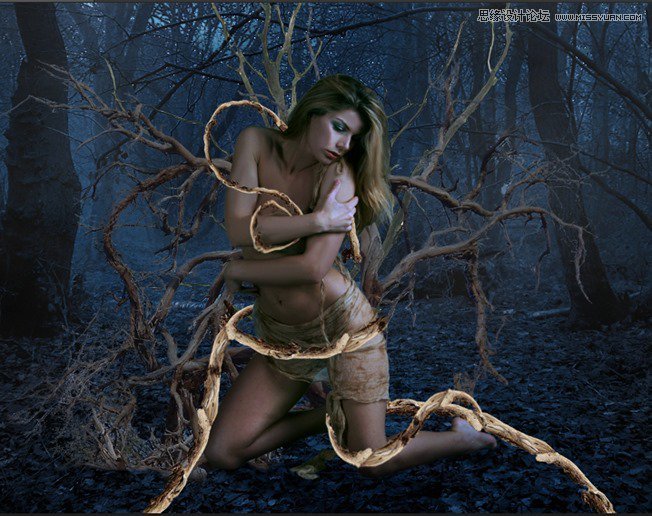
Continue creating twisted branches as many as you like, just don’t overdo it.
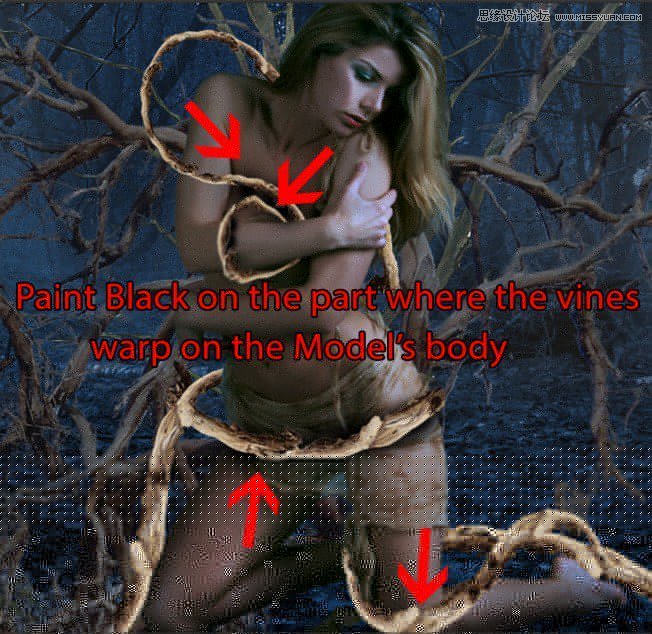
Create a new layer and paint some shadow to the part which the branches are on the model. Change the Blend Mode to Overlay.
 爱你不要你
爱你不要你
-
 Photoshop制作复古风格的老照片效果【英】2018-04-23
-
 Photoshop合成长着创意大树的长颈鹿【英】2018-04-23
-
 Photoshop合成冰冻特效的金鱼场景【英】2018-02-10
-
 Photoshop合成梦幻风格的森林场景【英】2018-02-10
-
 Photoshop合成正在施法的巫师【英】2018-02-10
-
 Photoshop制作金属质感的3D立体字【英】2018-01-09
-
 Photoshop设计火焰燃烧艺术字教程【英】2018-01-09
-
Photoshop制作复古风格的老照片效果【英】
相关文章11882018-04-23
-
Photoshop合成长着创意大树的长颈鹿【英】
相关文章13832018-04-23
-
Photoshop合成冰冻特效的金鱼场景【英】
相关文章34052018-02-10
-
 Photoshop制作黄金质感立体字【英】
相关文章7422018-02-10
Photoshop制作黄金质感立体字【英】
相关文章7422018-02-10
-
 Photoshop制作惊艳大气的3D立体字
相关文章14682018-02-10
Photoshop制作惊艳大气的3D立体字
相关文章14682018-02-10
-
Photoshop合成梦幻风格的森林场景【英】
相关文章24492018-02-10
-
Photoshop合成正在施法的巫师【英】
相关文章8372018-02-10
-
 Photoshop制作复古双重曝光字体
相关文章6532018-01-09
Photoshop制作复古双重曝光字体
相关文章6532018-01-09
