Photoshop制作黄金质感立体字【英】(5)
文章来源于 Tutsplus.com,感谢作者 Rose 给我们带来经精彩的文章!14. How to Use Adjustment Layers
Step 1
Click the Create new fill or adjustment layer icon at the bottom of the Layers panel, and choose Selective Color.

Step 2
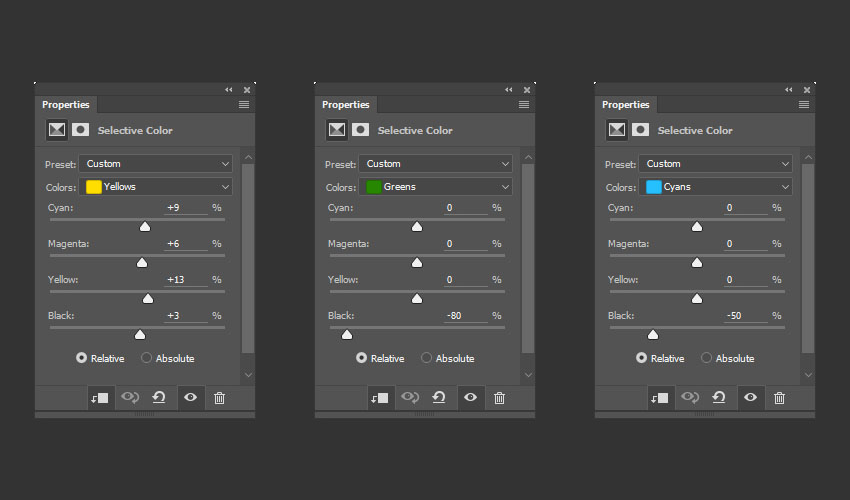
Clip the Selective Color layer to the 3D layer, and then modify these channels as below:
Yellows:
Cyan: 9
Magenta: 6
Yellow: 13
Black: 3
Greens:
Black: -80
Cyans:
Black: -50
Whites:
Cyan: -15
Magenta: 10
Yellow: 20
Black: -90
Neutrals:
Cyan: -2
Yellow: 5
Blacks:
Cyan: -5
Magenta: 5
Yellow: -20
Black: 5
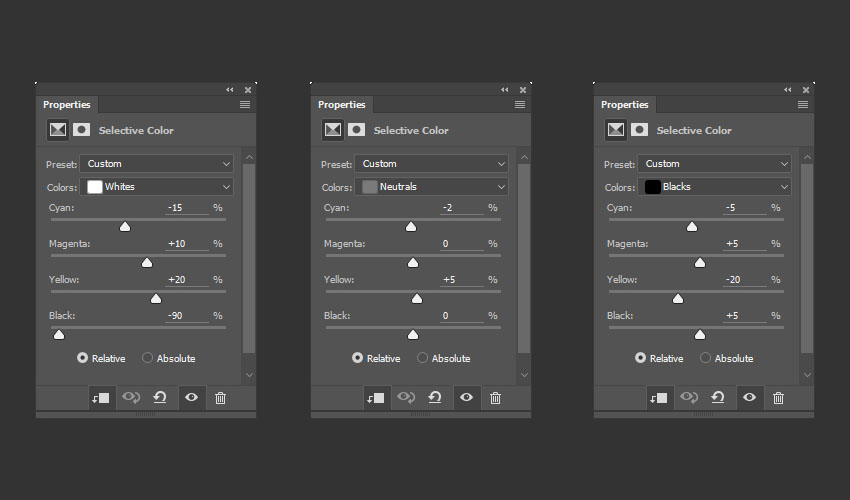
This will enhance the coloring of the text.
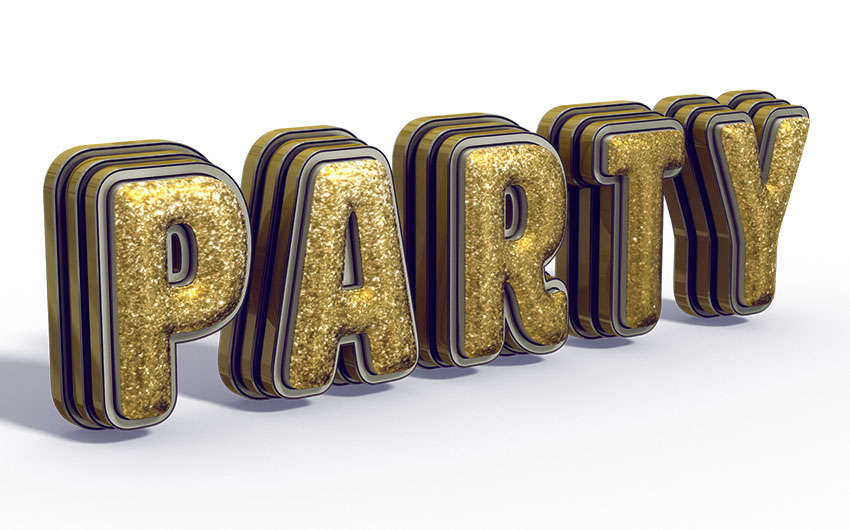
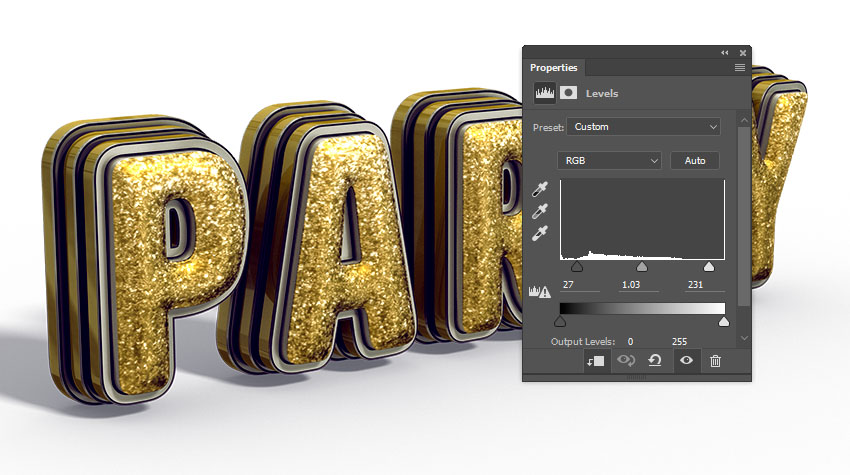
Step 3
Add a Levels adjustment layer, clip it to the 3D layer, and then change the Highlights to 27, the Gamma to 1.03, and the Shadows to 231.
This will enhance the contrast.
15. How to Create a Background
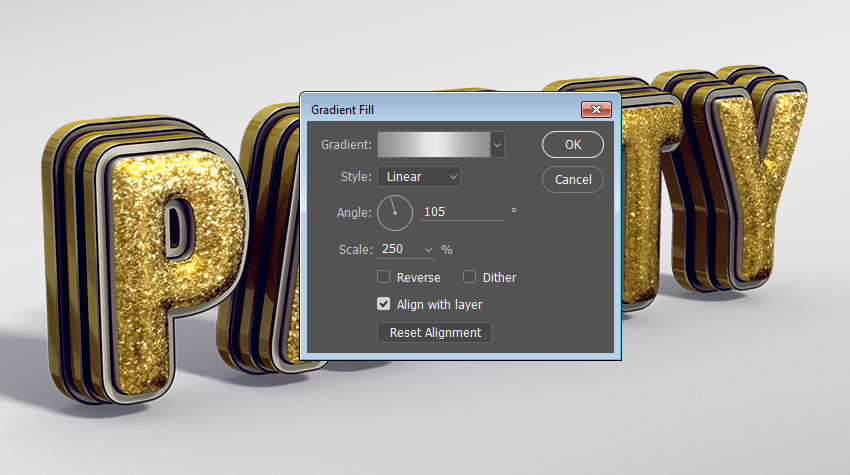
Step 1
Add a Gradient Fill layer on top of the Background layer, and create the Gradient using the colors #8f8e8e to the right, #ebeaea in the center, and #8f8e8e to the left.
Change the Angle to 105, and the Scale to 250. You can then click-drag the gradient fill inside the document to position it behind the text.
Step 2
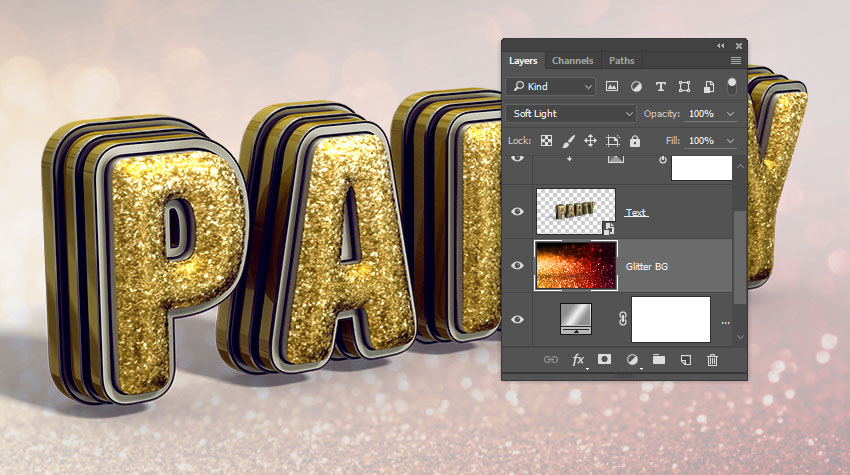
Place the Glitter Bokeh texture on top of the Gradient Fill layer, resize it as needed, rename its layer to Glitter BG, and change its Blend Mode to Soft Light.
Step 3
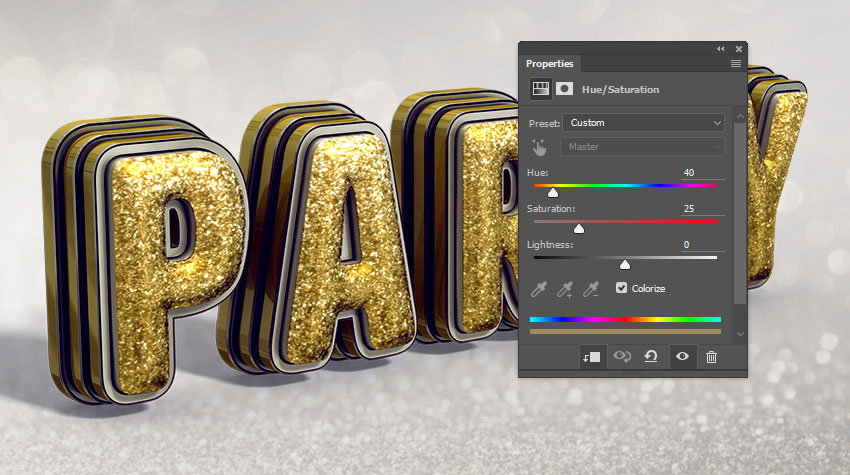
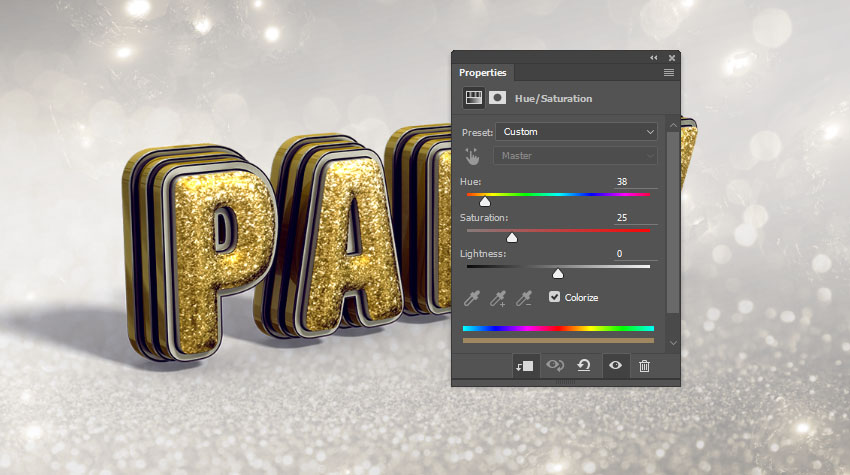
Add a Hue/Saturation adjustment layer, clip it to the Glitter BG layer, check the Colorize box, and change the Hue to 40.
Step 4
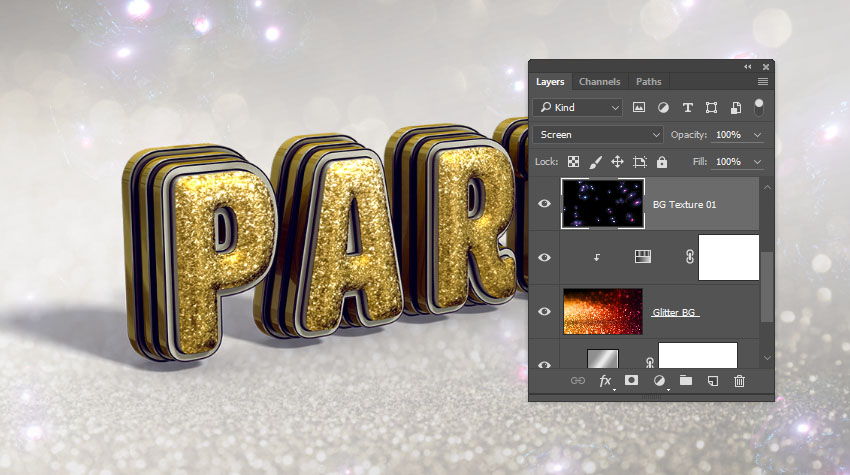
Place the hybrid3 image from the Salomdi hybrid c4d pack on top of the Glitter BG layer, and rename its layer to BG Texture 01.
Change the BG Texture 01 layer's Blend Mode to Screen, and resize it as needed.
Step 5
Add a Hue/Saturation adjustment layer, clip it to the BG Texture 01 layer, check the Colorize box, and change the Hue to 38.
 情非得已
情非得已
-
 Photoshop制作复古风格的老照片效果【英】2018-04-23
-
 Photoshop合成长着创意大树的长颈鹿【英】2018-04-23
-
 Photoshop合成冰冻特效的金鱼场景【英】2018-02-10
-
 Photoshop合成梦幻风格的森林场景【英】2018-02-10
-
 Photoshop合成正在施法的巫师【英】2018-02-10
-
 Photoshop制作金属质感的3D立体字【英】2018-01-09
-
 Photoshop设计火焰燃烧艺术字教程【英】2018-01-09
-
Photoshop制作复古风格的老照片效果【英】
相关文章11882018-04-23
-
 Photoshop制作惊艳大气的3D立体字
相关文章14682018-02-10
Photoshop制作惊艳大气的3D立体字
相关文章14682018-02-10
-
 Photoshop制作复古双重曝光字体
相关文章6532018-01-09
Photoshop制作复古双重曝光字体
相关文章6532018-01-09
-
 Photoshop制作木地板LOGO刻印效果【英】
相关文章19272018-01-09
Photoshop制作木地板LOGO刻印效果【英】
相关文章19272018-01-09
-
Photoshop制作金属质感的3D立体字【英】
相关文章4612018-01-09
-
 Photoshop制作复古花朵组成的艺术字【英】
相关文章3802018-01-09
Photoshop制作复古花朵组成的艺术字【英】
相关文章3802018-01-09
-
 Photoshop制作可爱的糖果饼干字【英】
相关文章6722017-12-25
Photoshop制作可爱的糖果饼干字【英】
相关文章6722017-12-25
-
 Photoshop制作梦幻耶稣光和高光背景【英】
相关文章6002017-12-16
Photoshop制作梦幻耶稣光和高光背景【英】
相关文章6002017-12-16
