Photoshop制作黄金质感立体字【英】(2)
文章来源于 Tutsplus.com,感谢作者 Rose 给我们带来经精彩的文章!4. How to Work With a 3D Scene
Step 1
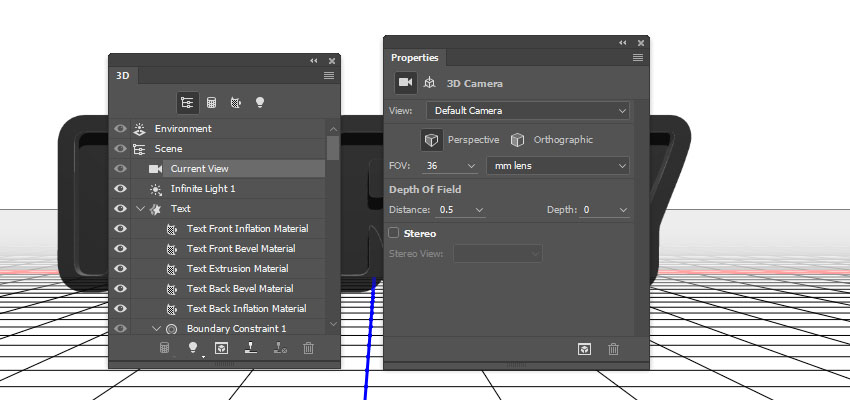
To access the 3D mesh settings and properties, you’ll need to open two panels: the 3D panel and the Properties panel (both found under the Window menu).
The 3D panel has all the components of the 3D scene, and when you click the name of any of those, you’ll be able to access its settings in the Properties panel. So make sure to always select the tab of the element you want to modify in the 3D panel before you change its settings in the Properties panel.
Step 2
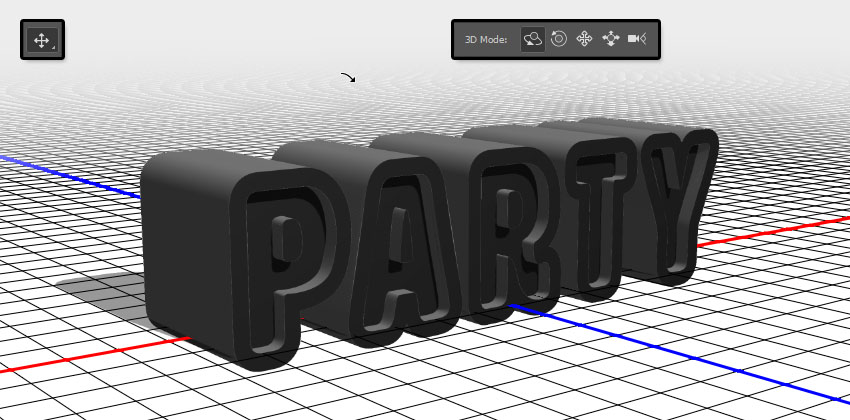
If you select the Move Tool, you’ll find a set of 3D Modes for it to the right of the Options bar.
When you choose one of those, you can then click and drag to perform changes (on the selected element in the 3D panel).
Use those modes to change the Current View into an angle you like.
5. How to Modify 3D Mesh Settings
Step 1
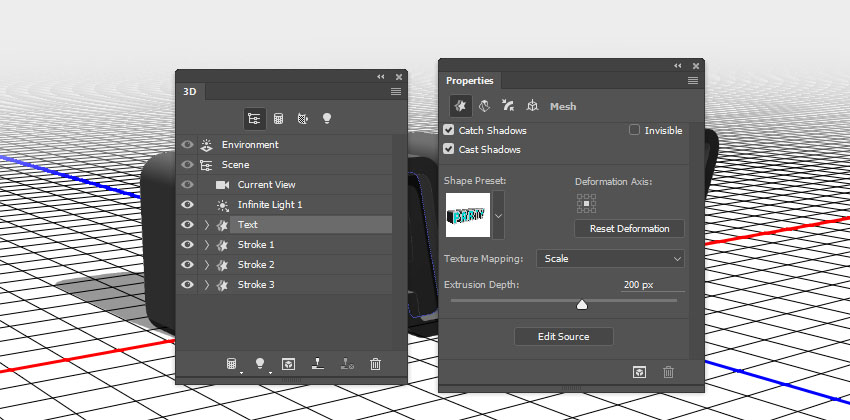
Select the Text mesh tab in the 3D panel, and then, in the Properties panel, change the Extrusion Depth to 200.
Step 2
Select all the Stroke mesh tabs, and change their Extrusion Depth to 35.

6. How to Modify 3D Cap Settings
Step 1
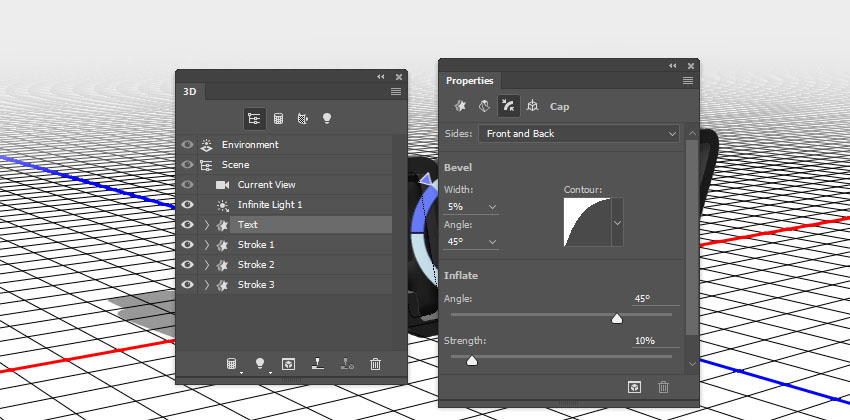
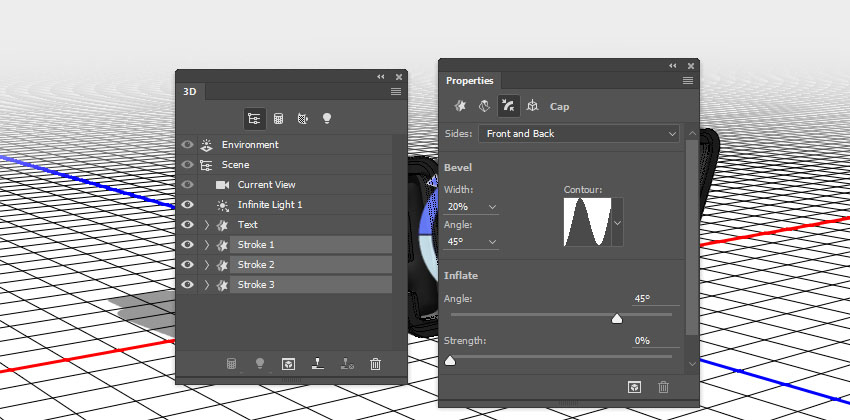
Select the Text tab again. Then click the Cap icon at the top of the Properties panel.
Set the Sides to Front and Back, and change the Bevel Width to 5%, the Contour to Half Round, and the Inflate Strength to 10%.
Step 2
Select the Stroke tabs, set the Sides to Front and Back, and then change the Bevel Width to 20% and the Contour to Ring.
7. How to Reposition 3D Meshes
Step 1
Select all the mesh tabs in the 3D panel, and then click the 3D panel menu icon, and choose Move Object to Ground Plane.

Step 2
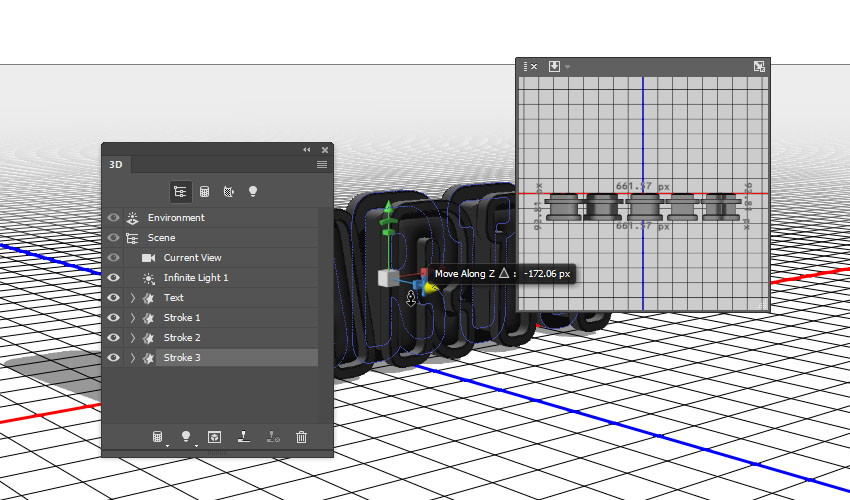
Pick the Move Tool, and use the 3D Axis to move the Stroke meshes apart from each other, and spread them over the 3D text you have.
The arrows at the ends of the axis move the mesh, the part below them is used for rotation, and the cubes are used for scaling. The cube in the center is used to scale the object uniformly. All you need to do is click and drag the part you want.
You can also open the 3D Secondary View window (View > Show > 3D Secondary View), and then click the little arrow to the left and choose the Top view, to better see what you are doing.
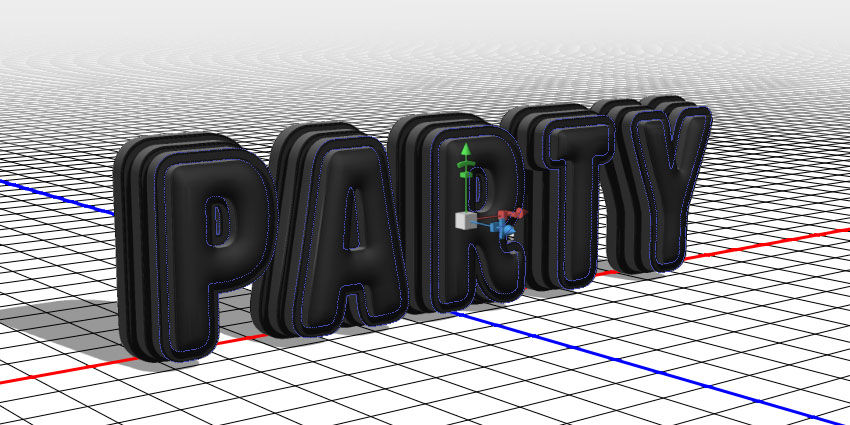
Step 3
Make sure that the biggest stroke is at the back and the smallest is in the front.
8. How to Create a 3D Text Front Inflation Material
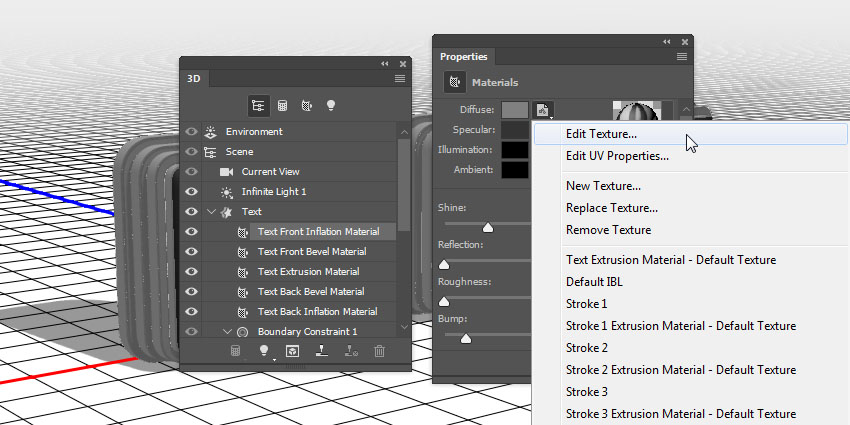
Step 1
Select the Text Front Inflation Material tab in the 3D panel, and then, in the Properties panel, click the Diffuse texture icon, and choose Edit Texture.
 情非得已
情非得已
-
 Photoshop制作复古风格的老照片效果【英】2018-04-23
-
 Photoshop合成长着创意大树的长颈鹿【英】2018-04-23
-
 Photoshop合成冰冻特效的金鱼场景【英】2018-02-10
-
 Photoshop合成梦幻风格的森林场景【英】2018-02-10
-
 Photoshop合成正在施法的巫师【英】2018-02-10
-
 Photoshop制作金属质感的3D立体字【英】2018-01-09
-
 Photoshop设计火焰燃烧艺术字教程【英】2018-01-09
-
Photoshop制作复古风格的老照片效果【英】
相关文章11882018-04-23
-
 Photoshop制作惊艳大气的3D立体字
相关文章14682018-02-10
Photoshop制作惊艳大气的3D立体字
相关文章14682018-02-10
-
 Photoshop制作复古双重曝光字体
相关文章6532018-01-09
Photoshop制作复古双重曝光字体
相关文章6532018-01-09
-
 Photoshop制作木地板LOGO刻印效果【英】
相关文章19272018-01-09
Photoshop制作木地板LOGO刻印效果【英】
相关文章19272018-01-09
-
Photoshop制作金属质感的3D立体字【英】
相关文章4612018-01-09
-
 Photoshop制作复古花朵组成的艺术字【英】
相关文章3802018-01-09
Photoshop制作复古花朵组成的艺术字【英】
相关文章3802018-01-09
-
 Photoshop制作可爱的糖果饼干字【英】
相关文章6722017-12-25
Photoshop制作可爱的糖果饼干字【英】
相关文章6722017-12-25
-
 Photoshop制作梦幻耶稣光和高光背景【英】
相关文章6002017-12-16
Photoshop制作梦幻耶稣光和高光背景【英】
相关文章6002017-12-16
