Photoshop制作惊艳大气的3D立体字(5)
文章来源于 Tutsplus.com,感谢作者 Rose 给我们带来经精彩的文章!8. How to Smooth the Final Outcome
Step 1
Select all the text groups you have, duplicate them, press Command-E to merge the copies, and hide the original ones.

Step 2
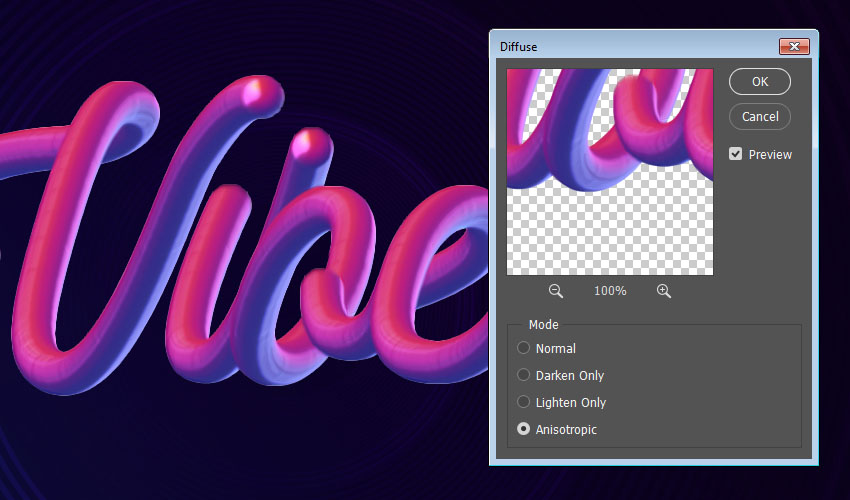
Go to Filter > Stylize > Diffuse, and set the Mode to Anisotropic to get a smoother result.
Advertisement
Step 3
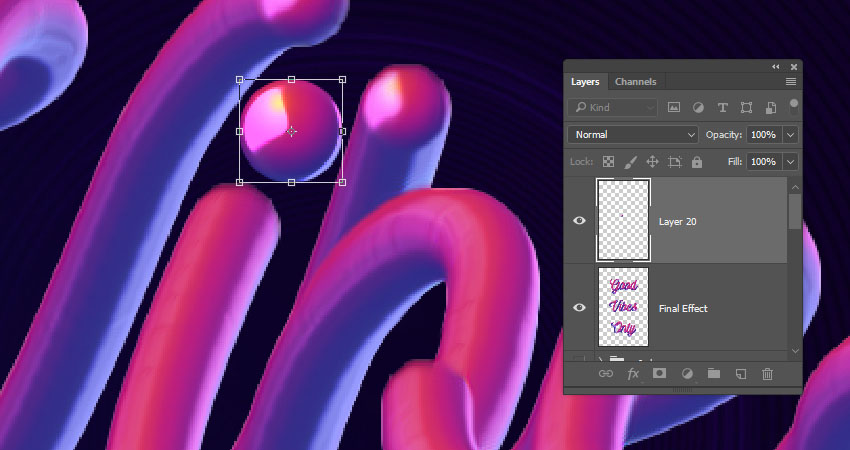
Add any extra dots or accents manually where needed, and make sure to do so on new layers so that you can transform them if you like, and then apply the Diffuse filter separately to them.
Congratulations! You're Done
In this tutorial, we created a simple background and a reference text layer. Then, we created an ellipse and styled it to create a mixer brush's tip. After that, we created a text work path and stroked the letters to create the text effect. Finally, we used a filter to smooth the final outcome.
Please feel free to leave your comments, suggestions, and outcomes below.

 情非得已
情非得已
-
 Photoshop制作复古风格的老照片效果【英】2018-04-23
-
 Photoshop合成长着创意大树的长颈鹿【英】2018-04-23
-
 Photoshop合成冰冻特效的金鱼场景【英】2018-02-10
-
 Photoshop合成梦幻风格的森林场景【英】2018-02-10
-
 Photoshop合成正在施法的巫师【英】2018-02-10
-
 Photoshop制作金属质感的3D立体字【英】2018-01-09
-
 Photoshop设计火焰燃烧艺术字教程【英】2018-01-09
-
Photoshop制作复古风格的老照片效果【英】
相关文章11882018-04-23
-
 Photoshop制作黄金质感立体字【英】
相关文章7422018-02-10
Photoshop制作黄金质感立体字【英】
相关文章7422018-02-10
-
 Photoshop制作复古双重曝光字体
相关文章6532018-01-09
Photoshop制作复古双重曝光字体
相关文章6532018-01-09
-
 Photoshop制作木地板LOGO刻印效果【英】
相关文章19272018-01-09
Photoshop制作木地板LOGO刻印效果【英】
相关文章19272018-01-09
-
Photoshop制作金属质感的3D立体字【英】
相关文章4612018-01-09
-
 Photoshop制作复古花朵组成的艺术字【英】
相关文章3802018-01-09
Photoshop制作复古花朵组成的艺术字【英】
相关文章3802018-01-09
-
 Photoshop制作可爱的糖果饼干字【英】
相关文章6722017-12-25
Photoshop制作可爱的糖果饼干字【英】
相关文章6722017-12-25
-
 Photoshop制作梦幻耶稣光和高光背景【英】
相关文章6002017-12-16
Photoshop制作梦幻耶稣光和高光背景【英】
相关文章6002017-12-16
