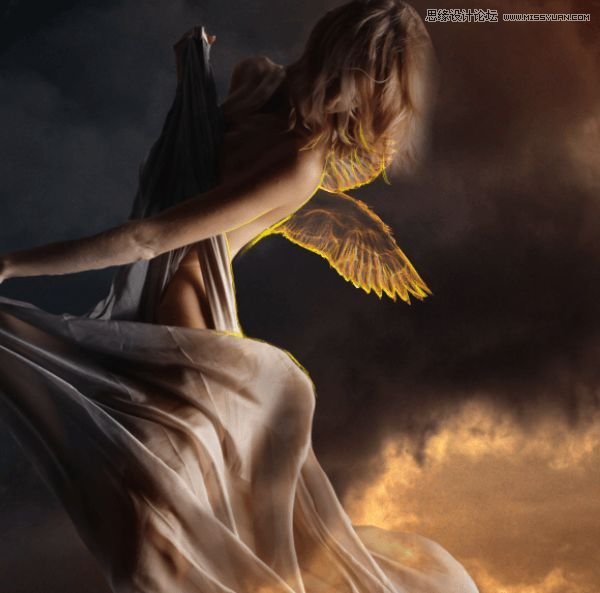
Photoshop合成在天空中飞行的天使【英】(3)
文章来源于 photoshoptutorials,感谢作者 MONIKA NOWAKOWSKA 给我们带来经精彩的文章!Step 10
We’ll start making wings. Under the model layer paste first wing. Transform it free and in perspective.
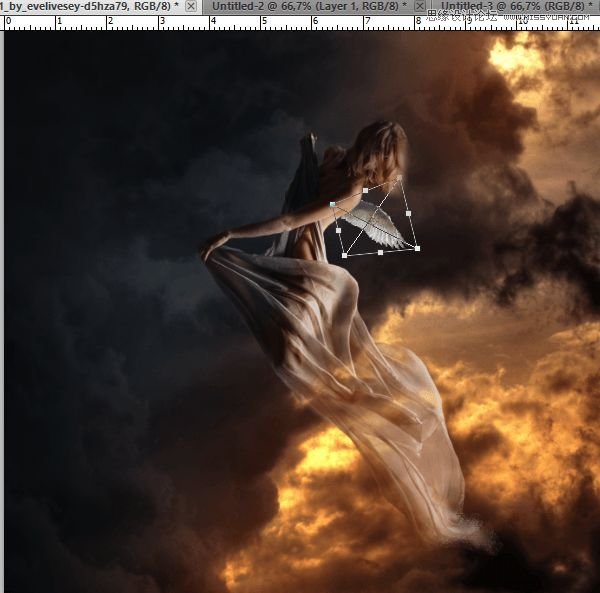
Step 11
Do the same with second wing.
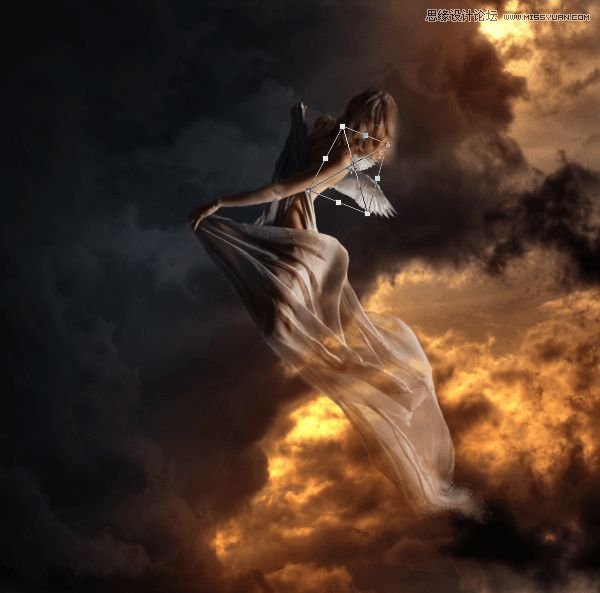
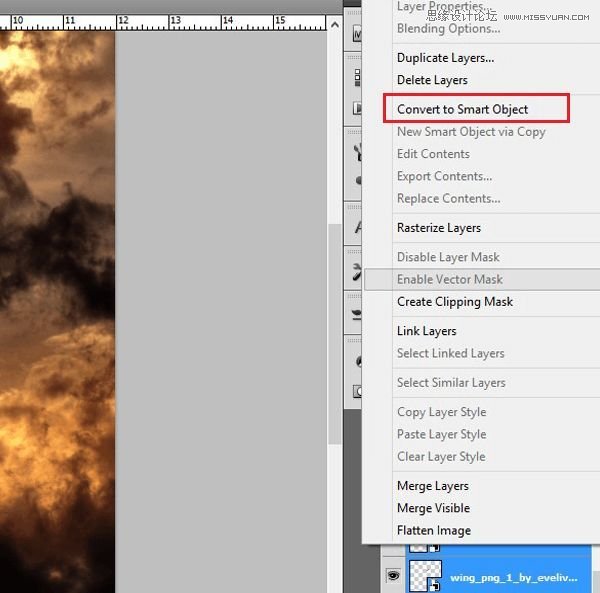
Step 12
Now press ctrl and choose layers with the wings. Then Click Right Mouse Button and from menu choose Convert to Smart Object.
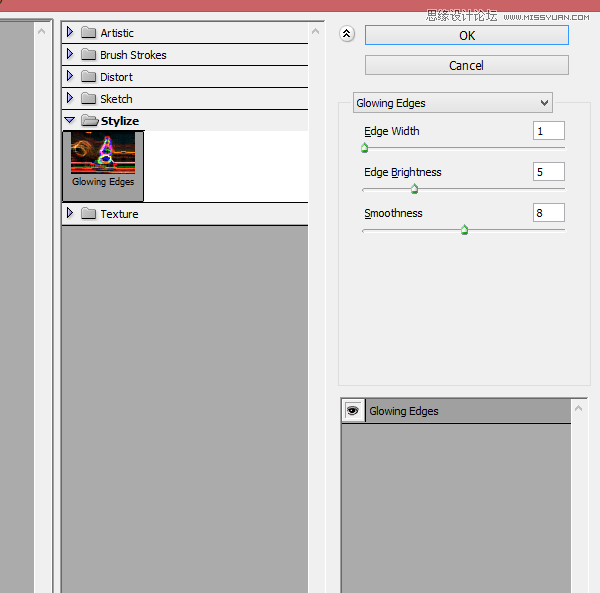
Step 13
From menu choose Filter > Filter gallery. From menu choose Stylize > Glowing edges.
Step 14
Then choose layer with wings. Change mode to Screen.
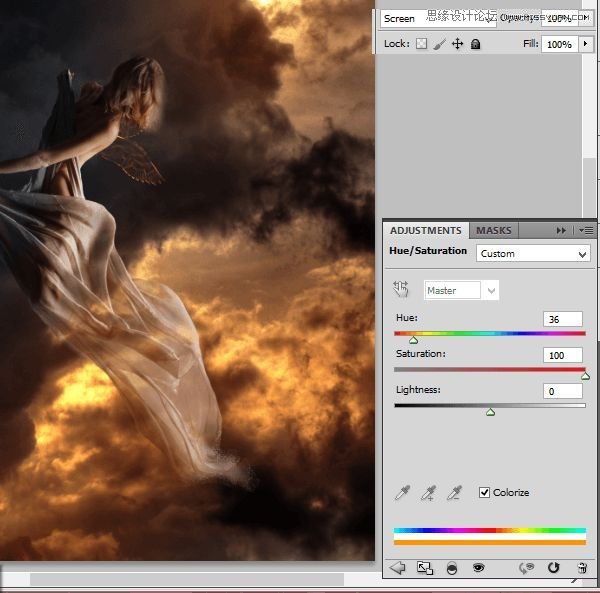
Step 15
Wings should be like gold, so add adjustment layer with hue/saturation.
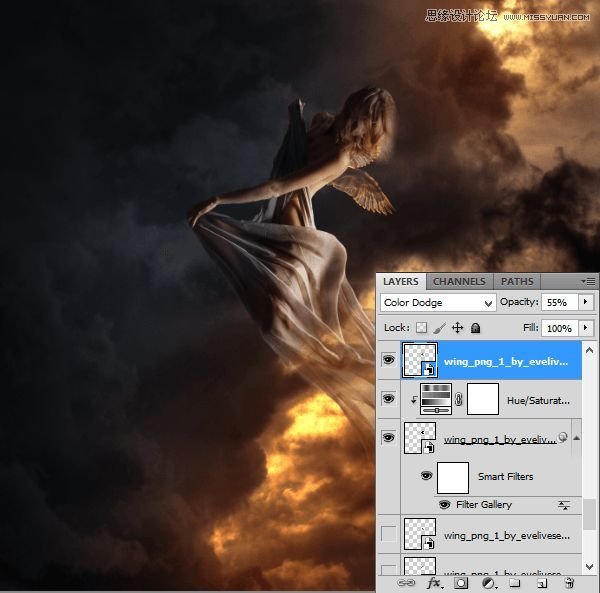
Step 16 – optional
But wings appears like empty. Duplicate wings layer. Change mode to Color Dodge and opacity to 55%
Step 17
With small (ex. 1-3px wide), soft brush color #d9cb04 draw contour of wings.
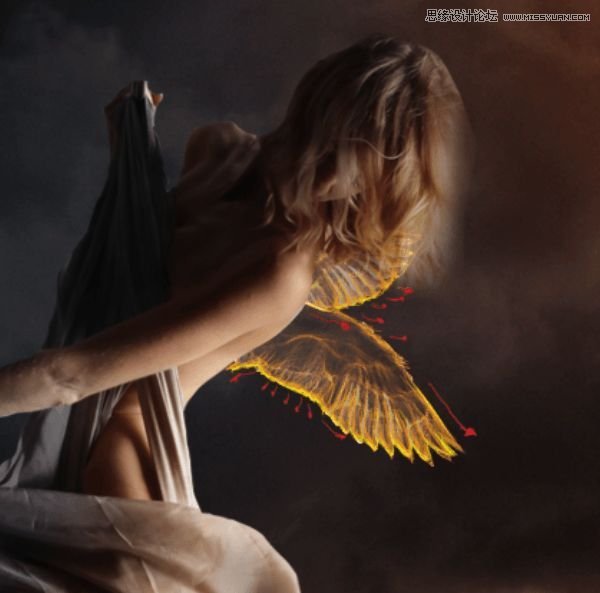
Step 18 – glow
Wings will be glowing. Draw gently lights on model from it. Choose the same brush as was as before, with #f7e802 color. On the back, hair, drapery.
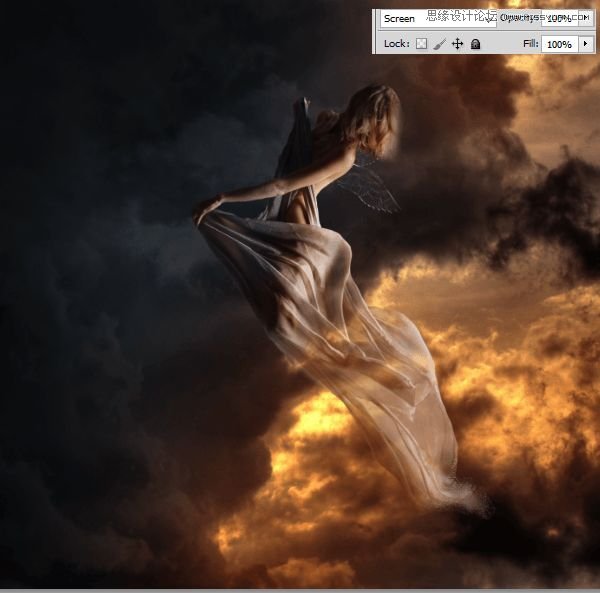
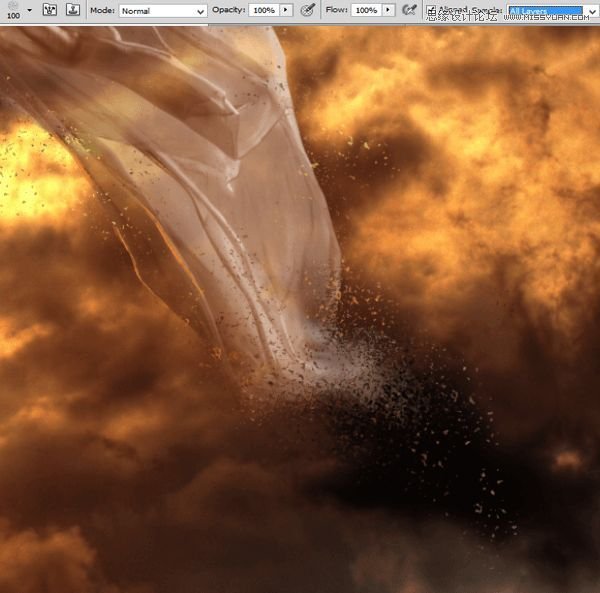
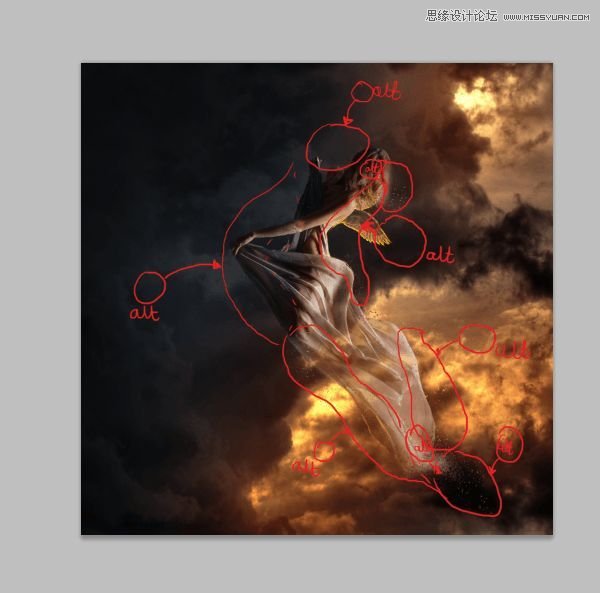
Step 19 – particles
Create new layer. Now choose Clone Stamp Tool, Rough round bristle 100px. Click with alt on edges of model on the image and draw somewhere on image. Pay attention that it will take some time. Be patient :)
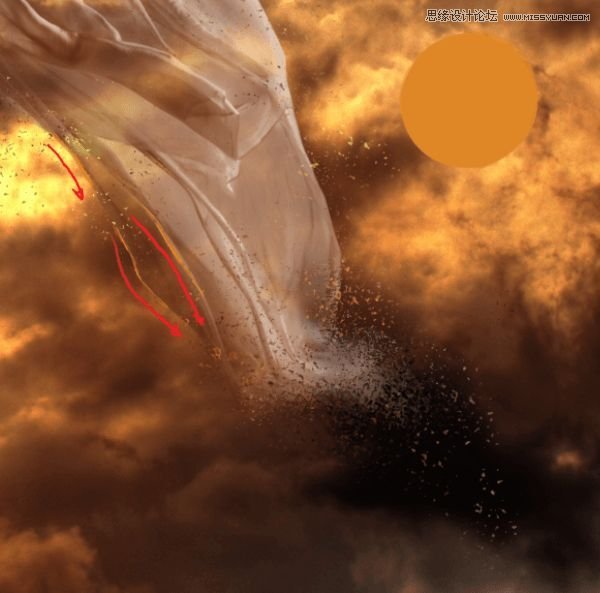
Step 20
I added also orange light on the drapery. With the 1px soft round brush #df8726 draw. Red arrows will help you :)
 情非得已
情非得已
-
 Photoshop制作复古风格的老照片效果【英】2018-04-23
-
 Photoshop合成长着创意大树的长颈鹿【英】2018-04-23
-
 Photoshop合成冰冻特效的金鱼场景【英】2018-02-10
-
 Photoshop合成梦幻风格的森林场景【英】2018-02-10
-
 Photoshop合成正在施法的巫师【英】2018-02-10
-
 Photoshop制作金属质感的3D立体字【英】2018-01-09
-
 Photoshop设计火焰燃烧艺术字教程【英】2018-01-09
