Photoshop设计火焰燃烧艺术字教程【英】(3)
文章来源于 Tutsplus,感谢作者 Rose 给我们带来经精彩的文章!6. How to Adjust a Layer's Blending Options
Step 1
Change the Flame Texture layer's Blend Mode to Soft Light.
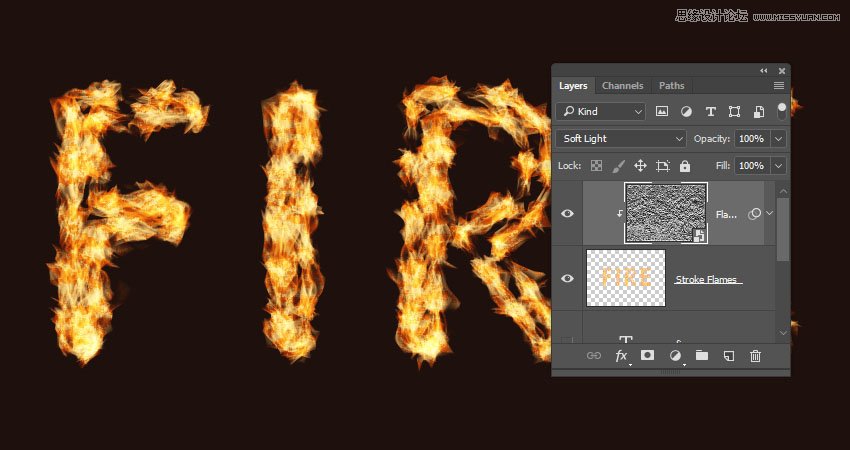
Step 2
Double-click the Flame Texture layer to adjust its Blending Options. We are going to adjust the This Layersliders under the Blend If section.
Press-hold the Option key, and click-drag the right slider to split it. As you move the slider's ends, you'll notice how the texture starts to blend better with the flames.
What this slider does is prevent the lighter areas of the texture from interacting with the content below it.

Step 3
Try different values until you like the outcome.
We will get back to the texture at the end of the tutorial to blur it, so you can also modify the values some more then.

7. How to Add Flame Images
Step 1
Use any of the flame images from the Flames0032, Flames0036, and Flames0043 sets to add to the text.
It is better to add the images as Smart Objects so that you can apply changes to them non-destructively.
To do so, go to File > Place Linked, and open the image you want to add.
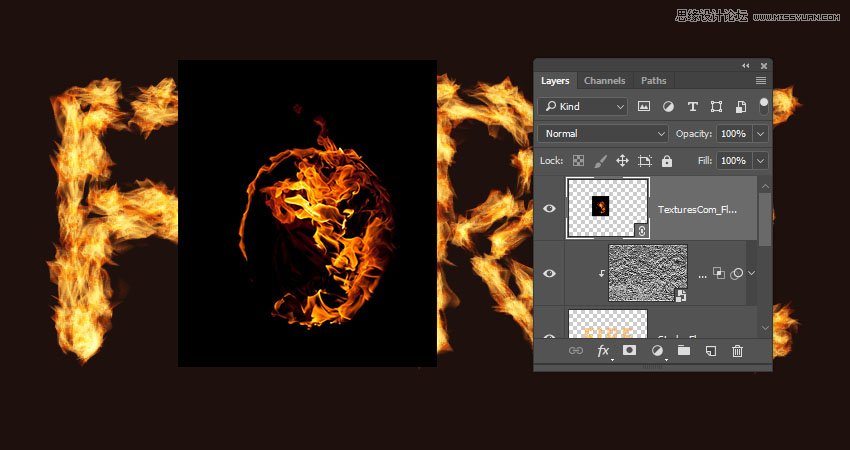
Step 2
Change the image layer's Blend Mode to Screen.
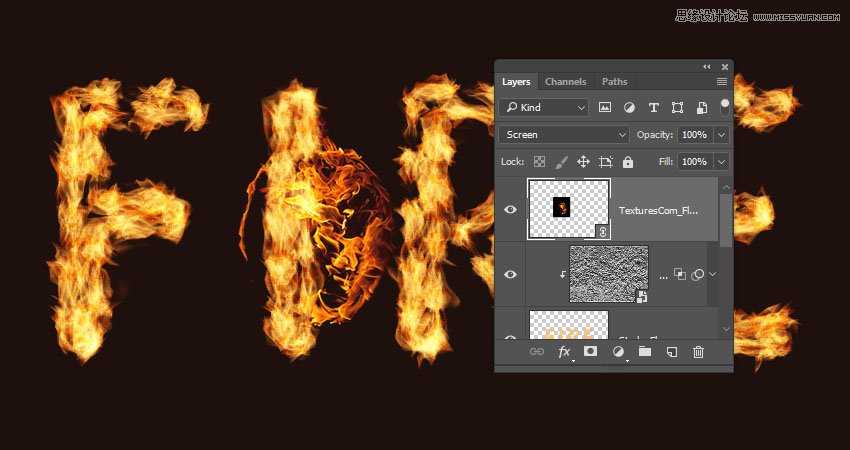
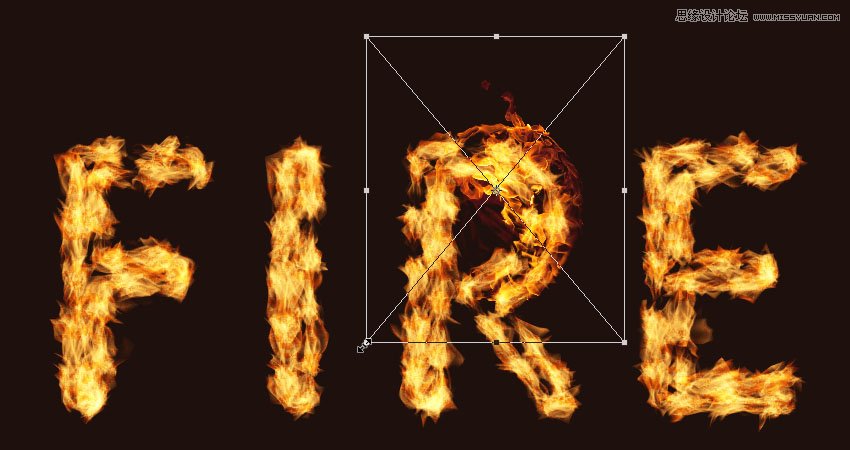
Step 3
Press Command-T to enter the Free Transform Mode, and move, resize, and rotate the image to place it over a part of the text.
Hit the Return key to commit the changes.
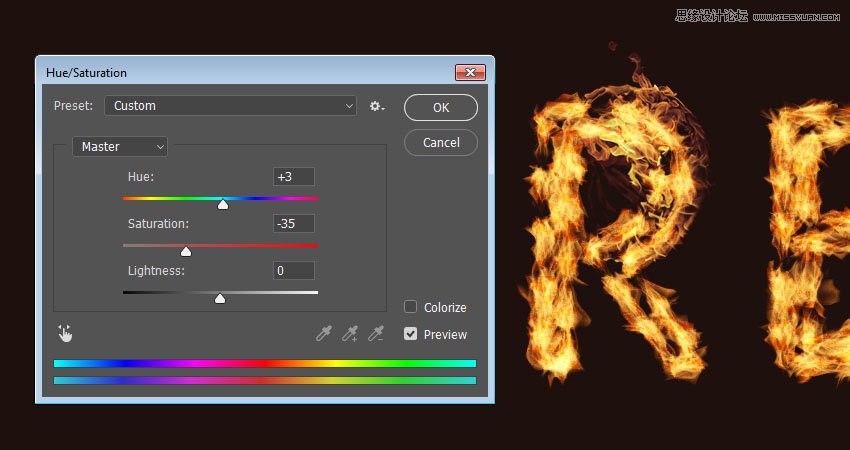
Step 4
Go to Image > Adjustments > Hue/Saturation, and change the Hue to 3 and the Saturation to -35, or use any other values to match the color of the image's flame with the stroke's flame color.
 爱你不要你
爱你不要你
-
 Photoshop制作复古风格的老照片效果【英】2018-04-23
-
 Photoshop合成长着创意大树的长颈鹿【英】2018-04-23
-
 Photoshop合成冰冻特效的金鱼场景【英】2018-02-10
-
 Photoshop合成梦幻风格的森林场景【英】2018-02-10
-
 Photoshop合成正在施法的巫师【英】2018-02-10
-
 Photoshop制作金属质感的3D立体字【英】2018-01-09
-
 Photoshop设计火焰燃烧艺术字教程【英】2018-01-09
-
 Photoshop制作复古花朵组成的艺术字【英】
相关文章3802018-01-09
Photoshop制作复古花朵组成的艺术字【英】
相关文章3802018-01-09
-
 Photoshop制作毛茸茸的圣诞节字体【英】
相关文章8882017-12-16
Photoshop制作毛茸茸的圣诞节字体【英】
相关文章8882017-12-16
-
 Photoshop合成创意的英雄战斗场景教程【英】
相关文章5802017-12-12
Photoshop合成创意的英雄战斗场景教程【英】
相关文章5802017-12-12
