Photoshop合成绚丽空中翱翔的仙子【英】(5)
文章来源于 photoshoptutorials,感谢作者 Jenny Le 给我们带来经精彩的文章!Step 35
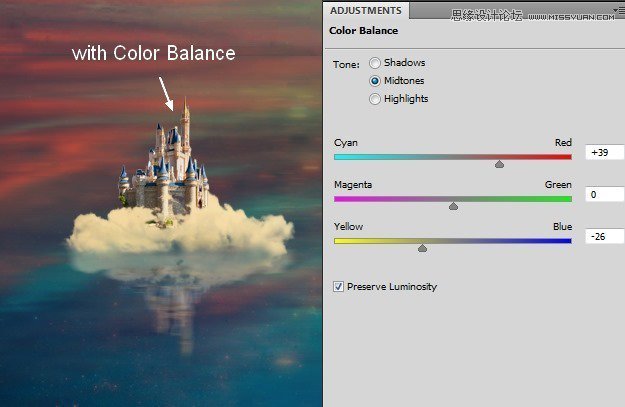
Group the castle and its reflection layers. Use Color Balance to add some warm color to them:
Step 36
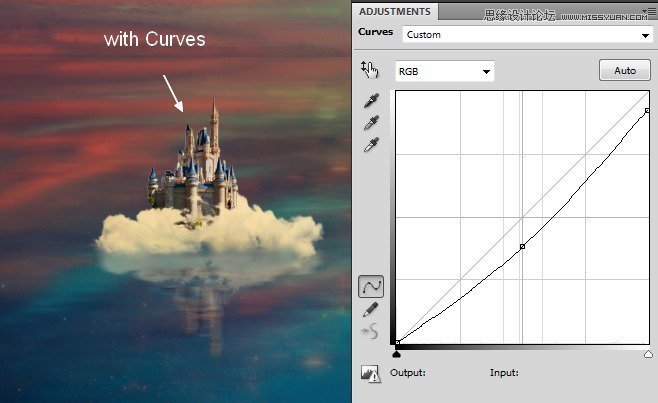
Use a Curves adjustment layer to darken them a little:
Step 37
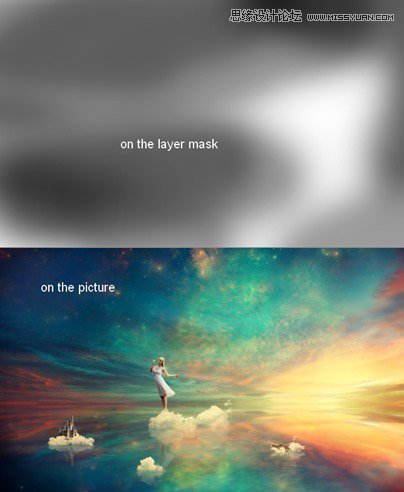
To change the contrast of the whole scene, make a new layer on the top . Active the Gradient Tool (G), choose Radial Gradient with default colors (black and white). Change the mode to Soft Light 100%:

Apply layer mask to refine the contrast of the image:
Step 38
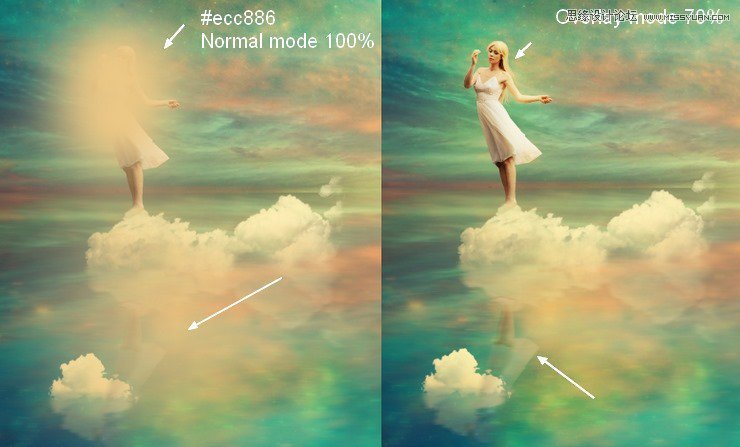
In this step I use a soft brush with the color #ecc886 to paint over the model and her reflection to give them a glowing effect. Change the mode to Overlay 70%:
Step 39
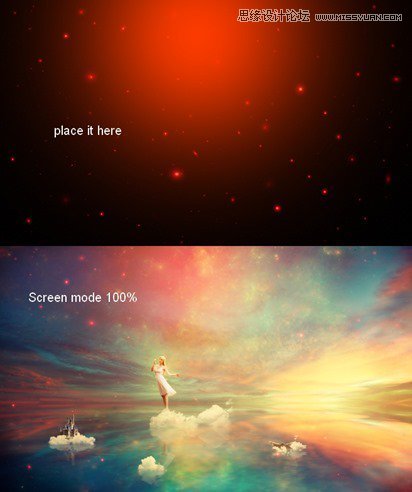
Open the light 1 images pack. I chose “starry4” to cover the working image then set the mode to Screen 100%:
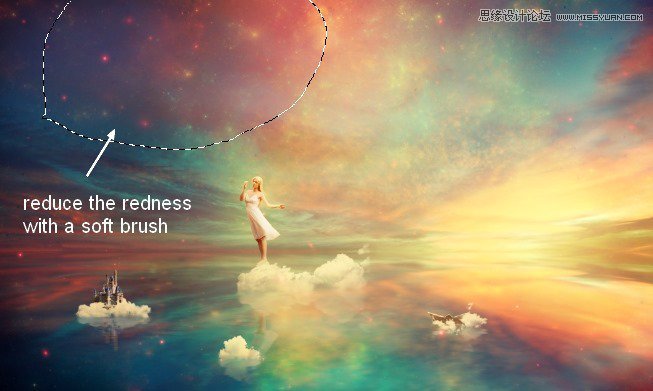
Use a soft brush with opacity about 20-25% to reduce the red effect on the top of the scene:
Step 40
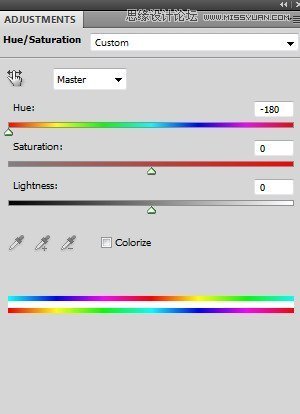
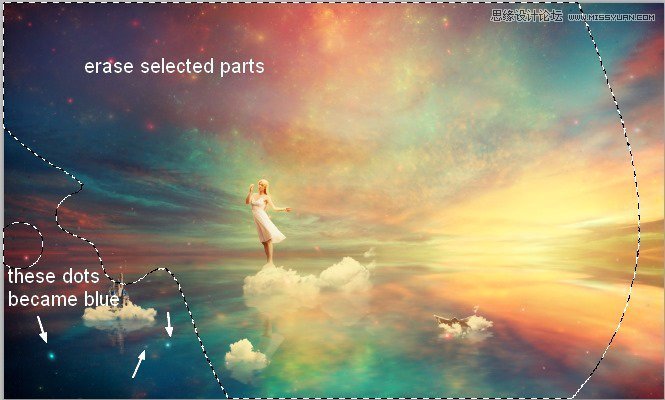
I used Hue/Saturation to turn some of the glowing dots on the lake into blue:
Erase the higher parts to keep their color as before adding Hue/Saturation:
Step 41
Duplicate this light layer and lower its position at the center. Apply layer mask to smoothly blend it with the scene: :
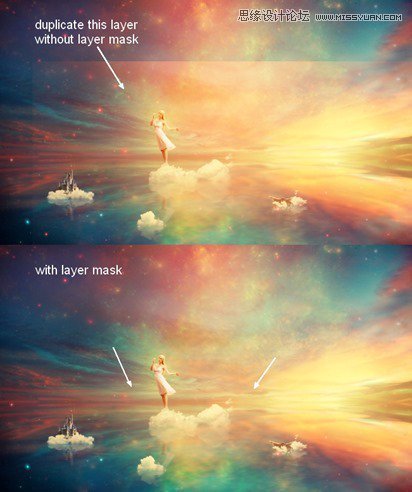
Step 42
After duplicating it again , move it to the top right and erase gently this effect with layer mask:

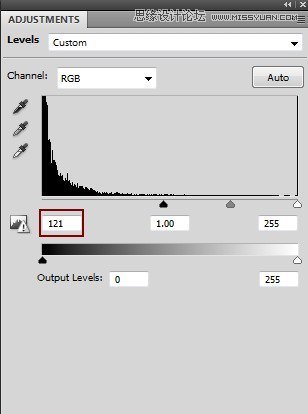
I used a Levels adjustment layer to reduce the saturation of this part:
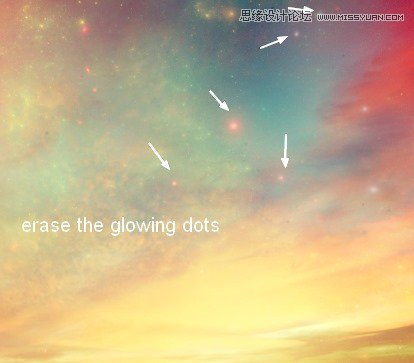
On its layer mask use a soft brush to erase some of the glowing dots :
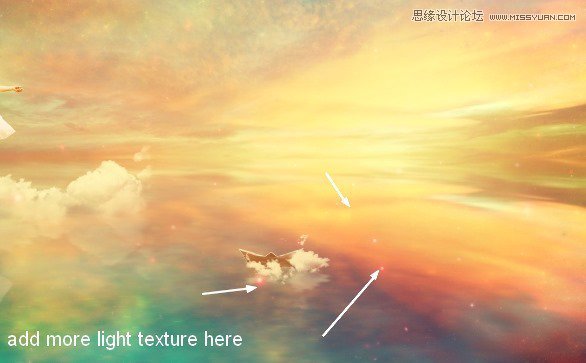
Step 43
Add this texture to the part around the paper boat:
 爱你不要你
爱你不要你
-
 Photoshop制作复古风格的老照片效果【英】2018-04-23
-
 Photoshop合成长着创意大树的长颈鹿【英】2018-04-23
-
 Photoshop合成冰冻特效的金鱼场景【英】2018-02-10
-
 Photoshop合成梦幻风格的森林场景【英】2018-02-10
-
 Photoshop合成正在施法的巫师【英】2018-02-10
-
 Photoshop制作金属质感的3D立体字【英】2018-01-09
-
 Photoshop设计火焰燃烧艺术字教程【英】2018-01-09
-
Photoshop制作复古风格的老照片效果【英】
相关文章11882018-04-23
-
Photoshop合成长着创意大树的长颈鹿【英】
相关文章13832018-04-23
-
Photoshop合成冰冻特效的金鱼场景【英】
相关文章34052018-02-10
-
 Photoshop制作黄金质感立体字【英】
相关文章7422018-02-10
Photoshop制作黄金质感立体字【英】
相关文章7422018-02-10
-
 Photoshop制作惊艳大气的3D立体字
相关文章14682018-02-10
Photoshop制作惊艳大气的3D立体字
相关文章14682018-02-10
-
Photoshop合成梦幻风格的森林场景【英】
相关文章24492018-02-10
-
Photoshop合成正在施法的巫师【英】
相关文章8372018-02-10
-
 Photoshop制作复古双重曝光字体
相关文章6532018-01-09
Photoshop制作复古双重曝光字体
相关文章6532018-01-09
