Photoshop合成绚丽空中翱翔的仙子【英】(3)
文章来源于 photoshoptutorials,感谢作者 Jenny Le 给我们带来经精彩的文章!Step 16
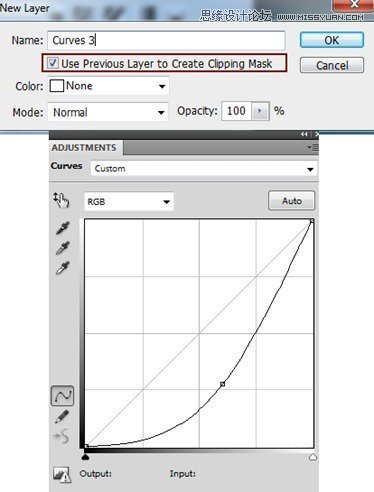
I used a Curves adjustment layer with Clipping Mask to darken a cloud a little:
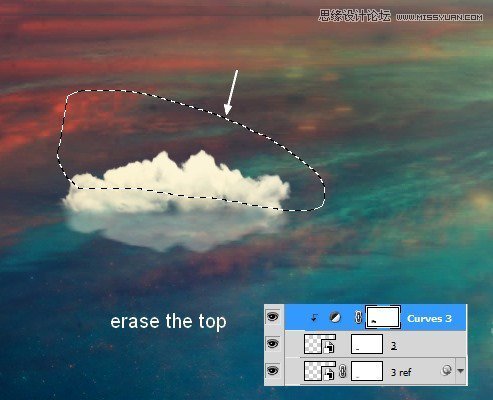
On this Curves layer mask use a soft brush to erase the top to keep it a bit darker than the bottom:
Step 17
Group all the cloud layers and their reflection ones. Change the mode of this group to Normal 100%. Add a Selective Color adjustment layer to add some yellow to the white clouds:
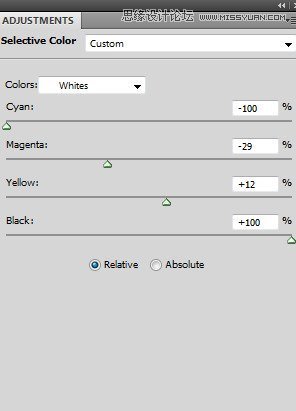
On its layer mask, use a soft brush to reduce the yellow effect on the cloud at the left edge:

Step 18
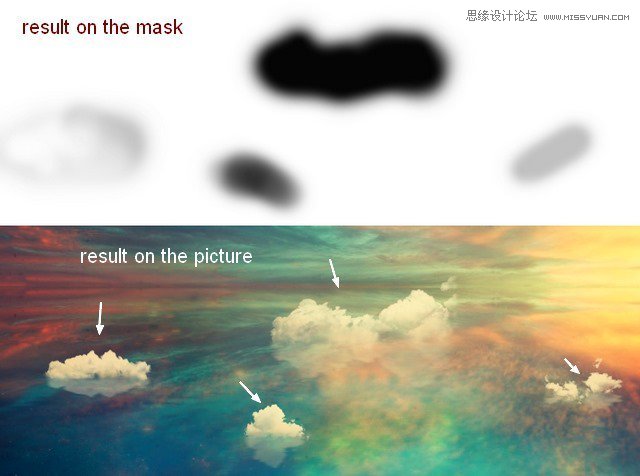
I used a Curves adjustment layer to darken and change the color of the clouds:
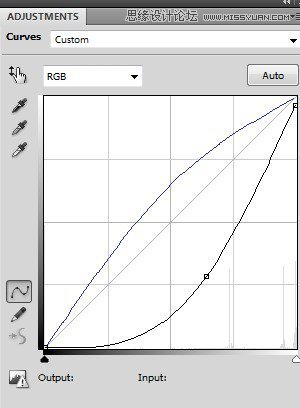
Apply brush masking to refine the light on them. You can see the result on the mask and on the picture:
Step 19
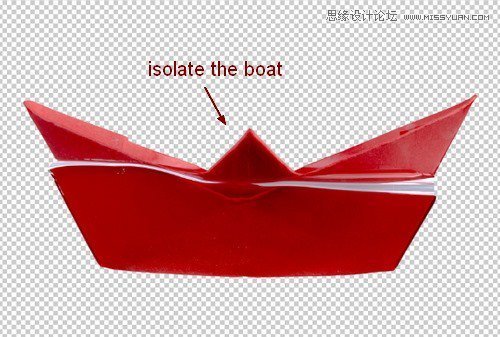
Open the paper boat stock and extract it from the background.
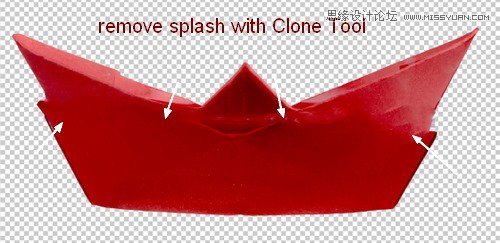
Make a new layer and active the Clone Tool (S). Use this tool to remove the splash on the boat:
Step 20
Hide the background layer. Hit Cmd/Ctrl+Option/Alt+Shift+E to merge the extracted boat and the clone layers. To reform this boat, use the Lasso Tool to choose the bottom of the boat, right click it, choose Layer via Cut:
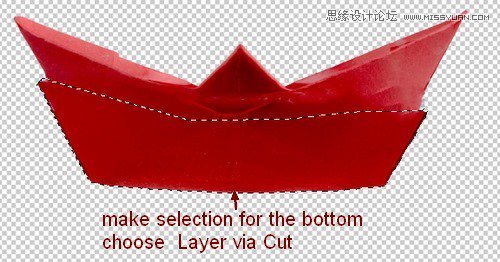
Use the Free Transform Tool (Cmd/Ctrl+T) to scale this bottom down to fit the top of the boat:

Merge all transparent layers.
Step 21
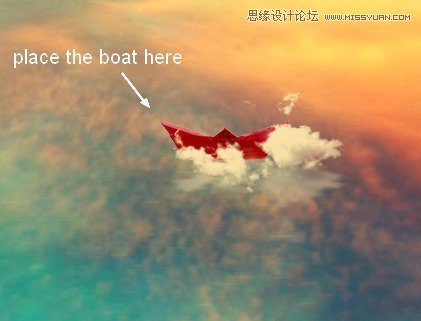
Place the merged boat at the cloud on the right edge. I set this layer under the clouds group:
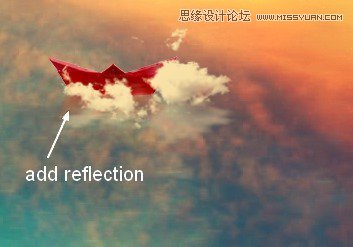
Make reflection for this boat as done with another elements:
Step 22
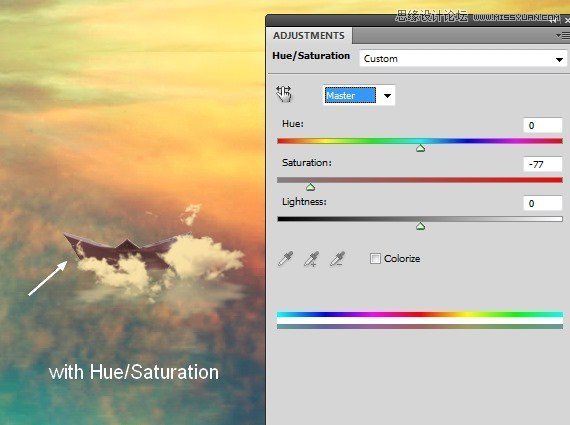
Group the boat and its reflection layers. I used a Hue/Saturation adjustment layer to reduce the saturation of the boat:
Step 23
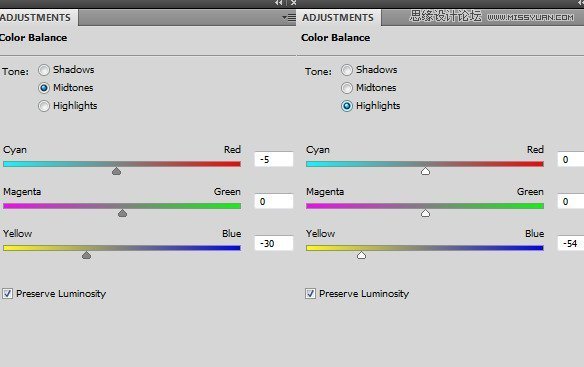
Add some vibrant color to the boat with Color Balance:
Step 24
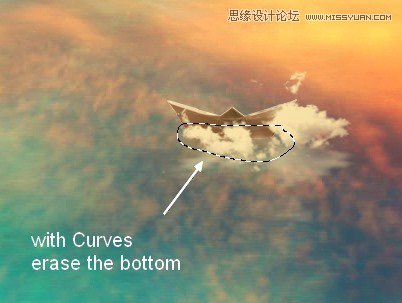
I used a Curves adjustment layer to brighten the top of the boat:
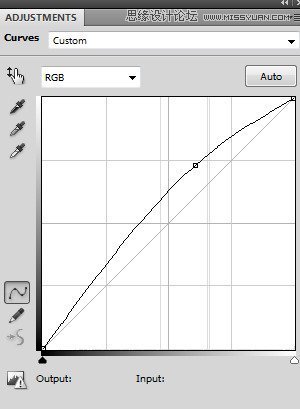
On this Curves layer mask erase the bottom with a soft black brush as it should be darker than the top.
Step 25
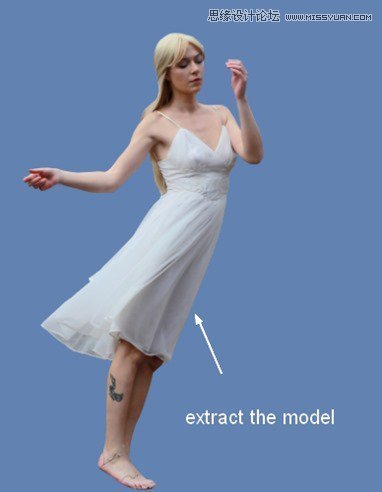
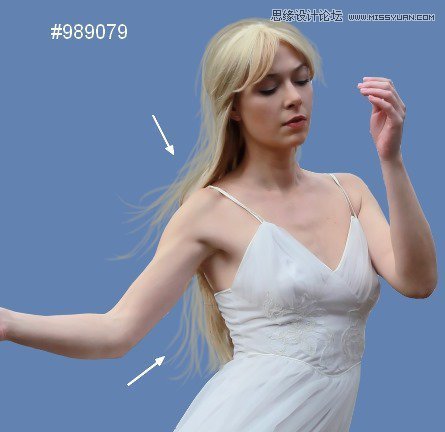
Open the model stock. Use your own method to extract her from the background.
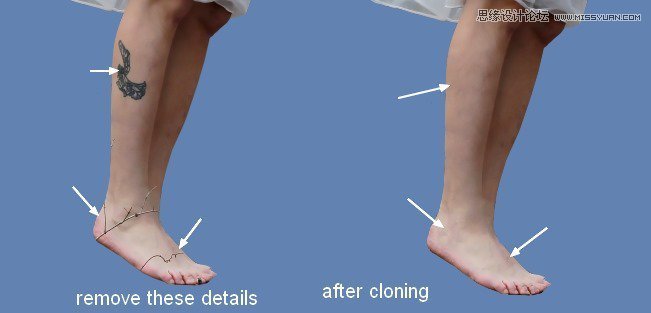
Make a new layer and use the Clone Tool to remove the tattoo and branches on her legs:
Step 26
Make a new layer. Active the Brush Tool with the basic ones and color #989079. Press F5 to change the settings of this brush:
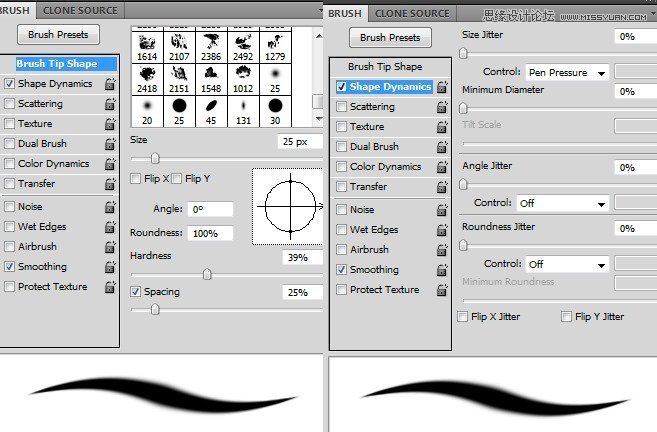
Use this brush to paint flying hair strands for the model.
Make another layer and pick the lighter color (#deddc8) for this brush. Paint more hair for her:
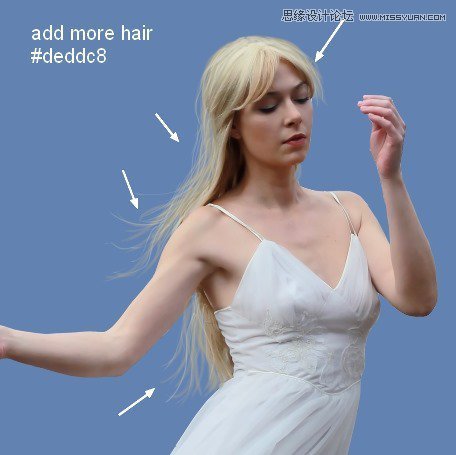
Merge the model, clone and hair ones.
 爱你不要你
爱你不要你
-
 Photoshop制作复古风格的老照片效果【英】2018-04-23
-
 Photoshop合成长着创意大树的长颈鹿【英】2018-04-23
-
 Photoshop合成冰冻特效的金鱼场景【英】2018-02-10
-
 Photoshop合成梦幻风格的森林场景【英】2018-02-10
-
 Photoshop合成正在施法的巫师【英】2018-02-10
-
 Photoshop制作金属质感的3D立体字【英】2018-01-09
-
 Photoshop设计火焰燃烧艺术字教程【英】2018-01-09
-
Photoshop制作复古风格的老照片效果【英】
相关文章11882018-04-23
-
Photoshop合成长着创意大树的长颈鹿【英】
相关文章13832018-04-23
-
Photoshop合成冰冻特效的金鱼场景【英】
相关文章34052018-02-10
-
 Photoshop制作黄金质感立体字【英】
相关文章7422018-02-10
Photoshop制作黄金质感立体字【英】
相关文章7422018-02-10
-
 Photoshop制作惊艳大气的3D立体字
相关文章14682018-02-10
Photoshop制作惊艳大气的3D立体字
相关文章14682018-02-10
-
Photoshop合成梦幻风格的森林场景【英】
相关文章24492018-02-10
-
Photoshop合成正在施法的巫师【英】
相关文章8372018-02-10
-
 Photoshop制作复古双重曝光字体
相关文章6532018-01-09
Photoshop制作复古双重曝光字体
相关文章6532018-01-09
