Illustrator设计一个色彩斑澜的U盘(3)
文章来源于 活力盒子,感谢作者 lucky翻译 给我们带来经精彩的文章!Step 24
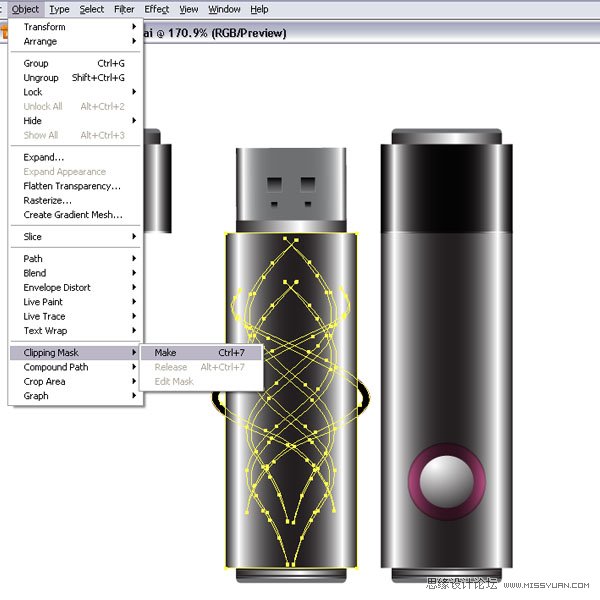
Let’s apply our tattoo style design. Place your tattoo design on top of the flash stick. Then make a copy of the bigger shape and place it on top. Select both, the shape and the tattoo and go to Object > Clipping Mask > Make (Command + 7). This will mask the tattoo design to the flash stick outline.
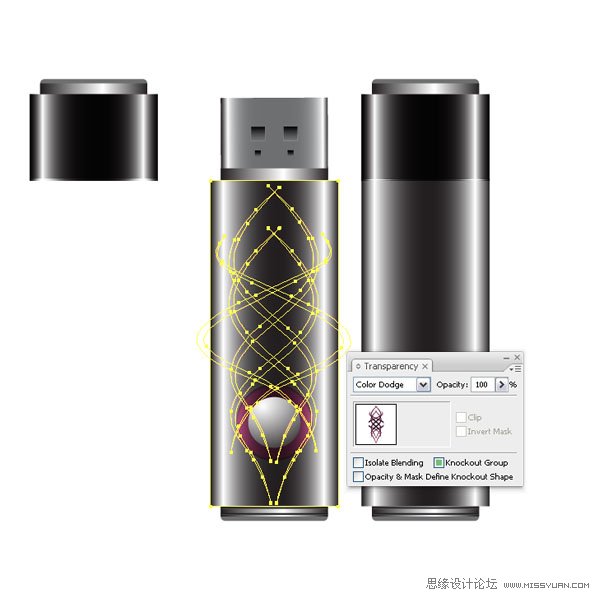
Set the Layer Mode to Color Dodge. Make sure that the circle shapes are on top. I placed another tattoo shape higher and applied another Clipping Mask. I set the Layer Mode to Normal.
24. 现在应用印花设计图案。把印花设计图案放在U盘的上面,然后复制一个大的矩形形状,把它放在印花设计图案的上面。同时选中这2个形状,然后执行对象菜单>剪切蒙版>建立(Ctrl+7)。这样印花设计图案就正好剪切到U盘的外观轮廓。
Step 25
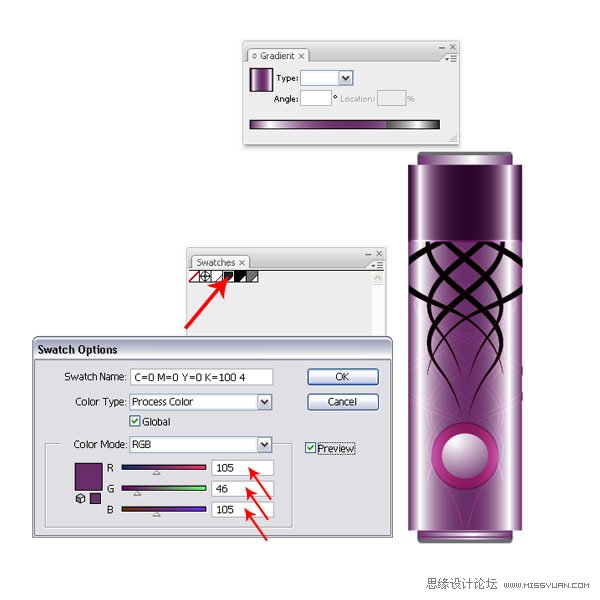
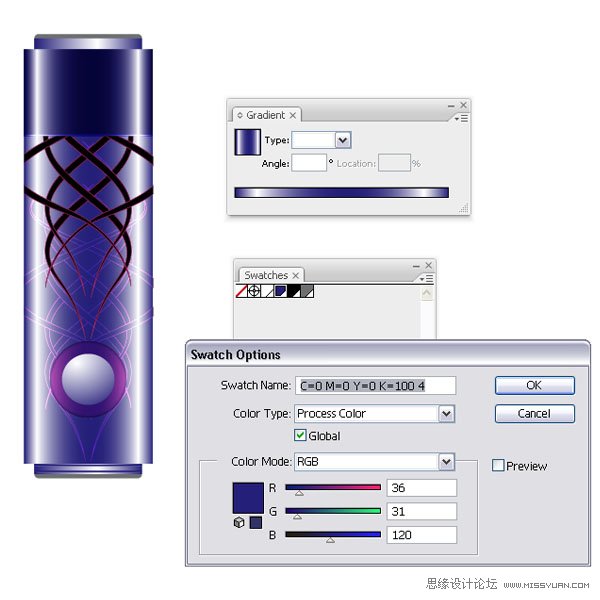
Now we will create another flash stick with different colors. Select your flash stick shapes (you might want to group them). Next, open another document, and paste the shapes onto the artboard. Then open the Swatch Palette and double-click the dark gray color swatch.
Since I have the document setup in RGB, I have three color sliders. I changed them to the settings you can see in the image below. This will give me a pinkish color. Make sure that you have the Preview selected, that way while you change the color, you can see how the color is instantly applied to your shapes. I changed the cap back to black by dragging the black color swatch back onto the gradient sliders. You can choose whatever color you’d like – experiment a little.
25. 现在我们绘制另一个不同色彩的U盘。选择U盘形状(你可以把这些形状编为一组)。然后,新建文档,把U盘形状粘贴到画板上。然后打开色板调板,在深灰色色板上双击。
当我把文档设置为RGB颜色模式时,我就有了3个颜色块,我把它们更改为如下图所示的设置。按照下图的设置,你会得到一个略带桃红的颜色,确认你选中了预览。当你用这个方法更改颜色时,你会看到颜色是如何快速地被应用到了形状上。然后,恢复U盘盖子的颜色,把黑色色板拖移到渐变滑块上。你可以选择任何你喜欢的颜色-多做一些尝试。
Step 26
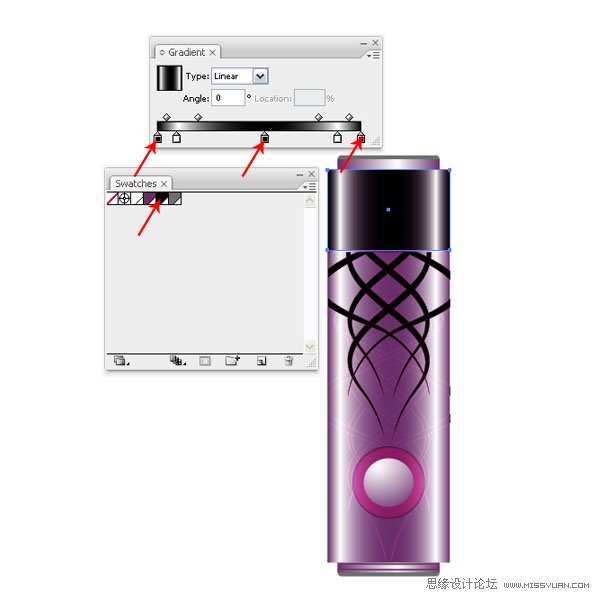
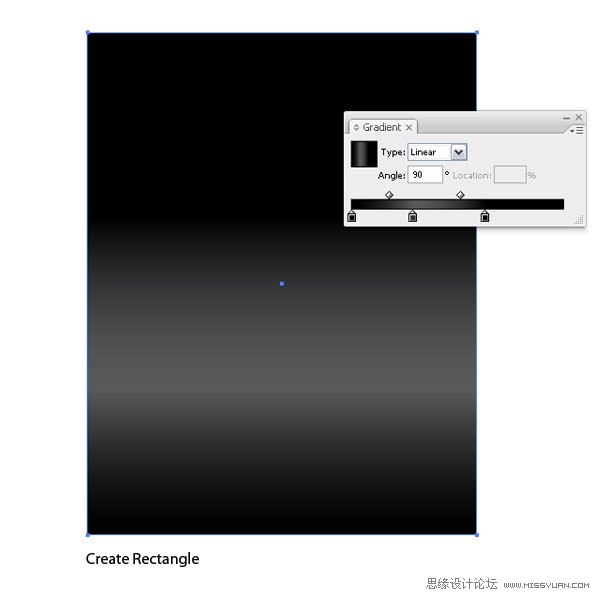
Lets’ create the final image. Create a rectangle in a new document or the just opened one. Fill it with a linear dark gray gradient.
26. 创建最后的图形。新建文档或者就用打开的文档,绘制一个矩形,填充深灰色线性渐变。
Step 27
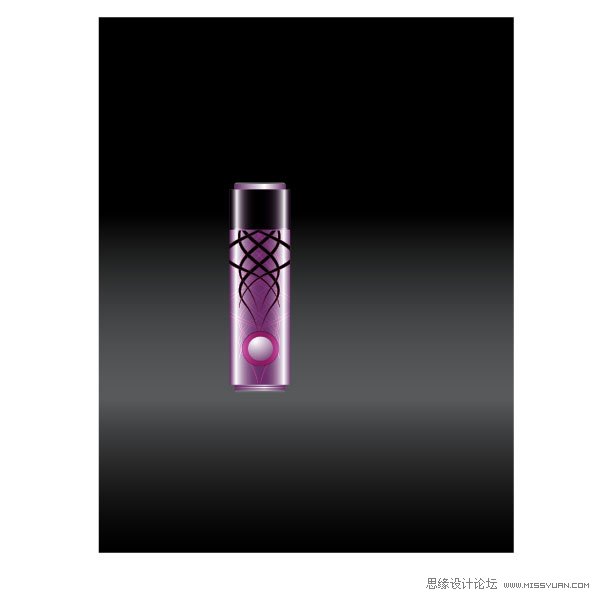
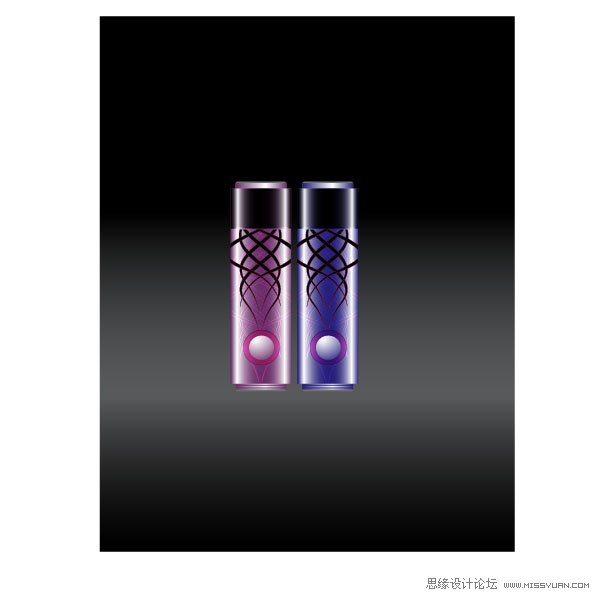
Select your colored flash stick and place it above the background.
27. 选择彩色的U盘,把它放在背景层的上面。
Step 28
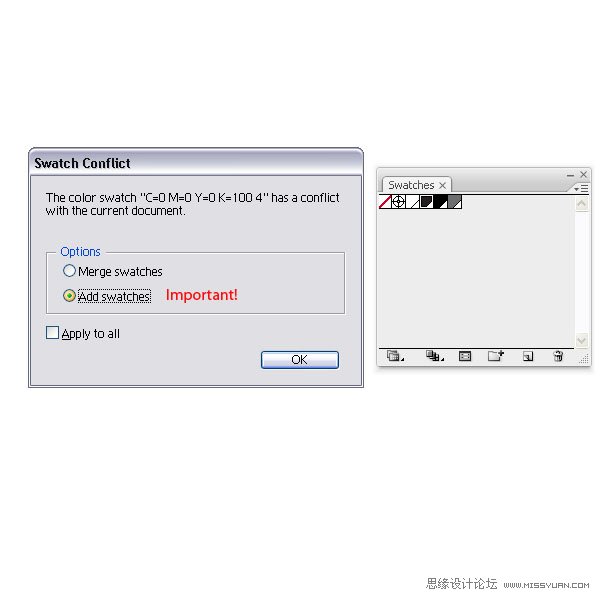
Now, assuming that you created more colored flash sticks and you copy them onto the artboard, a pop up window might appear, which says that there is a Swatch Conflict. Choose in the Options Add swatches, if not you will loose your colors since they think that they share a color swatch. The new color swatches will be added to your Swatch Palette.
28. 现在,假如你绘制了很多的彩色U盘,然后复制在了画板上,这个时候,就会显示弹出窗口,告诉你你遇到了色板冲突的问题,选择“添加色板”选项。如果你不这么做的话,你就会丢失掉一些颜色,因为系统会认为它们共享的是同一个色板。新的色板会添加进色板调板中。

Step 29
Place your second flash stick next to the other.
29. 将第2个U盘放到第1个的旁边。
Step 30
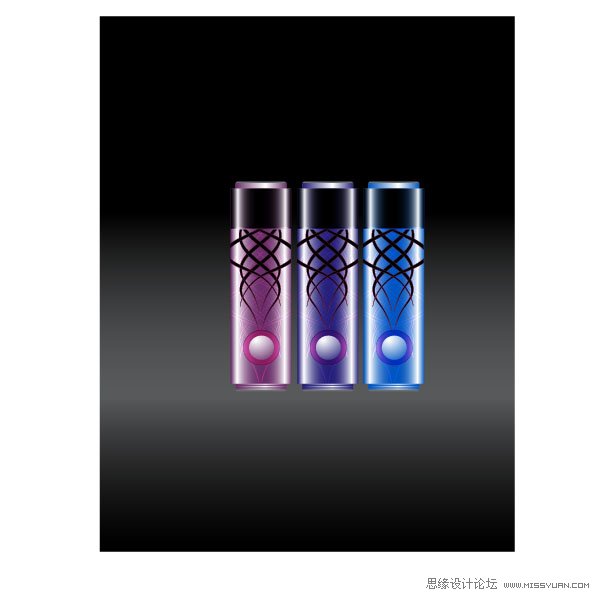
Copy the third onto the artboard and place all of them side by side.
30. 复制第3个U盘到画板上,然后把它们排在一起。
Step 31
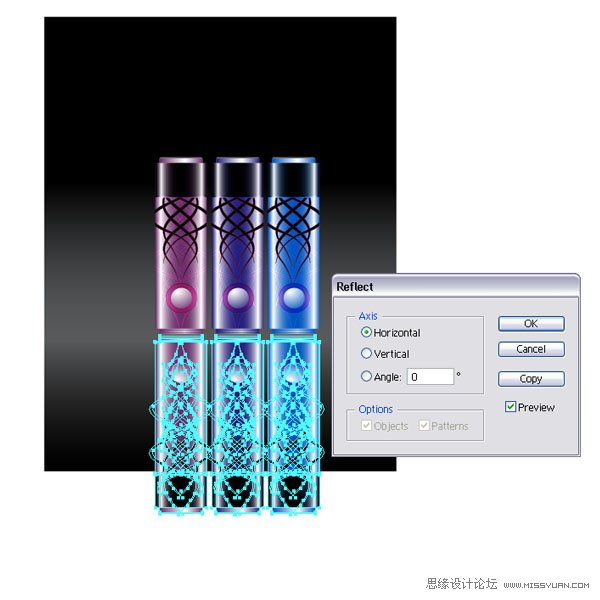
Select all three flash sticks, duplicate them, and reflect them on the horizontal axis (Object > Arrange > Reflect).
31. 选择这3个U盘,然后复制它们,然后水平镜像对称(对象菜单>变换>对称)。
Step 32
Select them and apply an Opacity Mask.
32. 在U盘副本的上面,绘制一个矩形,然后选中矩形和U盘副本,建立不透明剪切蒙版。

Conclusion
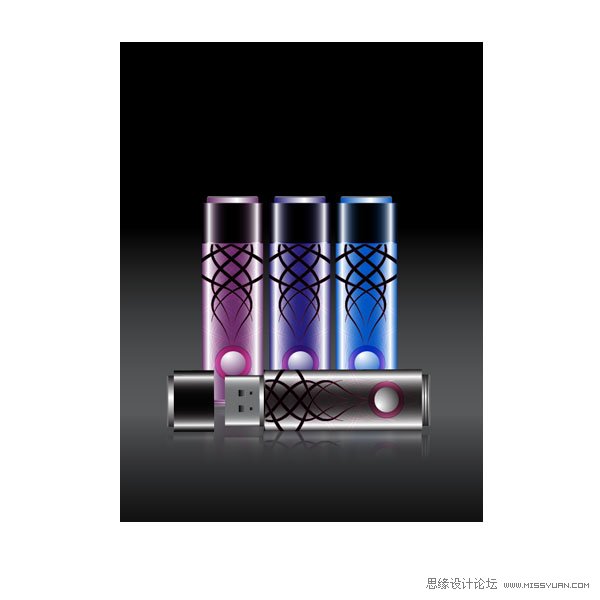
Here is my final image. I place the gray flash stick with the open cap in front of the others and applied an Opacity Mask again. I hope this tutorial gave a little insight into Global Colors. If you ever have a bigger project and you set it up with Global Colors, you can easily change the look of your design on the fly.
尾声
下图就是成品图了。我把打开盖子的灰色U盘放在其它形状的前面,然后也是建立不透明剪切蒙版。我希望这篇教程能让你对全局色有一个深入的了解。如果你要做一个更大的工程的话,你就要设置全局色了,这样你就可以很容易而且很快地更改你的设计了。
 情非得已
情非得已
-
 Illustrator绘制扁平化风格的建筑图2020-03-19
-
 Illustrator制作扁平化风格的电视机2020-03-18
-
 Illustrator绘制渐变风格的建筑场景插画2020-03-12
-
 佩奇插画:用AI绘制卡通风格的小猪佩奇2019-02-26
-
 插画设计:AI绘制复古风格的宇航员海报2019-01-24
-
 房屋插画:AI绘制圣诞节主题的房屋插画2019-01-21
-
 圣诞插画:AI绘制简约风格圣诞节插画2019-01-21
-
 灯塔绘制:AI绘制的灯塔插画2019-01-21
-
 时尚船锚:AI绘制鲜花装饰的船锚图标2019-01-18
-
 扁平宝箱图形:AI绘制游戏中常见的宝箱2019-01-18
-
 Illustrator制作复古风格的邮票效果2021-03-10
-
 Illustrator设计简洁的乒乓球主题页面
相关文章8532020-09-28
Illustrator设计简洁的乒乓球主题页面
相关文章8532020-09-28
-
 Illustrator绘制扁平化风格的室内效果图
相关文章15042020-03-19
Illustrator绘制扁平化风格的室内效果图
相关文章15042020-03-19
-
 Illustrator快速的设计复杂的箭头
相关文章2542020-03-19
Illustrator快速的设计复杂的箭头
相关文章2542020-03-19
-
 Illustrator设计紫色立体效果的企业LOGO
相关文章9252020-03-19
Illustrator设计紫色立体效果的企业LOGO
相关文章9252020-03-19
-
 文字设计:用AI制作趣味剪影文字效果
相关文章12412019-08-15
文字设计:用AI制作趣味剪影文字效果
相关文章12412019-08-15
-
 标志设计:用AI制作2.5D风格的LOGO图标
相关文章26042019-04-16
标志设计:用AI制作2.5D风格的LOGO图标
相关文章26042019-04-16
-
 标志设计:用AI设计渐变风格的立体标志
相关文章18552019-03-19
标志设计:用AI设计渐变风格的立体标志
相关文章18552019-03-19
-
 立体图形:用AI的3D功能设计3D图形
相关文章11162019-03-19
立体图形:用AI的3D功能设计3D图形
相关文章11162019-03-19
