Illustrator设计一个色彩斑澜的U盘
文章来源于 活力盒子,感谢作者 lucky翻译 给我们带来经精彩的文章!In this tutorial, we’ll explain how to create a semi-realistic flash stick with gradients and simple shapes. We will make our own custom brush to create tattoo style swooshes. Also, we’ll review how to use Global Colors in Illustrator, which allows us to flexibly change the colors of an object on the fly.
本教程,我们会教你使用渐变和简单的形状是如何绘制一个半写实的闪存盘的。制作U盘上的印花图案我们会用到自己创建的自定义笔刷。我们还会教你如何使用Illustrator中的全局色,以使我们非常快地更改一个对象的颜色。
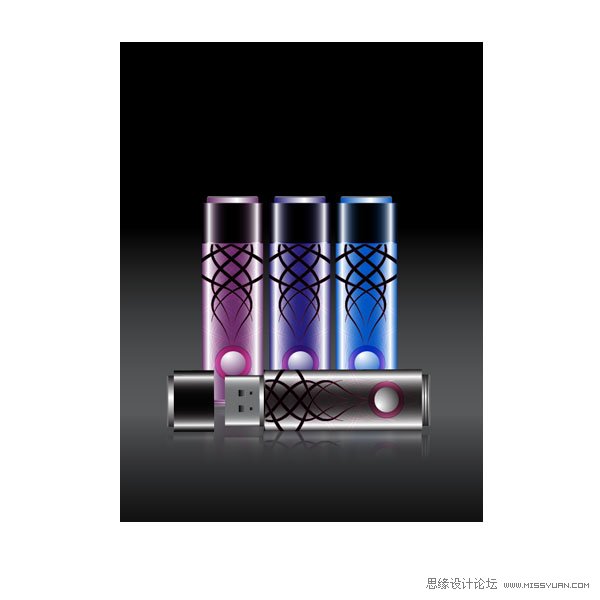
Final Image Preview
To begin with let’s have a look at the image we’ll be creating.
成品图预览
首先让我们先来看一下我们将要绘制的成品图。
Step 1
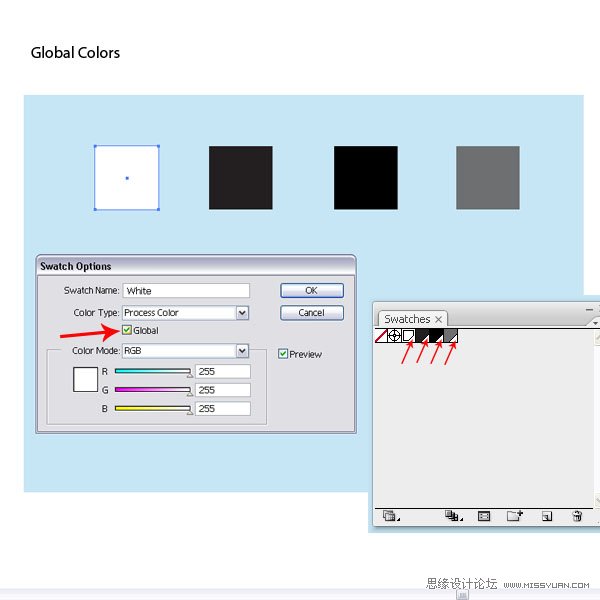
Before we begin, we will have a look at the Swatch Palette. We need to set up our Global Colors right from the start. I picked four colors as a base. I chose a white, black and two grays. Once I added them in my Swatch Palette, I deleted all other color swatches.
Now let’s set up the Global Colors. Double-click on the Color Swatch. In the Swatch Options Menu, select the option Global. Leave the Color Type at Process Color, then click OK. The Color Swatch now has a small white triangle in the bottom right corner. This indicates that the color is now a Global Color. If we apply a Global Color to any object or path, we can later change the color on the fly and it will be applied where the Global Color was added.
1. 在我们开始教学之前,我们先来看一下色板。首先,我们先要设置全局色。我选了4种颜色作为基色,我选了白色,黑色和2个灰色。当我们把这4种颜色拖进色板调板之后,我就可以删除其它不需要的色板了。
现在,我们开始设置全局色。在色板上双击,然后在色板选项窗口中,选择“全局色”选项。颜色的类型保留为印刷色,然后点确定。现在色板的右下角有一个小的白色的三角形,这表示这个颜色现在是全局色了。如果我们把全局色应用到某个对象或者路径时,我们在之后还可以很快地更改原来的颜色,并且应用的还是新增的全局色。
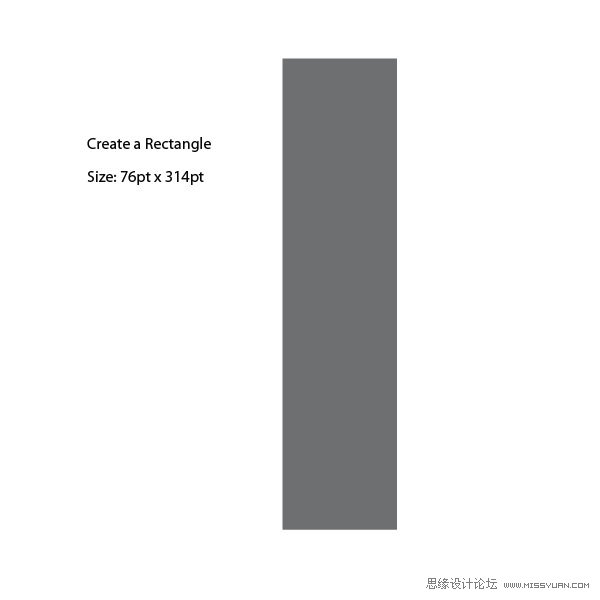
Step 2
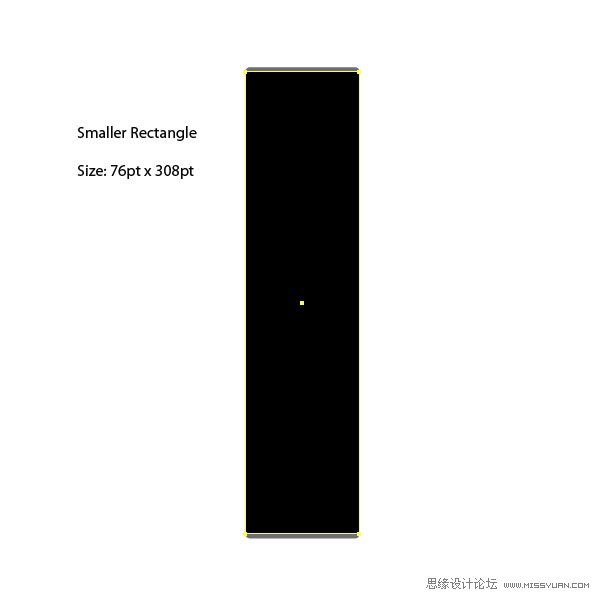
Create a rectangle with the Rectangle Tool (M). Use the size indicated in the image below.
2. 使用矩形工具(M)绘制一个矩形,使用的大小如下图所示。
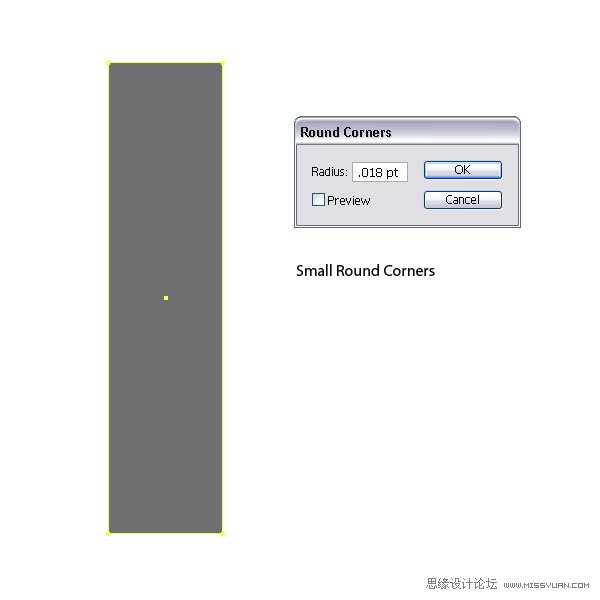
Step 3
Let’s start creating. Select the object and go to Effect > Stylize > Round Corners and apply a tiny amount to it of .018pt. This will give us small rounded corners.
3. 我们继续绘制。选择矩形对象,然后执行效果菜单>风格化>圆角,圆角半径:0.018pt。
Step 4
Create another rectangle on top of the other one, and use the size as indicated below.
4. 在矩形的上面绘制另一个矩形,使用的大小如下所示。
译者提示:可以Ctrl+C,Ctrl+F复制第3步的矩形,然后在变换调板中点“约束宽度和高度比例”的图标,在高度字段框内输入数值。这样第5步也可省略。
Step 5
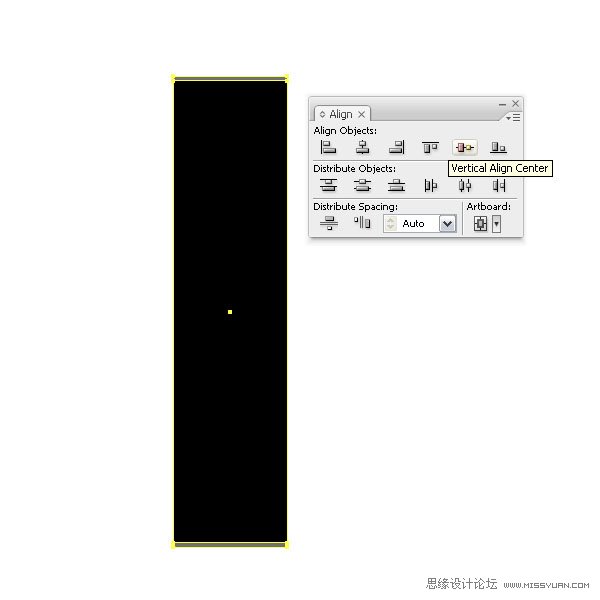
Select both rectangles and align them centered, both horizontally and vertically.
5. 选择这2个对象,居中对齐。
Step 6
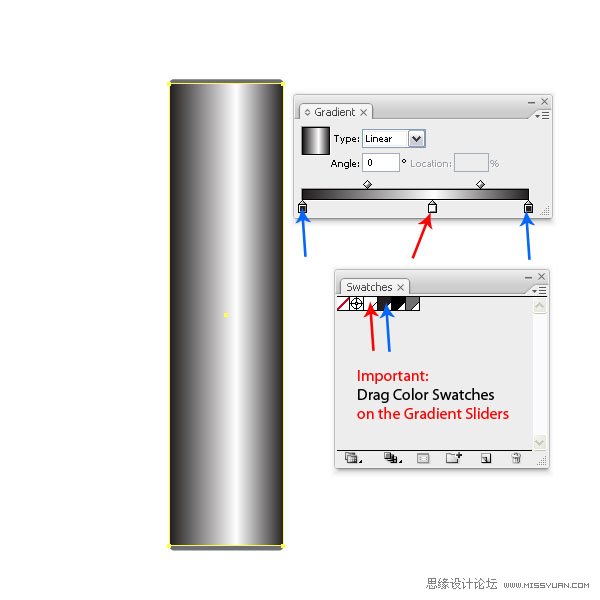
Apply a linear gradient to the second shape. We have to make sure that we use the Global Colors that we have set up. To do so, drag the desired color swatch onto the gradient slider. If one is missed, the color change won’t be applied.
6. 第2个矩形应用线性渐变。我们必须要确定我们使用的是我们之前设置的全局色。选中矩形,切到渐变调板,把想要的色板拖移到渐变的滑动块上。如果没有选中对象的话,渐变将不起作用。
Step 7
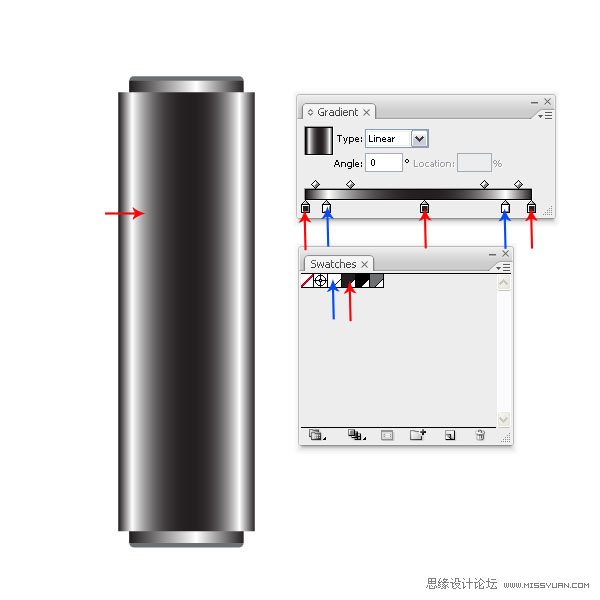
Create another rectangle on top and use the size indicated below.
7. 在上面绘制另一个矩形,使用大小如下所示。

Step 8
Apply yet another linear gradient and make sure that you use Global Colors. Align the shape centered to the others.
8. 再应用另一个线性渐变,确定你使用的是全局色。然后所有形状居中对齐。
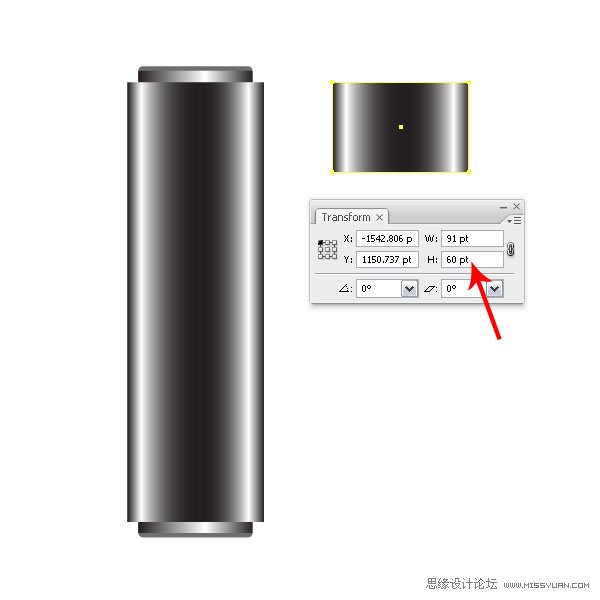
Step 9
Make a copy of the newly created shape, then transform it to the sizes 91pt by 60pt. You can do so using the Transform Palette. Just type in the numbers while the selection is active.
9. 再制作一个刚刚绘制的矩形的副本,然后更改它的大小为91*60pt,你可以使用变换调板来更改,只要选中对象,然后输入数值就可以。
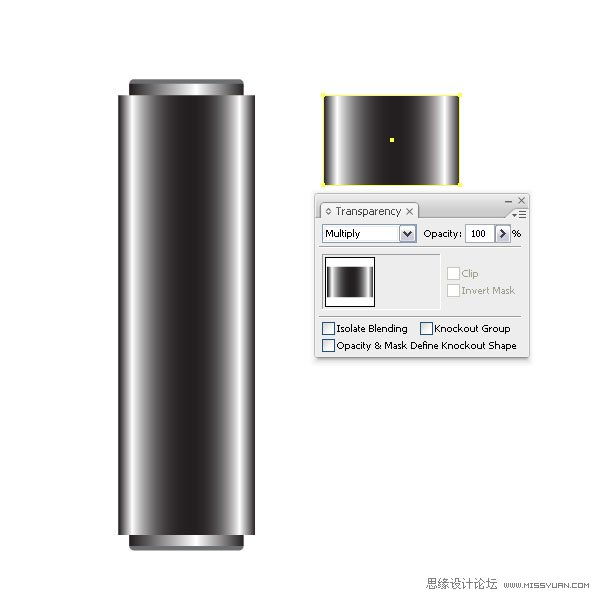
Step 10
Set the Layer mode of the small rectangle to Multiply.
10. 这个小矩形的混合模式设置为“正片叠底”。
图示Transparency:透明度调板
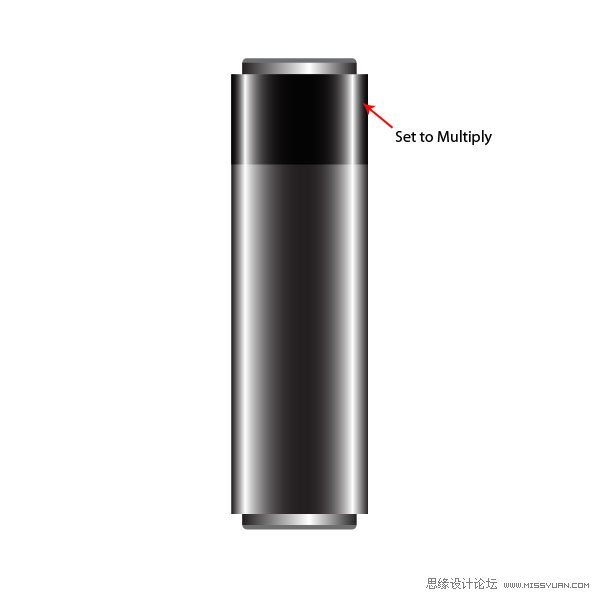
Step 11
Align it with the bigger rectangle along the top and vertically in the center. This will be our cap.
11. 选中小矩形和大矩形,然后在大矩形上点一下(译者提示:在大矩形上点一下,目的是为了在执行对齐时以大矩形为参考对齐对象),切到对齐调板,点“垂直顶对齐”按钮。这就是U盘的盖子了。
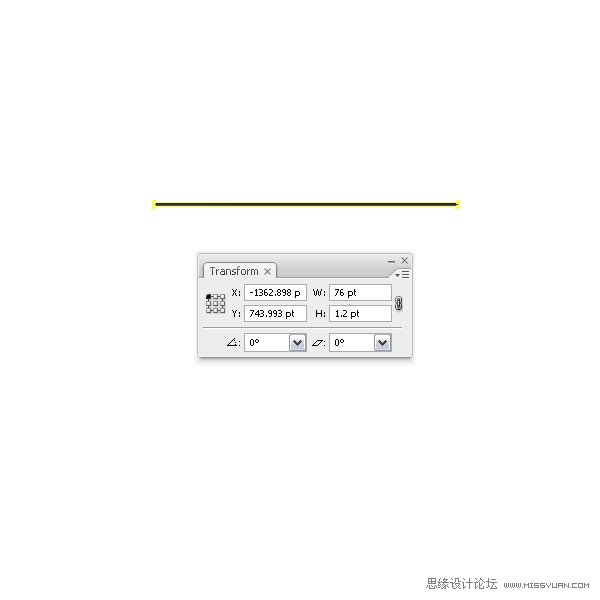
Step 12
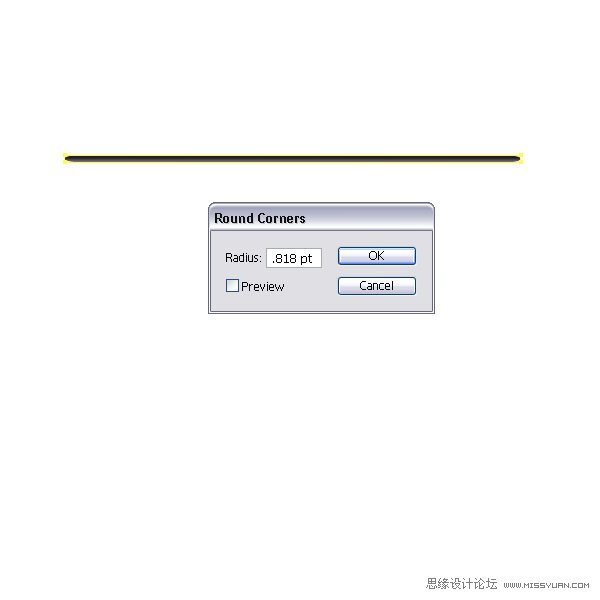
Create a tiny long rectangle with the sizes 76pt x 1.2pt and fill it with a gray linear gradient. Go to Effect > Stylize > Round Corners and choose a radius of .818pt.
12. 绘制一个76*1.2pt的扁长矩形,填充灰色线性渐变,然后执行效果菜单>风格化>圆角,输入圆角半径:0.818pt。
Step 13
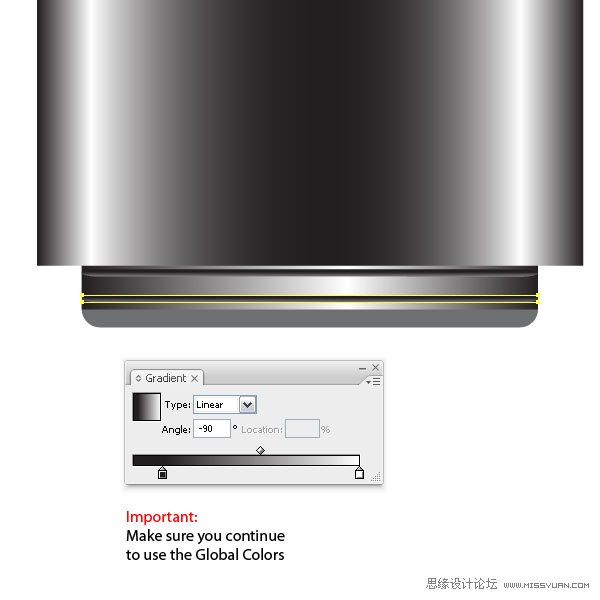
Make a copy of the shape, align them and place them on the bottom of the flash stick shape. They will be a small accent to the bottom part. Again, make sure that the gradients have Global Colors set.
13. 绘制一个扁长矩形的副本,然后使它们和其它形状对齐,然后把它们移到U盘的最下面。它们就是U盘底下小的凸起部分。同样的,确定一下渐变上的颜色使用的是全局色。
 情非得已
情非得已
-
 Illustrator绘制扁平化风格的建筑图2020-03-19
-
 Illustrator制作扁平化风格的电视机2020-03-18
-
 Illustrator绘制渐变风格的建筑场景插画2020-03-12
-
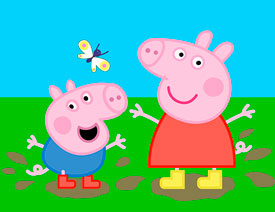 佩奇插画:用AI绘制卡通风格的小猪佩奇2019-02-26
-
 插画设计:AI绘制复古风格的宇航员海报2019-01-24
-
 房屋插画:AI绘制圣诞节主题的房屋插画2019-01-21
-
 圣诞插画:AI绘制简约风格圣诞节插画2019-01-21
-
 灯塔绘制:AI绘制的灯塔插画2019-01-21
-
 时尚船锚:AI绘制鲜花装饰的船锚图标2019-01-18
-
 扁平宝箱图形:AI绘制游戏中常见的宝箱2019-01-18
-
 Illustrator制作复古风格的邮票效果2021-03-10
-
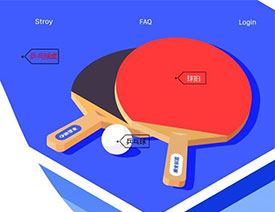 Illustrator设计简洁的乒乓球主题页面
相关文章8532020-09-28
Illustrator设计简洁的乒乓球主题页面
相关文章8532020-09-28
-
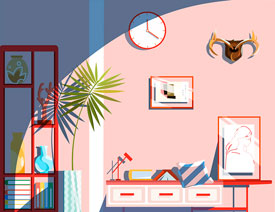 Illustrator绘制扁平化风格的室内效果图
相关文章15042020-03-19
Illustrator绘制扁平化风格的室内效果图
相关文章15042020-03-19
-
 Illustrator快速的设计复杂的箭头
相关文章2542020-03-19
Illustrator快速的设计复杂的箭头
相关文章2542020-03-19
-
 Illustrator设计紫色立体效果的企业LOGO
相关文章9252020-03-19
Illustrator设计紫色立体效果的企业LOGO
相关文章9252020-03-19
-
 文字设计:用AI制作趣味剪影文字效果
相关文章12412019-08-15
文字设计:用AI制作趣味剪影文字效果
相关文章12412019-08-15
-
 标志设计:用AI制作2.5D风格的LOGO图标
相关文章26042019-04-16
标志设计:用AI制作2.5D风格的LOGO图标
相关文章26042019-04-16
-
 标志设计:用AI设计渐变风格的立体标志
相关文章18552019-03-19
标志设计:用AI设计渐变风格的立体标志
相关文章18552019-03-19
-
 立体图形:用AI的3D功能设计3D图形
相关文章11162019-03-19
立体图形:用AI的3D功能设计3D图形
相关文章11162019-03-19
