Photoshop合成恐怖特效的万圣节人像【英】(4)
文章来源于 photoshoptutorials,感谢作者 Andrea Garcia 给我们带来经精彩的文章!Step 22- Working with Colors
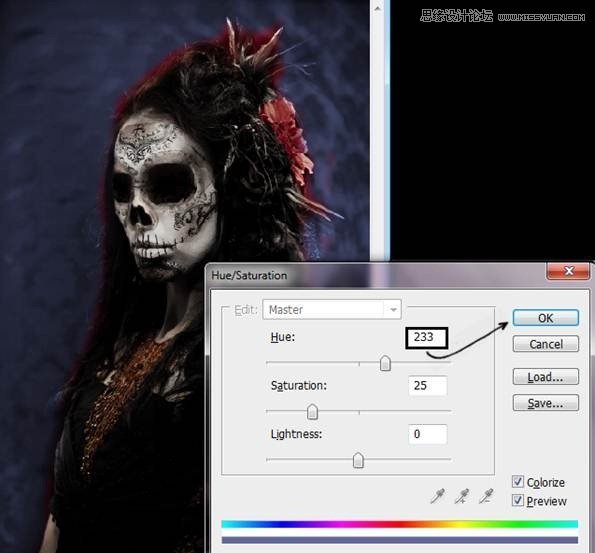
Go to the original layer of the model. And Duplicate (Ctrl+J). Change the color of that layer pressing (Ctrl + U) or go to Image- Adjustments – Hue/ Saturation.Change the Hue at 233 to get a purple tone.Then press ok to save the changes.
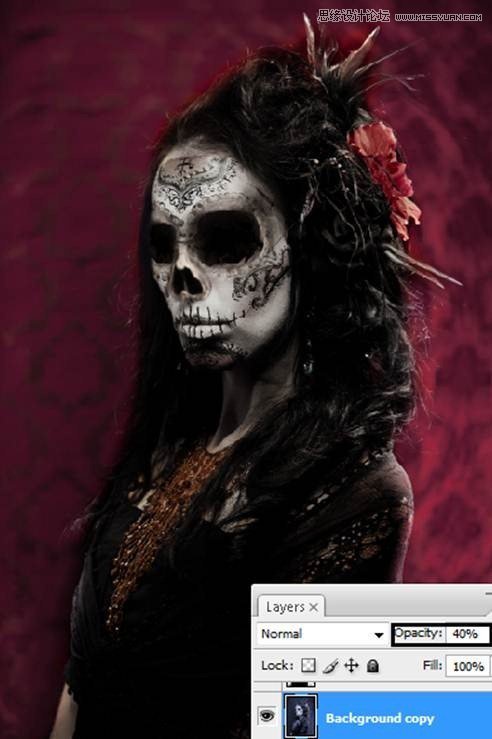
Step 23- Change the opacity of the layer.
Reduce de opacity of the layer to 40% to get this result.
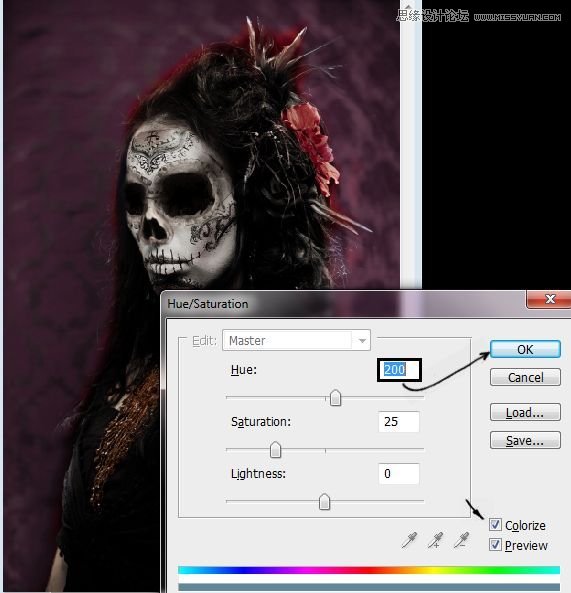
Step 24- Another Layer.
Duplicate that layer (Ctrl+J) and change the color (Ctrl+U) or Image – Adjustment – Hue/ Saturation. In the option Hue put 200. You have to be in the colorize option. To save changes press ok.
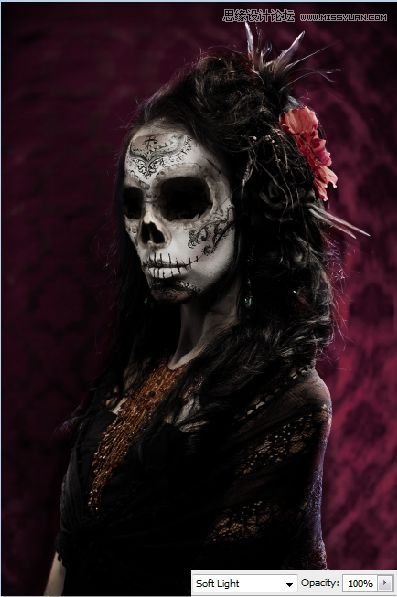
Step 25- Use the layer in soft light mode.
Change the layer mode to soft light to get this result:
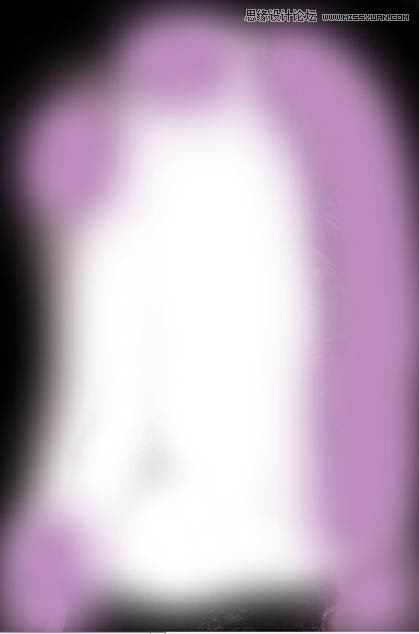
Step 26 – make the model stand out
Add a new layer (Shift+ Ctrl + N) and paint it with a soft brush using white, black and violet like this:
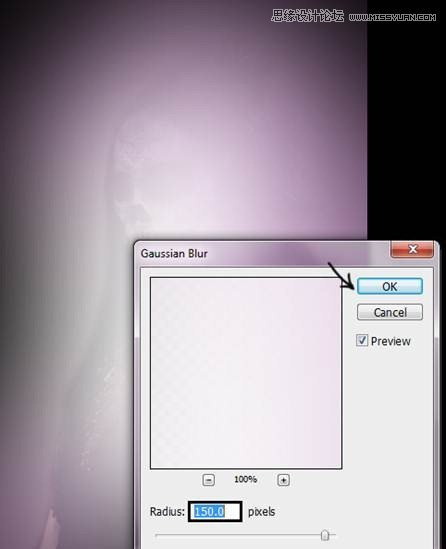
Step 27- Add some blur
Use Gaussian Blur – Filter – Blur – Gaussian Blur: 150 of radius.
Step 28- Changing layer order.
Put the layer under the model’s layer and change the mode from normal to soft light.

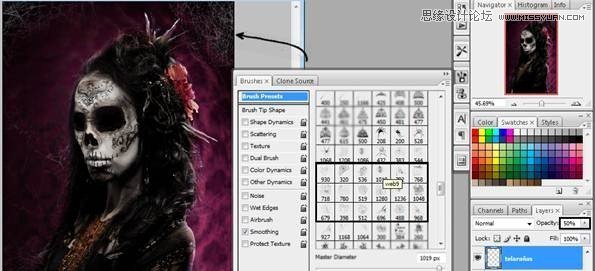
Step 29 – Add some webs
You can used spider-webs brushes. Create a new layer (Shift+ Ctrl+ N) then reduce the opacity to 50%. Select the brushes and paint over the new layer.
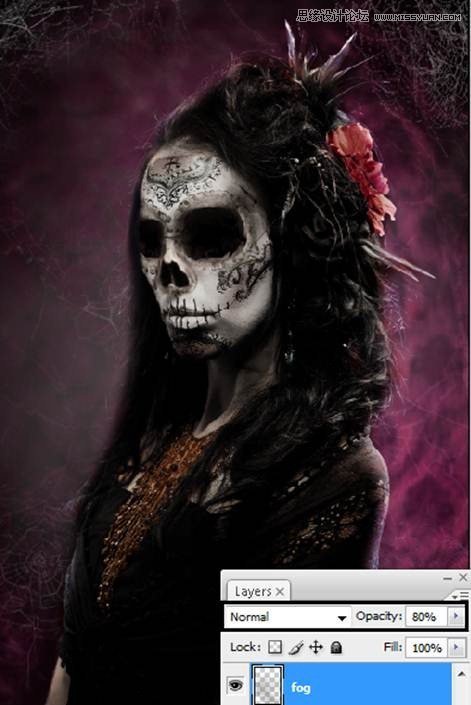
Step 30- Add some fog
To create the fog you can used brushes of clouds of foggy brushes. Paint over the layer and then change the opacity of the layer to 80%.
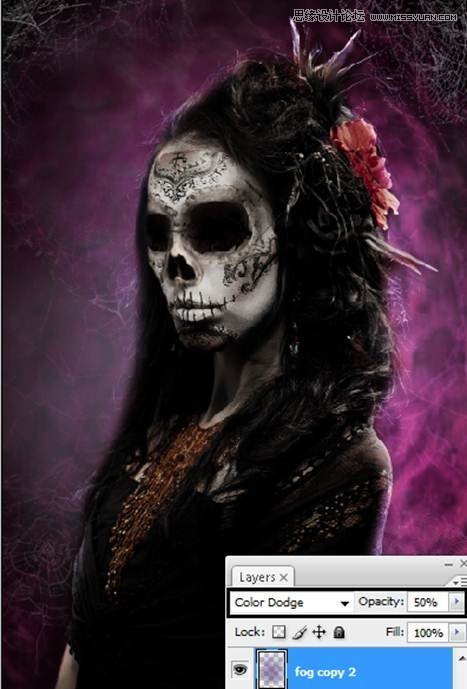
Step 31- More fog.
Add another foggy layer but in this case change the layer’s mode to Color Dodge to get something like this:
 爱你不要你
爱你不要你
-
 Photoshop制作复古风格的老照片效果【英】2018-04-23
-
 Photoshop合成长着创意大树的长颈鹿【英】2018-04-23
-
 Photoshop合成冰冻特效的金鱼场景【英】2018-02-10
-
 Photoshop合成梦幻风格的森林场景【英】2018-02-10
-
 Photoshop合成正在施法的巫师【英】2018-02-10
-
 Photoshop制作金属质感的3D立体字【英】2018-01-09
-
 Photoshop设计火焰燃烧艺术字教程【英】2018-01-09
-
Photoshop合成冰冻特效的金鱼场景【英】
相关文章34052018-02-10
