Photoshop合成城市被流星攻击场景【英】(6)
文章来源于 Photoshoptutorials,感谢作者 Jarka Hrnčárko 给我们带来经精彩的文章!Step 19 – Bluer Tones II
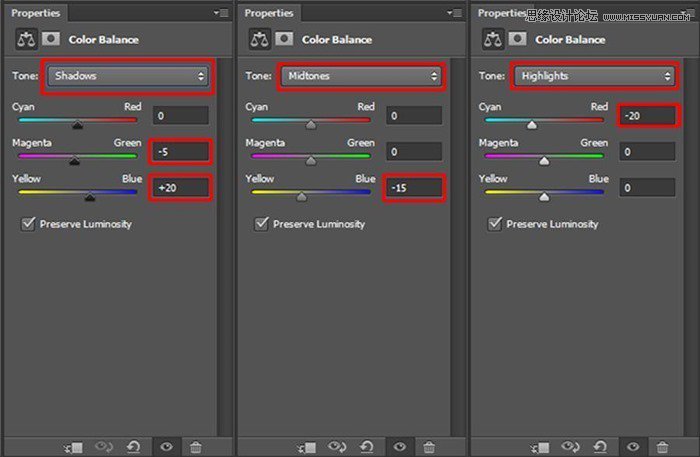
To add even more blue tones add new adjustment layer Color Balance and set the values as on the following picture:
On the following image you can compare how the photo manipulation looks before and after the adjustment.
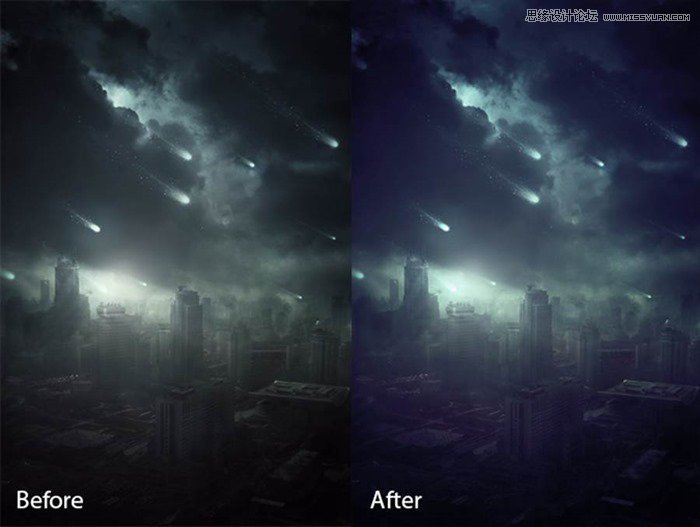
Thanks to the more vibrant colors the photo manipulation is more eye catching, isn’t it?
Step 20 – Increasing Contrast
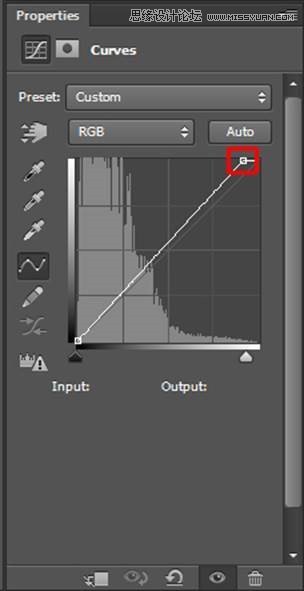
According to me the photo manipulation would look more interesting if there is more contrast. To increase it you use two adjustment layers in this step – Gradient Map and Curves. Let’s start with Curves. You use this adjustment layer to to make lights lighter. Add new adjustment layer Curves on the top of all layers and set the curve as on the following picture.
To make shadows darker add new adjustment layer Gradient Map on the top of all layers and set it as on the following picture.
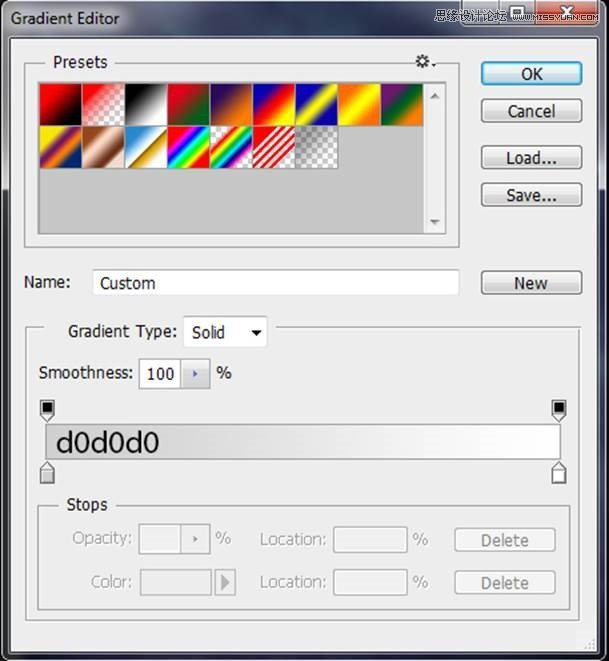
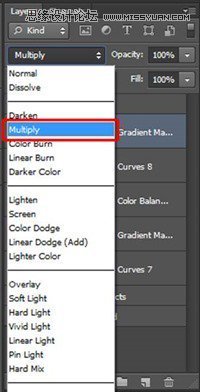
To blend this adjustment layer properly with the rest of the image change its Blending Mode from Normal to Multiply.
Step 21 – Sharpening
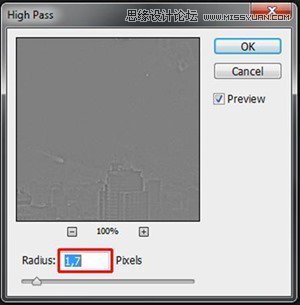
To create an illusion of more details you’ll gently sharpen your photo manipulation in this step. Press Ctrl+A on your keyboard to select the whole image. Then go to Edit > Copy Merged (or press Ctrl + Shift + C) to copy merged image. Paste it by pressing Ctrl+V. Place this new layer on the top of all layers and name it SHARPENING. Go to Filter > Other > High Pass and set the value Radius on about 1,7 pixels. Press OK.
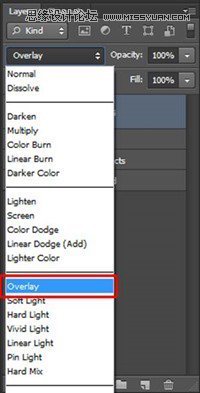
To blend this layer with the rest of the photo manipulation change its Blending Mode from Normal to Overlay.
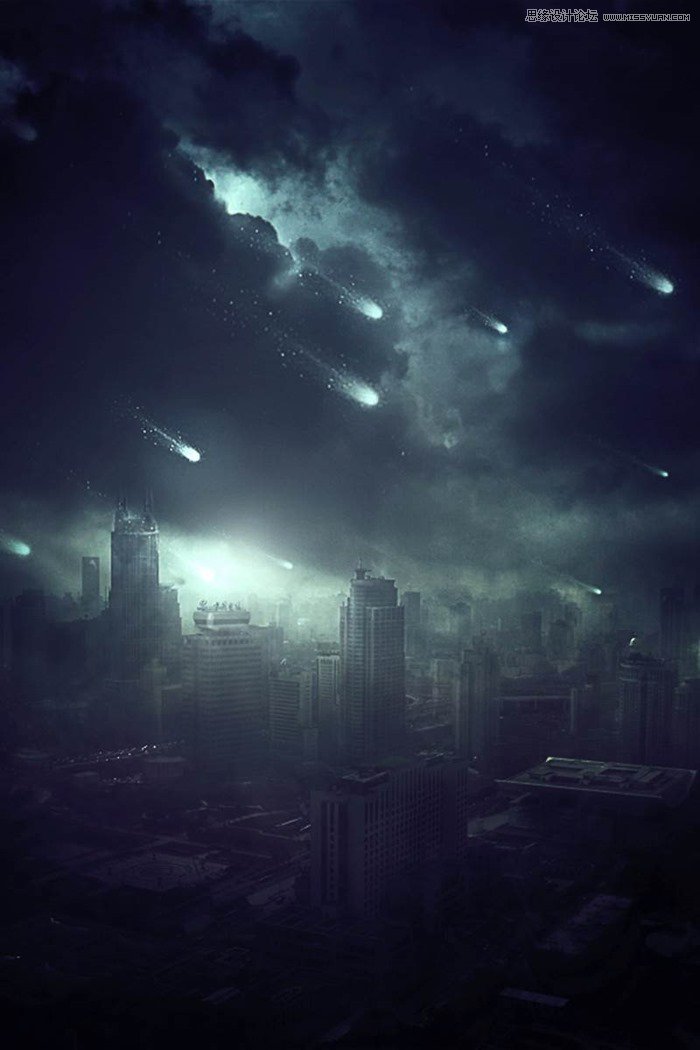
Final Results
 爱你不要你
爱你不要你
-
 Photoshop制作复古风格的老照片效果【英】2018-04-23
-
 Photoshop合成长着创意大树的长颈鹿【英】2018-04-23
-
 Photoshop合成冰冻特效的金鱼场景【英】2018-02-10
-
 Photoshop合成梦幻风格的森林场景【英】2018-02-10
-
 Photoshop合成正在施法的巫师【英】2018-02-10
-
 Photoshop制作金属质感的3D立体字【英】2018-01-09
-
 Photoshop设计火焰燃烧艺术字教程【英】2018-01-09
-
Photoshop合成冰冻特效的金鱼场景【英】
相关文章34052018-02-10
-
Photoshop合成梦幻风格的森林场景【英】
相关文章24492018-02-10
-
 Photoshop合成创意的英雄战斗场景教程【英】
相关文章5802017-12-12
Photoshop合成创意的英雄战斗场景教程【英】
相关文章5802017-12-12
