Photoshop���Ʊ��������ëˢ(5)
������Դ�� ICONFANS����л���� LDL �����Ǵ��������ʵ����£�Step 29
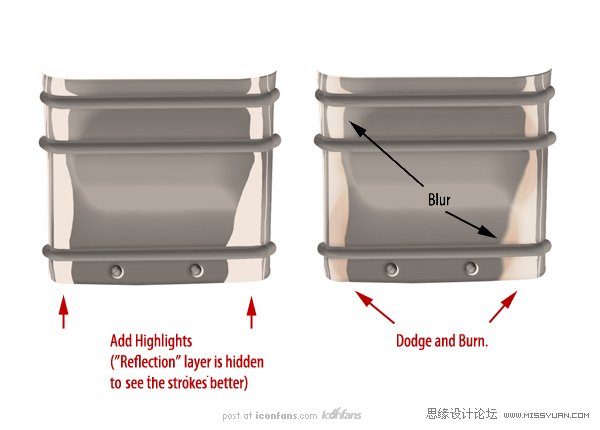
Create another clipping layer called “Highlights 1.” Using a lightercolor, draw in some highlights as shown. Use the Burn Tool to give the colorsome variation and the Blur Tool to soften some of the highlights.
(��һ����Ϊ“Highlight 1.”�ļ��в㣬�ýϵ�����ɫ����һЩ���㣬��ͼ��ʾ����“����”����ʹһЩ��ɫ�仯����“ģ��”����ʹһЩ������͡�)
Step 30
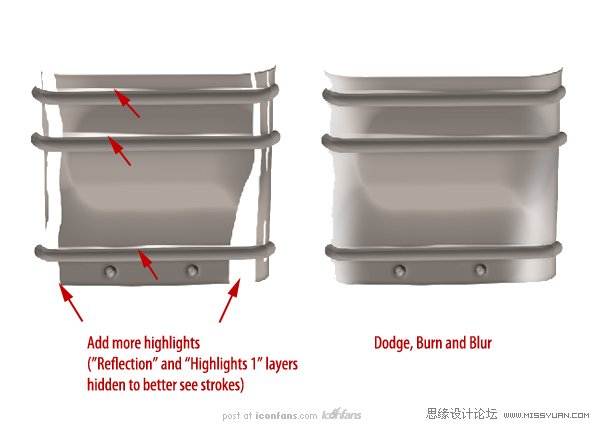
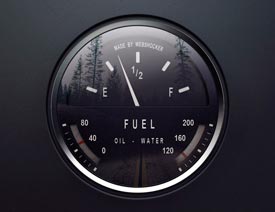
Create another clipping layer called “Highlights 2″ and using thesame techniques from the previous step, add some additional highlights.
(��һ����Ϊ“Highlight 2.”�ļ��в㣬��֮ǰ�IJ���һ������ͬ�����ַ�����һЩ��������㡣)
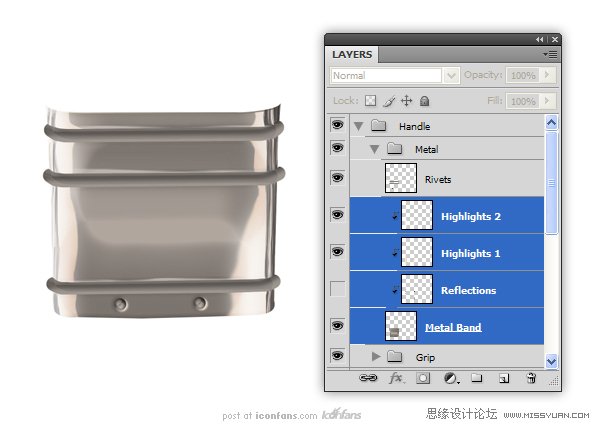
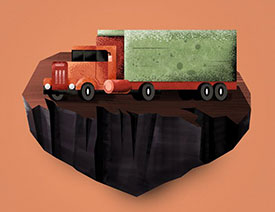
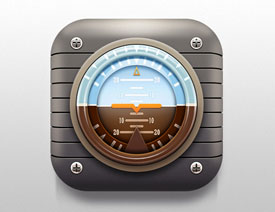
Your image should resemble the following
���ͼ��Ӧ��������������ͼ��ʾ.
Step 31
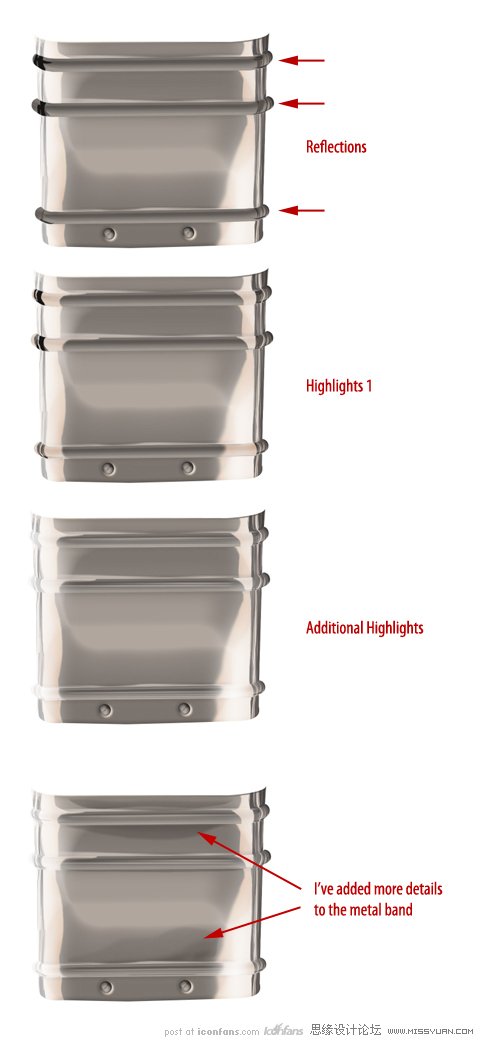
Now that we’ve added reflections and highlights as clipping layersto the “Metal Band” layer, we will use the same techniques to add reflectionsand highlights to the bevels. After this is done, add any additional details asyou see fit.
(���������Ѿ�������һЩӳ���������“Metal Band”�ڵļ��в��� �����ǽ���ͬ���ķ�����б��“Bevels”������һЩӳ������㡣��������Ժ����������һЩ����Ϊ���ʵĶ���ϸ�ڡ�)
Step 32
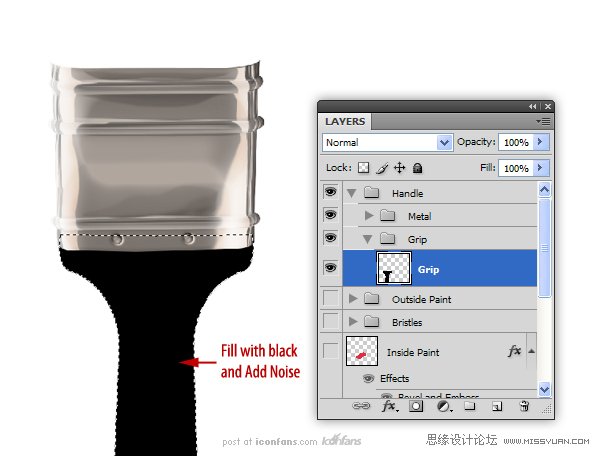
Create a New Layer called “Grip” inside the previously created“Grip” group. Draw the shape of a brush handle and fill with black. Give thissome noise (Filter > Noise > Add Noise) with a setting of 10%.
(��֮ǰ���Ǵ�����“Gip”�����½�һ����Ϊ“Gip”��ͼ�㡣��һ��ˢ������״�����ú�ɫ�������oһЩ����ɫ(�V�R>�����sɫ)�O��Ϊ10%��
Step 33
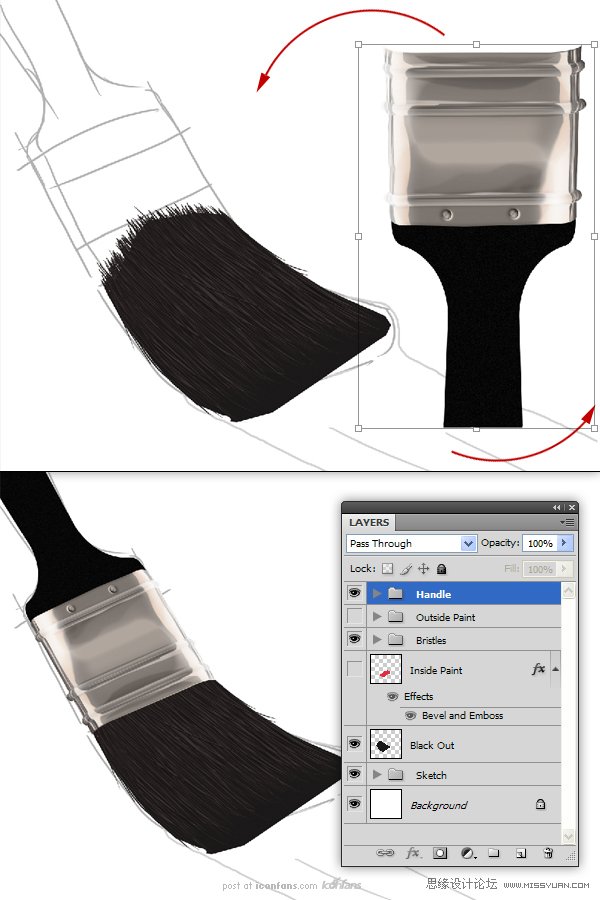
Before we finish the grip, rotate and skew the “Handle” group in toposition in our scene. Unhide the “Sketch” and “Bristles” group to help withthe positioning.
��������ɰ���ָǰ����ת����б��“Handle”�����dz�������Ӧ��λ�á���֮ǰ����������“Sketch”��“Bristles”�飬ȡ�������Ա��ڶ�λ��
Step 34
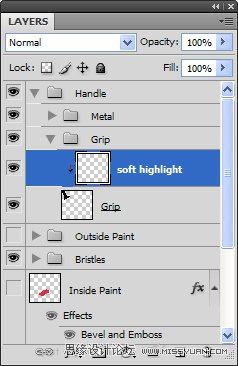
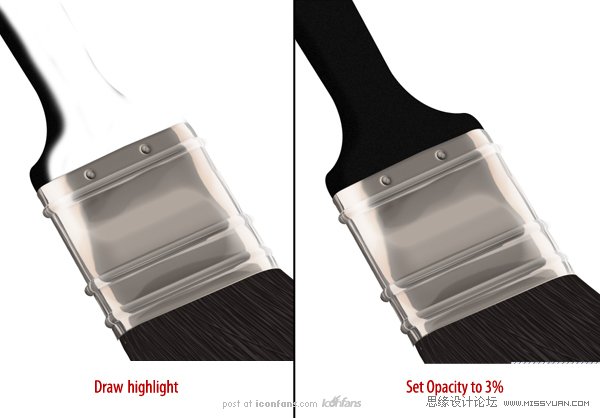
Now, we are going to start texturing the grip. We will do this witha series of clipping layers. Create a new clipping layer to the “Grip” layerand, using a soft brush, paint a portion of it white (see image below). Setthis layer’s opacity to 3%.
�������ǽ���ʼ���ֵ������ṹ�����ǽ���һϵ�еļ���ͼ�������������½�һ�����в㵽“Gip”�飬��һ����ˢ��������ɫ����(��ͼ)���������ͼ��IJ�����Ϊ3%��
Step 35
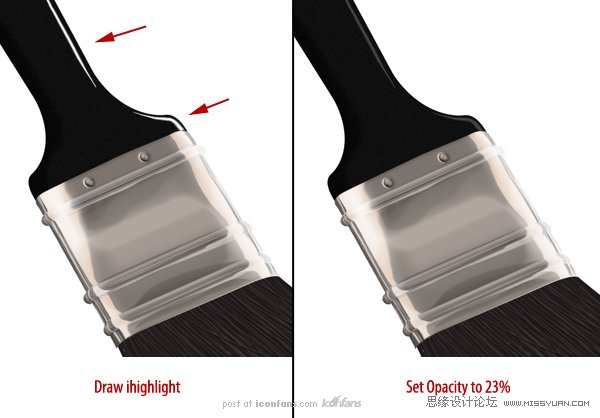
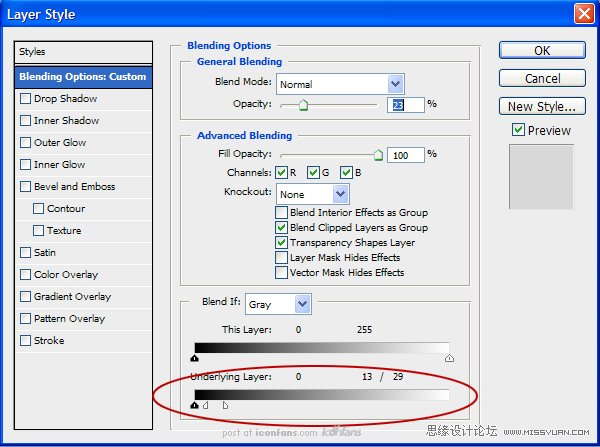
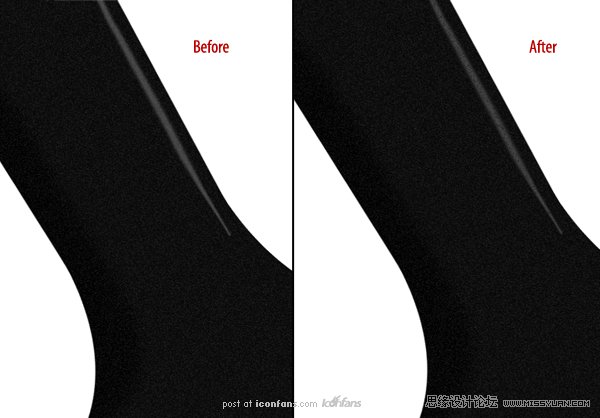
On a new clipping layer, draw a thinner highlight on the grip.Change the opacity to 23%. Open the Layer Styles and adjust the layer’s BlendIf sliders as shown (this will break up the highlight so it doesn’t appearunnaturally smooth).
��һ���µļ��в��ϣ��ڰ����ϻ���һ�����ĸ߹⡣�������ȸ�Ϊ23%����ͼ����ʽ������“�����ɫ��“������ͼ��ʾ��(�������Դ��Ƹ߹⣬��˲�����ֲ���Ȼ��ƽ��)
 ��ǵ���
-
 Photoshop����ĥɰ���IJ廭��Ʒ2021-03-16
-
 Photoshop���AI������ƽ��������Ů�廭2021-03-11
-
 Photoshop���AI���Ʊ�ƽ��������Ů�廭2020-03-13
-
 Photoshop���AI���ƴ�������廭��Ʒ2020-03-13
-
 Photoshop����ʱ�д������ֻ�APPͼ��2020-03-12
-
 Photoshop���������ʮ����ֻ�ͼ��2020-03-12
-
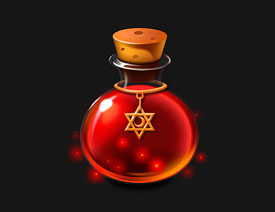 ����ƿ�滭��PS���Ʋ����ʸе�ħ��ƿ2020-03-11
-
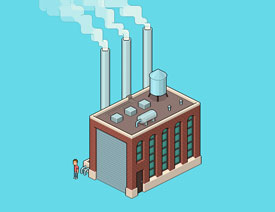 ���ع�������PS��ƵȾ����صĹ���ͼ��2019-03-20
-
 ʥ�����ˣ�ʹ��PS����ʥ�����˲廭2019-02-21
-
 Lumix�����PS���Ʒ�ɫ��������̳�2019-01-18
-
Photoshop���AI������ƽ��������Ů�廭2021-03-11
-
Photoshop����ĥɰ���IJ廭��Ʒ2021-03-16
-
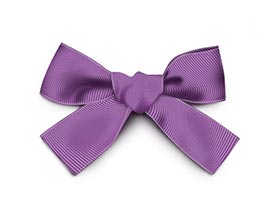 ������滭��PS���Ʊ���ĺ�����ͼ��
�������7222019-01-07
������滭��PS���Ʊ���ĺ�����ͼ��
�������7222019-01-07
-
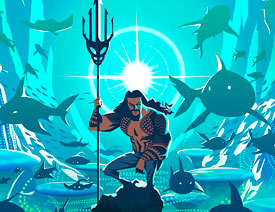 ��ҵ�廭��PS���Ʊ����DC�����廭
�������8962018-12-20
��ҵ�廭��PS���Ʊ����DC�����廭
�������8962018-12-20
-
 Photoshop�����������������DZ���ͼ��
�������19312018-11-03
Photoshop�����������������DZ���ͼ��
�������19312018-11-03
-
 Photoshop���Ʊ���ij���֩�����̳�
�������11872018-09-17
Photoshop���Ʊ���ij���֩�����̳�
�������11872018-09-17
-
 Photoshop���Ʊ������Ϸ����ͼ��
�������4902018-09-12
Photoshop���Ʊ������Ϸ����ͼ��
�������4902018-09-12
-
 Photoshop�����������ͼ��̳�
�������8722018-09-03
Photoshop�����������ͼ��̳�
�������8722018-09-03
-
 Photoshop���Ʊ���������ӳ����ƽ̳�
�������14742018-08-23
Photoshop���Ʊ���������ӳ����ƽ̳�
�������14742018-08-23
-
 Photoshop���Ʊ���������DZ��̳̽�
�������12252018-08-16
Photoshop���Ʊ���������DZ��̳̽�
�������12252018-08-16
