Photoshop实例教程:创建金属光泽图标(4)
文章来源于 Dalton Tan,感谢作者 viperasi 给我们带来经精彩的文章!Step 7: Adding Polish
第七步:添加光线修饰
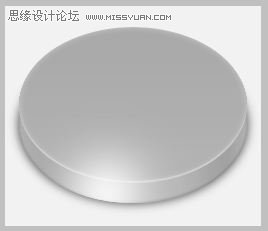
Create new layer right at the top. Get a White Brush with a Hardness of 0% and Master Diameter of 125px. Get the selection of the “3D” layer and Brush once at the corner. Set the Opacity to 85%.
在最上层创建一个新层,选择白色笔刷,硬度为0%,大小为125px。选择“3D”图层的边框,然后在角落刷一下,设置透明度为85%。
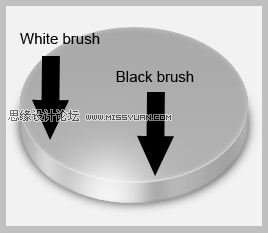
Create another layer and get a Black Brush with a Hardness of 0% and a Master Diameter of 20pxand Brush it downwards while holding Shift. Use Gaussian Blur with 8px. Now ctrl+click on the “3D” layer icon then ctrl+alt+click on the “Top” layer mask icon. Finally invert your selection withctrl+shift+I and Delete the selection. Repeat the same process with a white Brush with 25px Master Diameter and set the Opacity to 70%.
新建层,然后选择黑色笔刷,硬度0%,大小20px。然后按住Shift键从下向下刷。然后使用高斯模糊,半径为8px。现在按着Ctrl点击“3D”图层的图标,然后按照Ctrl+Alt键点击“Top”图层的遮罩图标。最后用Ctrl+Shift+I反转选择,然后删除已选内容。用白色笔刷,大小25px,重复相同的步骤,设置透明度为70%。
Foreground & Background Colour
You can easily switch your background and foreground colour by pressing D. You can swap colours between the two by pressing X.
前景色与背景色
你可以使用D键将前景色和背景色回复为默认。你可以用X键来切换两个颜色。
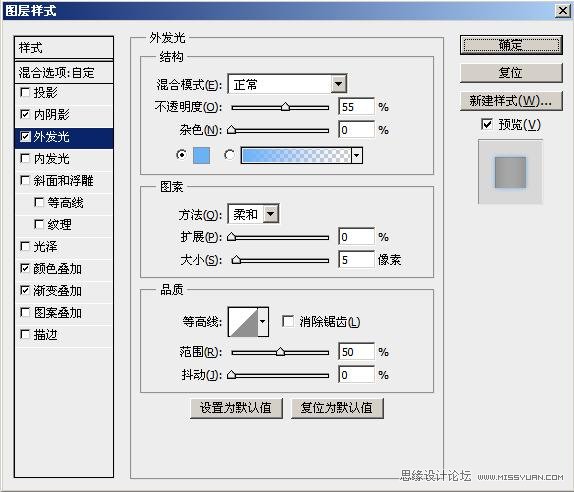
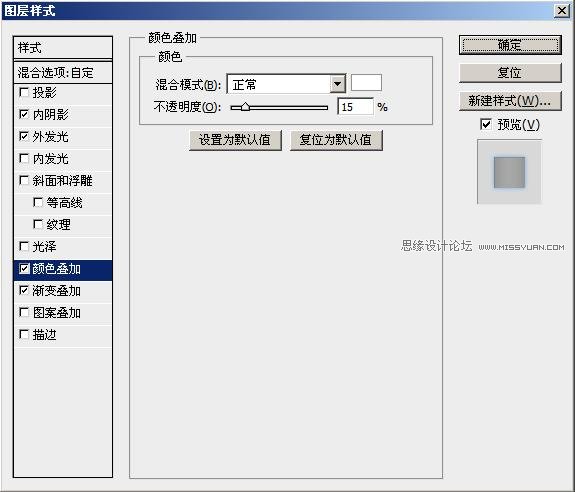
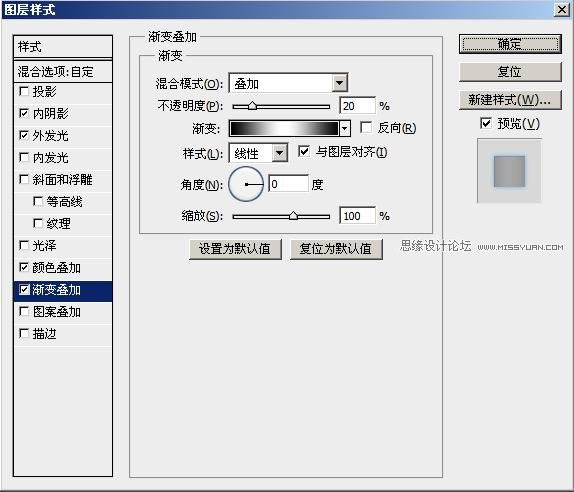
Step 8: Adding Glow
第八步:添加暗光
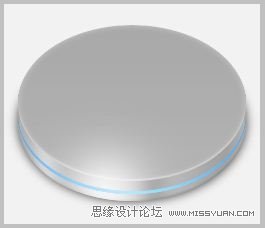
Create a new layer and name it “Glow”. Get the selection of the “3D” layer and move it up by 7px. Fillthe selection with the following colour: #6ab2f6. Before deselecting, shift the selection up by another3px and press Delete. Bring down the Fill to 70%.
创建一个新层,命名为“Glow”。选择“3D”图层的可选范围,并向上移动7px。使用#6ab2f6来填充选择的区域。在取消选择前,在向上移动3px然后删除。填充不透明度修改为70%。
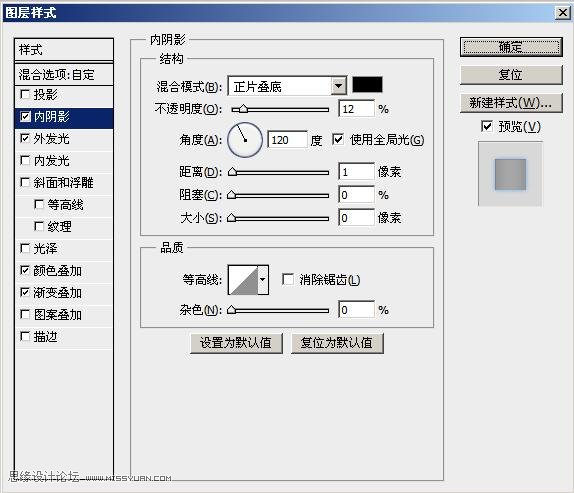
Now give it the following Layer Styles.
现在修改层样式
Get the selection of the current layer and create a new layer. Get a White Brush with 0% Hardnessand 300px Diameter and and click once right in the center of the selection. Bring down the Opacity to 70%. Set the Blending Mode to Overlay.
选择当前层内容然后创建新层。使用白色笔刷,硬度为0%,大小300px,然后在选择的中间点击一次。将透明度修改为70%,设置融合模式为叠加。
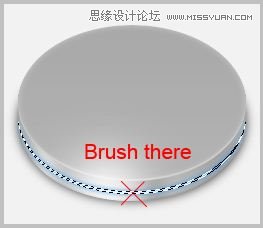
Brush cursor
you can easily find the center of the Brush cursor by pressing Caps Lock. Or you can go toEdit>Preferences>Cursors and enable “Show Crosshair in Brush Tip”.
笔刷光标
你可以通过Caps Lock(大写锁定键)方便的找到笔刷光标的中心。或者你可以在编辑–>首选项–>光标中启用“在画笔笔尖显示十字线”。
 情非得已
情非得已
-
 Photoshop设计撕纸特效的人物海报教程2020-10-28
-
 Photoshop制作立体风格的国庆节海报2020-10-10
-
 Photoshop设计撕纸特效的人像海报2020-03-27
-
 图标设计:用PS制作奶油质感手机主题图标2019-11-06
-
 图标设计:用PS制作中国风圆形APP图标2019-11-01
-
 手机图标:用PS设计儿童贴画风格的APP图标2019-08-09
-
 电影海报:用PS制作蜘蛛侠海报效果2019-07-09
-
 创意海报:用PS合成铁轨上的霸王龙2019-07-08
-
 电影海报:用PS设计钢铁侠电影海报2019-07-08
-
 立体海报:用PS制作创意的山川海报2019-05-22
-
 Photoshop设计猕猴桃风格的APP图标2021-03-10
-
 Photoshop制作逼真的毛玻璃质感图标2021-03-09
-
 Photoshop结合AI制作抽象动感的丝带2021-03-16
-
 Photoshop结合AI制作炫酷的手机贴纸2021-03-16
-
Photoshop设计猕猴桃风格的APP图标
相关文章2212021-03-10
-
Photoshop制作逼真的毛玻璃质感图标
相关文章2102021-03-09
-
图标设计:用PS制作奶油质感手机主题图标
相关文章11692019-11-06
-
图标设计:用PS制作中国风圆形APP图标
相关文章8772019-11-01
-
 简约图标:用PS制作荷花形态的APP图标
相关文章11812019-08-15
简约图标:用PS制作荷花形态的APP图标
相关文章11812019-08-15
-
手机图标:用PS设计儿童贴画风格的APP图标
相关文章13392019-08-09
-
 设计图标:用PS设计拟物风格的APP图标
相关文章16132019-08-05
设计图标:用PS设计拟物风格的APP图标
相关文章16132019-08-05
-
 手机图标:用PS制作拟物风格手机APP图标
相关文章15532019-07-12
手机图标:用PS制作拟物风格手机APP图标
相关文章15532019-07-12
