Photoshop绘制超真实的铅笔教程(4)
文章来源于 iconfans.org,感谢作者 leenjia 给我们带来经精彩的文章!Step 16步骤16
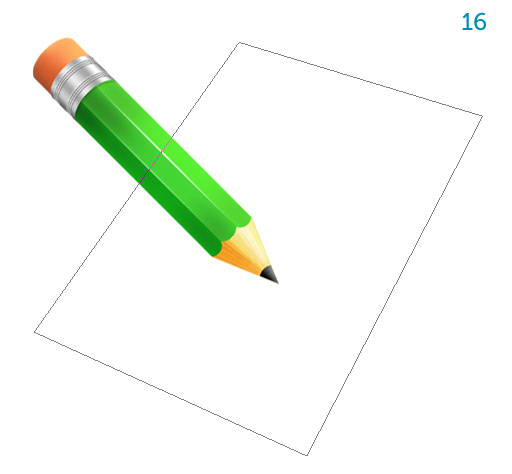
Using the Pen Tool (P) draw the top page of the sketchbook (16a).使用钢笔工具(规划)提请写生(16A条)首页。
The sketchbook's orientation nicely contrasts that of the pencil for a balanced composition.在作画的方向很好的对比,对铅笔的组成平衡。
Step 17步骤17
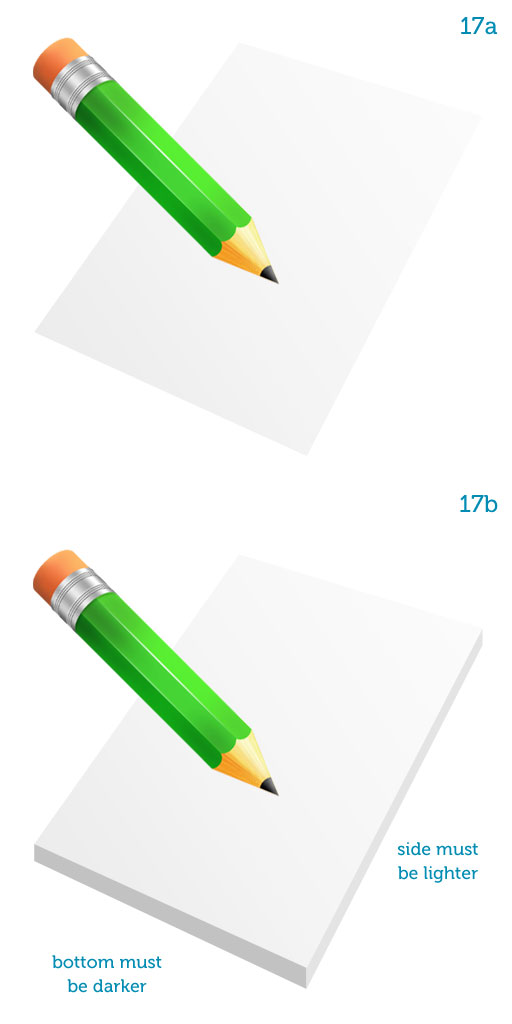
Shade the page with a soft gradient, from almost white (top) to a light gray (bottom) (17a).色光的页面软梯度,几乎白(顶端),浅灰色(下)(17A条)。
Using the Pen Tool again add thickness to the sketchbook.使用钢笔工具又增加厚度的人物。
Use two shades of gray, making the bottom darker (17b).利用灰色两种颜色,使底部暗(17页)。
Step 18第18步
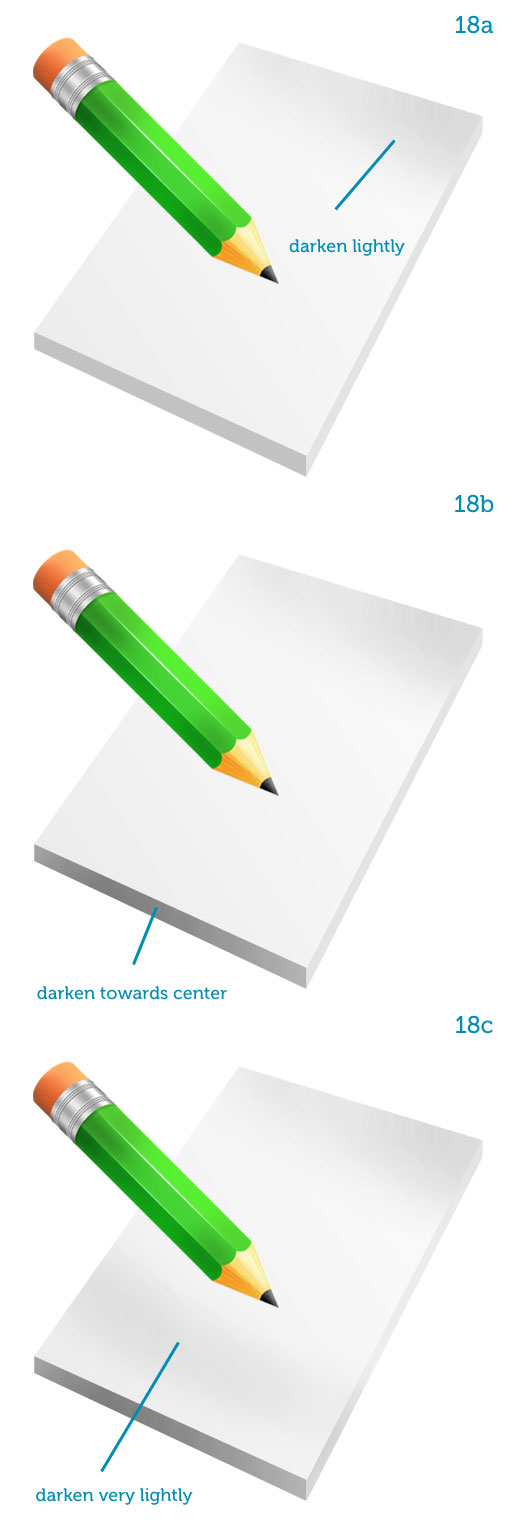
Lock the transparency of all three layers (page, side and bottom).锁的透明度所有三个层次(页,侧面和底部)。
Using soft, black brushes with low opacity darken the page at the top and bottom.使用变暗在顶部和底部的页面透明度低软,黑色刷子。
Also darken the bottom thickness near its center.同时变暗其中心附近的底部的厚度。
These color variations suggest a slight unevenness that makes the objects look a bit more natural (18a, 18b, 18c).这些颜色的变化,提出一个轻微的不平衡,使得对象看上去有点更自然(18A条,第18B,18C型)。
Step 19步骤19
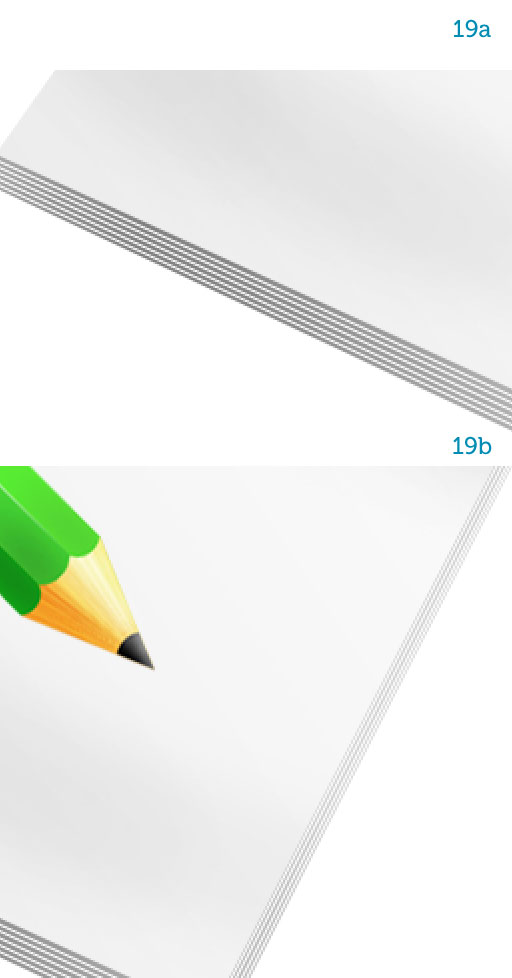
Using the Line Tool (U) set to white, draw parallel lines over the bottom and side (19a and 19b).使用直线工具(ü)设置为白色,得出的底部和侧面平行线(19A及19B)。
They represent the stack of pages, of course, so adjust their opacity to your liking.他们代表页的堆栈当然,所以调整其透明度根据自己的喜好。
Group them together once you're done.集团在一起一旦你完成。
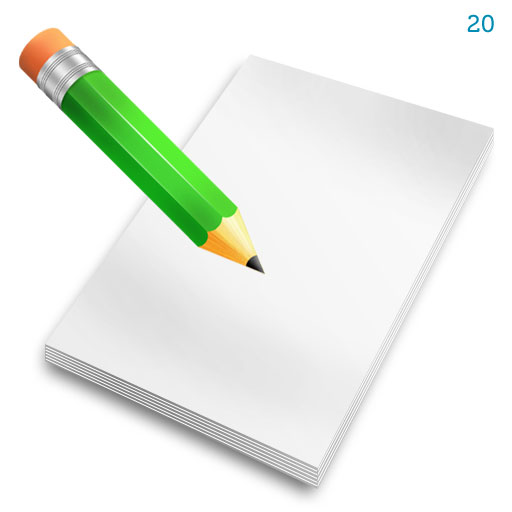
Step 20步骤20
You can now duplicate all the sketchbook layers and merge them together.现在,您可以复制所有的写生层和合并在一起。
Again, keep the original layer structure for any changes you require down the line.再次,保留您需要的任何更改了东线的层结构。
When creating icons you optimize the smaller sizes (48px, 32px, 16px) by eliminating those elements that won't be readable anymore, for example the page lines.当创建图标您优化,消除这些因素,不会再是可读的小尺寸(48px,32px,16px),例如网页线。
Add a Drop Shadow to the sketchbook using a simple layer style.添加阴影的写生使用简单的图层样式。
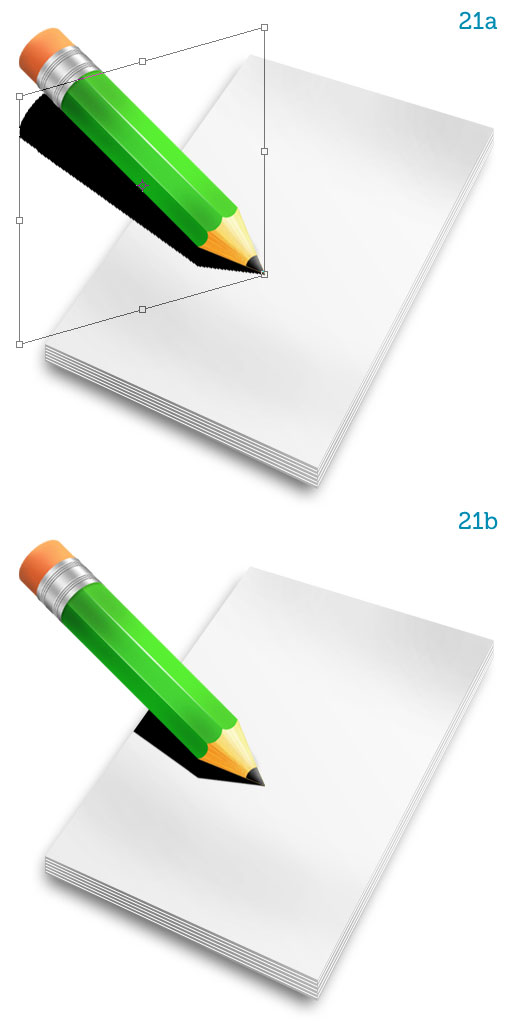
Step 2121步
The light comes from the top so the pencil projects a shadow onto the sketchbook.光线来自上方,因此项目的铅笔写生上阴影。
Duplicate the pencil layer and turn it black.重复铅笔层,把它黑色。
I usually hit Command+ U to bring up Hue/saturation and move the Lightness slider all the way to the left.我通常打命令+ U键弹出色相/饱和度和亮度滑块移动一直向左侧。
But everyone develops a unique workflow.但大家都开发了独特的工作流程。
Skew the shadow (Command + T, right-click and choose Skew) so it lies parallel to the sketchbook's top and bottom sides (21a).歪斜的影子(Command + T键,用鼠标右键单击并选择偏移),因此它是平行于写生的顶部和底部(第21A)。
Alt-click the line between the "sketchbook" and the "shadow" layers to mask the shadow with the sketchbook's contour (21b).按住Alt键之间的“写生路线”和“阴影”层,以掩盖与写生的轮廓(乙)的影子。
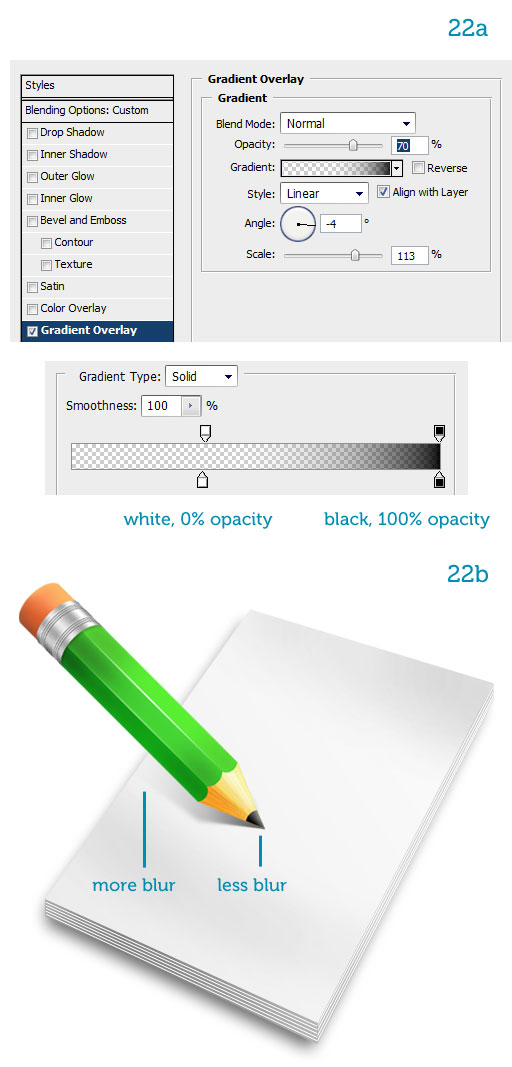
Step 22步骤22
Reduce the shadow's fill to 0%.减少阴影的填充为0%。
Add a Gradient Overlay, making the left color stop transparent and the right color stop black (22a).添加一个渐变叠加,使得左边的颜色停止透明和正确的颜色停止黑色(22A条)。
The shadow now fades away from the tip of the pencil to the border of the page.现在的影子没有不散的筵席从铅笔顶端的页面边框。
Blur the shadow using the Blur Tool.模糊的影子使用模糊工具。
The farther from the tip, the blurrier (22b).越远,从冰山的模糊(22页)。
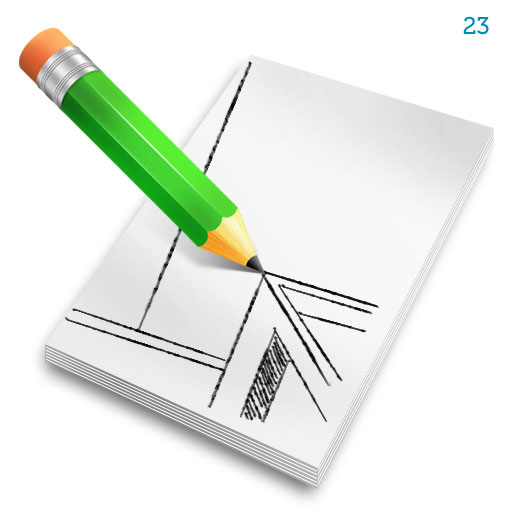
Step 23步骤23
The icon is now complete.该图标现已完成。
All we have to do now is draw a little sketch on the page.所有我们现在要做的就是在页面上绘制一些素描。
I'll leave you free to draw whatever you want.我将离开你自由地绘制任何你想要的。
Just pick a brush with a little texture from the Brush Presets (hit F5) and you're good to go.您只需选择了以小刷预置纹理画笔(按F5键),你可以安心上路。
 情非得已
情非得已
-
 Photoshop绘制磨砂风格的插画作品2021-03-16
-
 Photoshop结合AI制作扁平化滑轮少女插画2021-03-11
-
 Photoshop结合AI绘制扁平化风格的少女插画2020-03-13
-
 Photoshop结合AI绘制春字主题插画作品2020-03-13
-
 Photoshop绘制时尚大气的手机APP图标2020-03-12
-
 Photoshop绘制立体感十足的手机图标2020-03-12
-
 玻璃瓶绘画:PS绘制玻璃质感的魔法瓶2020-03-11
-
 像素工厂:用PS设计等距像素的工厂图标2019-03-20
-
 圣诞老人:使用PS绘制圣诞老人插画2019-02-21
-
 Lumix相机:PS绘制粉色的照相机教程2019-01-18
-
Photoshop结合AI制作扁平化滑轮少女插画2021-03-11
-
Photoshop绘制磨砂风格的插画作品2021-03-16
-
Photoshop绘制磨砂风格的插画作品
相关文章1702021-03-16
-
Photoshop结合AI制作扁平化滑轮少女插画
相关文章2032021-03-11
-
 Photoshop绘制搞怪的胖子人像教程
相关文章6912020-09-26
Photoshop绘制搞怪的胖子人像教程
相关文章6912020-09-26
-
 Photoshop绘制立体风格的序章图标
相关文章8612020-04-01
Photoshop绘制立体风格的序章图标
相关文章8612020-04-01
-
Photoshop结合AI绘制扁平化风格的少女插画
相关文章7992020-03-13
-
Photoshop结合AI绘制春字主题插画作品
相关文章4762020-03-13
-
Photoshop绘制立体感十足的手机图标
相关文章6362020-03-12
-
 像素绘画:用PS绘制像素风格树木教程
相关文章10652019-03-26
像素绘画:用PS绘制像素风格树木教程
相关文章10652019-03-26
