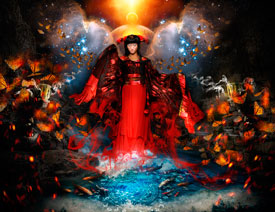
Photoshop合成绚丽空中翱翔的仙子【英】(4)
文章来源于 photoshoptutorials,感谢作者 Jenny Le 给我们带来经精彩的文章!Step 27
Place the model onto the biggest cloud (at the center):

Use layer mask with a cloud brush to blend the model legs with this cloud:

Step 28
Make reflection for the model as done with the others.

Step 29
Group the model and her reflection layers. Make a Hue/Saturation adjustment layer within this group to reduce the redness on two these layers:

Step 30
Use Color Balance to add some vibrant yellow to the model:


Step 31
I used Curves to darken the front of the model then erase the rest of hers to keep its brightness:

Step 32
To add some bright yellow light of the scene reflected on the model and her reflection I made a new layer, used a soft brush with color #ecc886 to paint on the right of them. Change the mode of this layer to Overlay 100%:

Step 33
Cut out the castle and place it onto a left cloud. Pick a cloud brush (I chose the number 1369) to blend this castle with the cloud:

Make reflection for this castle as done with another elements:

Step 34
Now come back to the clouds group. Select the mask of the cloud’s reflection mentioned in previous step. Choose the cloud brush you used to mask off the castle and press F5 to flip its position:

Paint on the top of this reflection to create a likeness between this cloud and its reflection through the lake:

 爱你不要你
爱你不要你
-
 Photoshop制作复古风格的老照片效果【英】2018-04-23
-
 Photoshop合成长着创意大树的长颈鹿【英】2018-04-23
-
 Photoshop合成冰冻特效的金鱼场景【英】2018-02-10
-
 Photoshop合成梦幻风格的森林场景【英】2018-02-10
-
 Photoshop合成正在施法的巫师【英】2018-02-10
-
 Photoshop制作金属质感的3D立体字【英】2018-01-09
-
 Photoshop设计火焰燃烧艺术字教程【英】2018-01-09
-
Photoshop制作复古风格的老照片效果【英】
相关文章11882018-04-23
-
Photoshop合成长着创意大树的长颈鹿【英】
相关文章13832018-04-23
-
Photoshop合成冰冻特效的金鱼场景【英】
相关文章34052018-02-10
-
 Photoshop制作黄金质感立体字【英】
相关文章7422018-02-10
Photoshop制作黄金质感立体字【英】
相关文章7422018-02-10
-
 Photoshop制作惊艳大气的3D立体字
相关文章14682018-02-10
Photoshop制作惊艳大气的3D立体字
相关文章14682018-02-10
-
Photoshop合成梦幻风格的森林场景【英】
相关文章24492018-02-10
-
Photoshop合成正在施法的巫师【英】
相关文章8372018-02-10
-
 Photoshop制作复古双重曝光字体
相关文章6532018-01-09
Photoshop制作复古双重曝光字体
相关文章6532018-01-09
